Onboarding Process
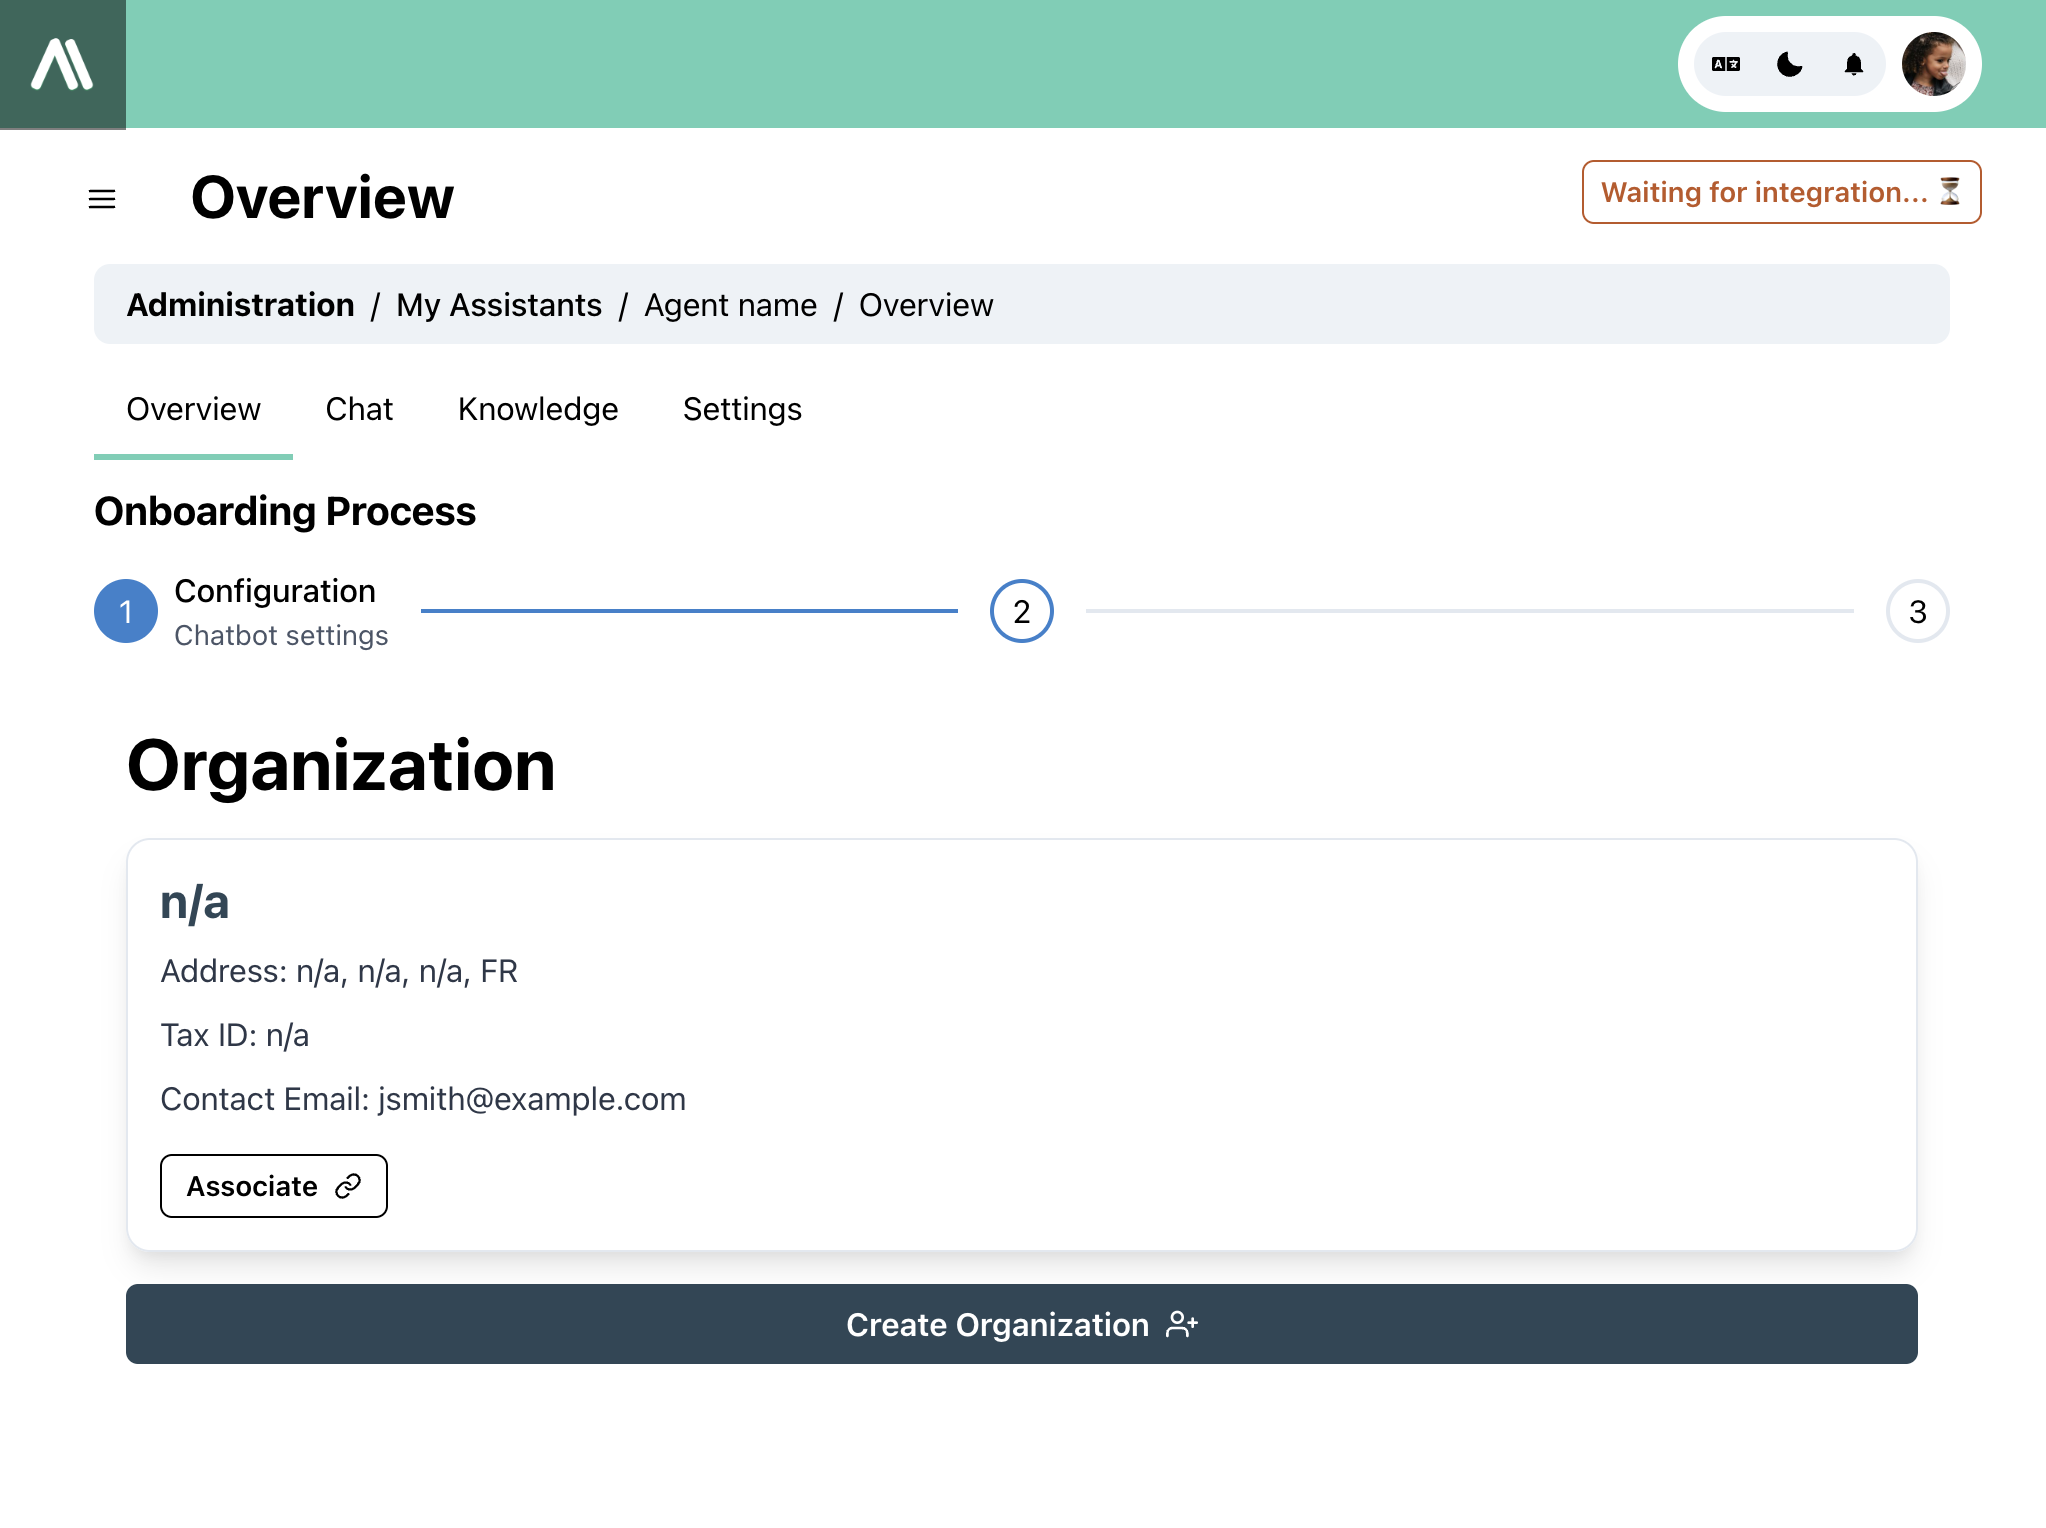
Step 1: Organization Association or Creation
During this step, you have the option to either associate your chatbot with an existing organization or create a new one.
Associating with an Existing Organization
- If you choose to associate with an existing organization, you will need to select the appropriate organization from the provided list.
Creating a New Organization
- If you decide to create a new organization, you will start a 1-month trial period with the trial plan.
- The information required for creating an organization typically includes the organization's name, address, tax ID, and contact email.
- After filling in the necessary information, click on the "Create Organization" button to proceed.
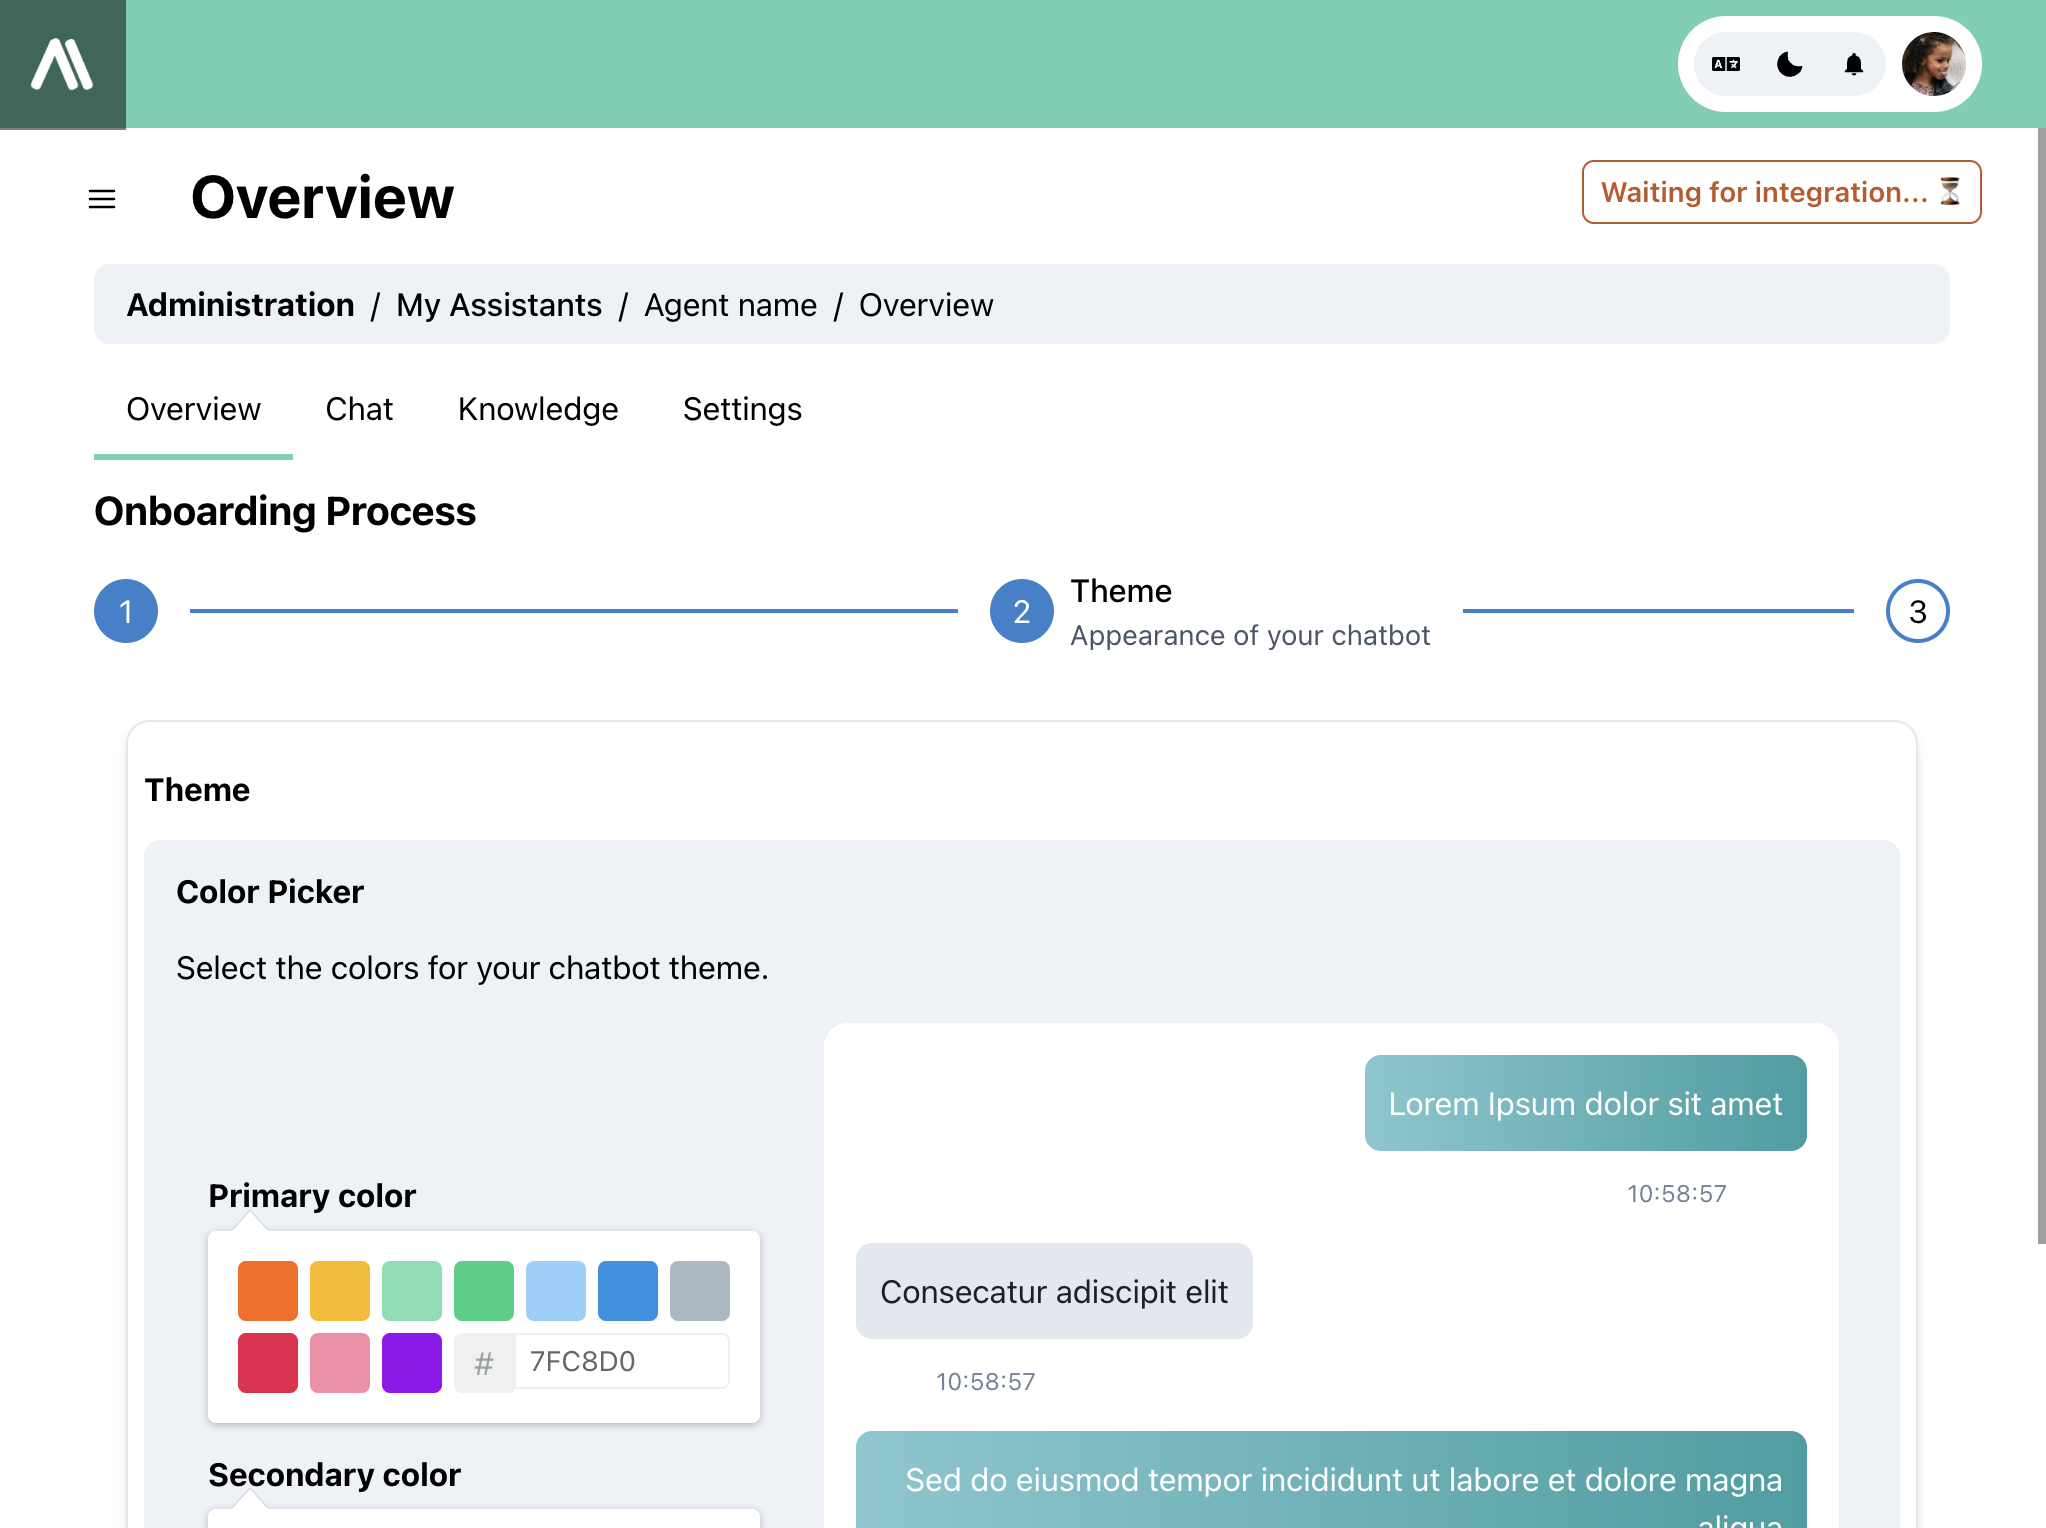
Step 2: Theme - Appearance of Your Chatbot
In this step, you can customize the appearance of your chatbot by selecting the primary and secondary colors.
Customization Options
- Primary Color: Select the primary color for your chatbot from the color picker.
- Secondary Color: Select the secondary color for your chatbot from the color picker.
After selecting the colors, a chatbot creation request is processed. Your chatbot will be available with the new theme within 30 seconds to 5 minutes.
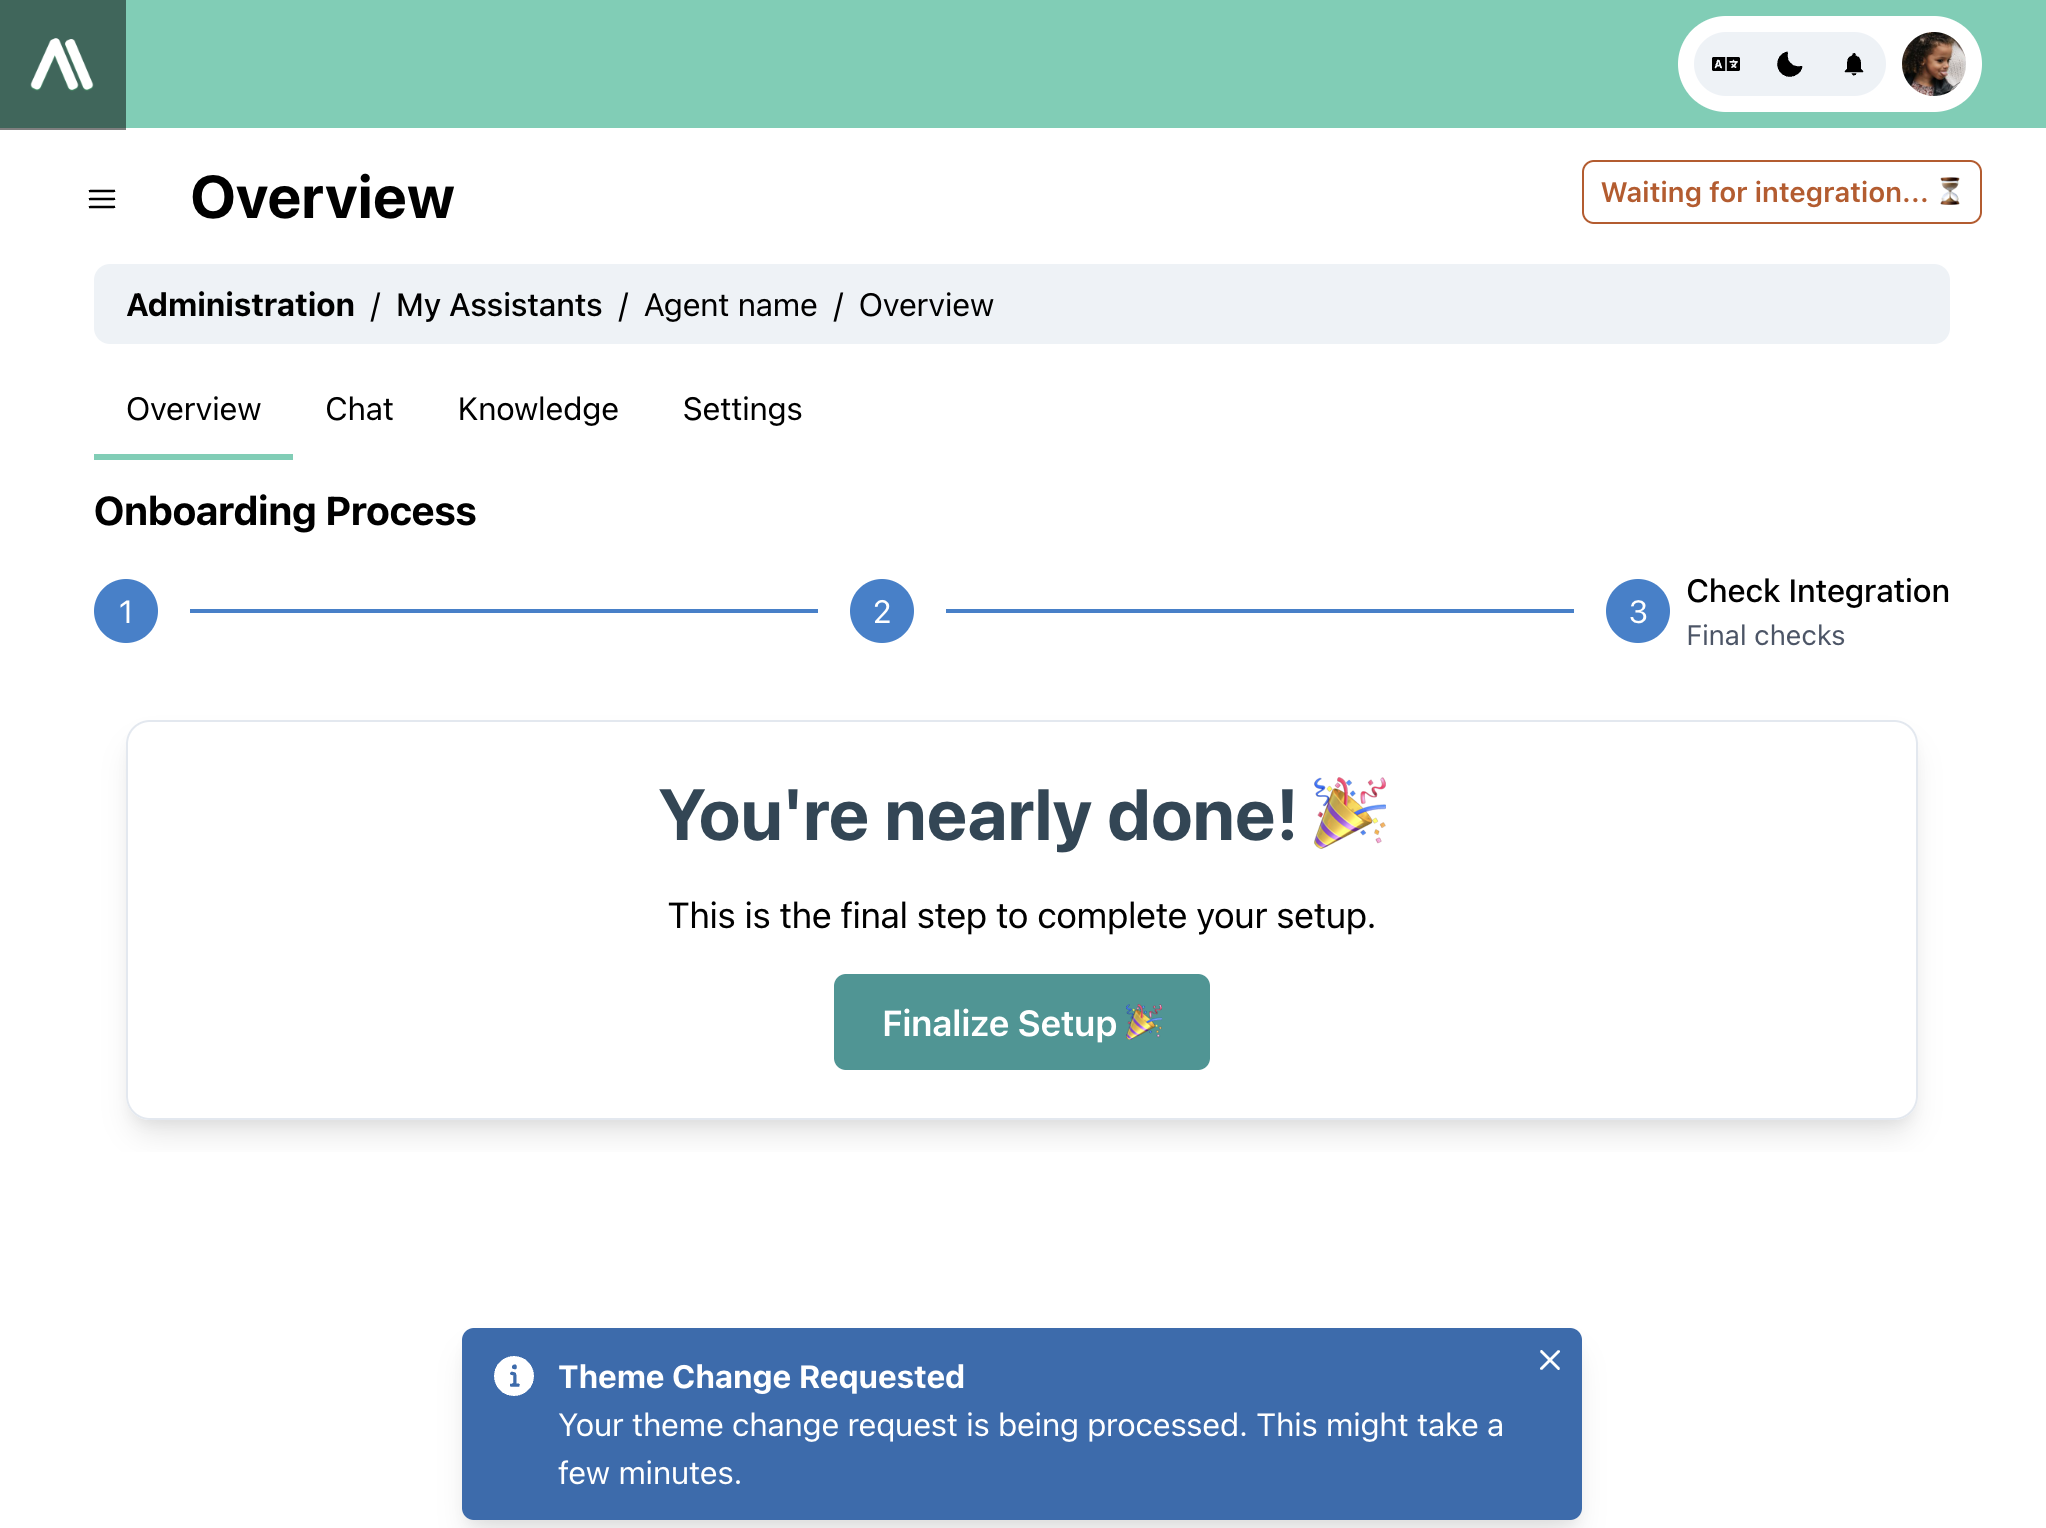
Step 3: Finalization - Check Integration
Finalize Setup
- Click on the "Finalize Setup" button to apply the recommended configuration for notifications and other settings to ensure a seamless experience.
- This action will complete the setup process and redirect you to the integration page.
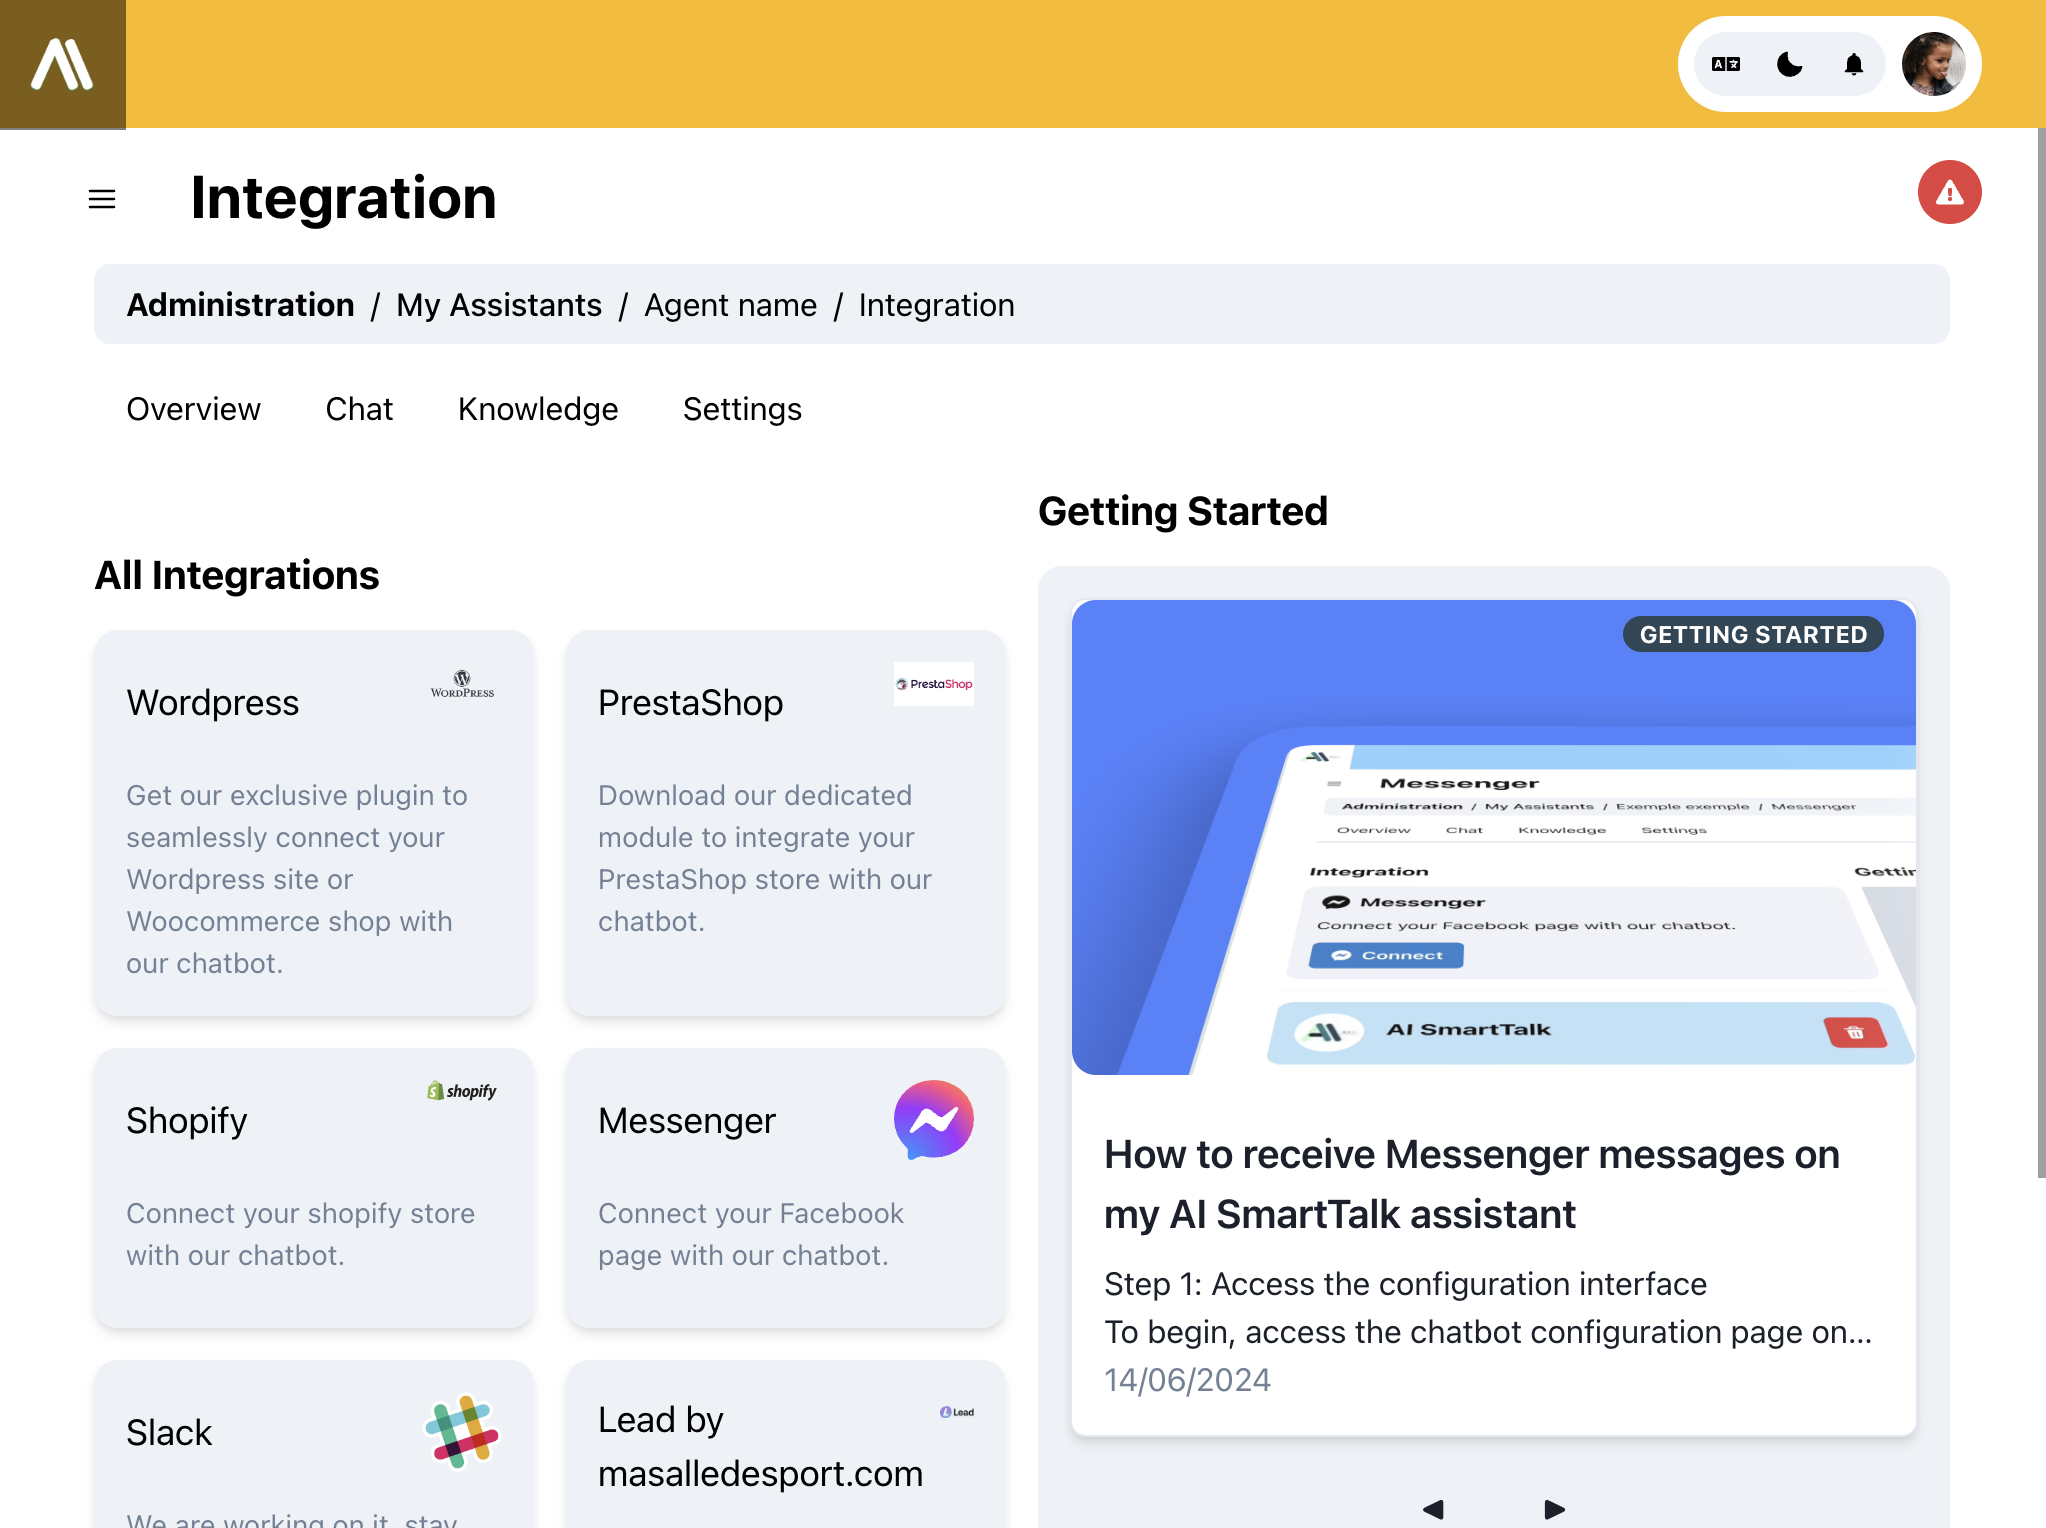
Integration Page
On the integration page, you can connect your chatbot with various platforms and communication channels.
Available Integrations
- WordPress: Use the exclusive plugin to seamlessly connect your WordPress site or WooCommerce shop with your chatbot.
- PrestaShop: Download the dedicated module to integrate your PrestaShop store with your chatbot.
- Shopify: Connect your Shopify store with your chatbot.
- Messenger: Connect your Facebook page with your chatbot.
- Slack: Integrate your chatbot with Slack for internal communication.
- Lead by masalledesport.com: Integration with specific services provided by masalledesport.com.
Setting Up Integrations
- Each integration option comes with specific steps to connect and sync your data with your chatbot's knowledge base.
- These integrations help display your chatbot on your website or other platforms, as well as set up communication channels for interacting with your users.
- Follow the provided instructions for each integration to complete the setup.
For more detailed setup instructions for each integration, visit our Integrations Documentation.
Troubleshooting Tips
- Ensure that you have the necessary permissions and API keys for the platforms you wish to integrate with.
- Check the documentation and support resources provided for each integration to resolve any issues.
By following these steps, you can successfully complete the onboarding process and set up your chatbot with the desired configurations and integrations.