User Management 👥
To access this page, go to your chatbot settings and select "Access Control."
The user management page allows you to administer the users of your system. This page is divided into two main sections: Active Users and Invitations.
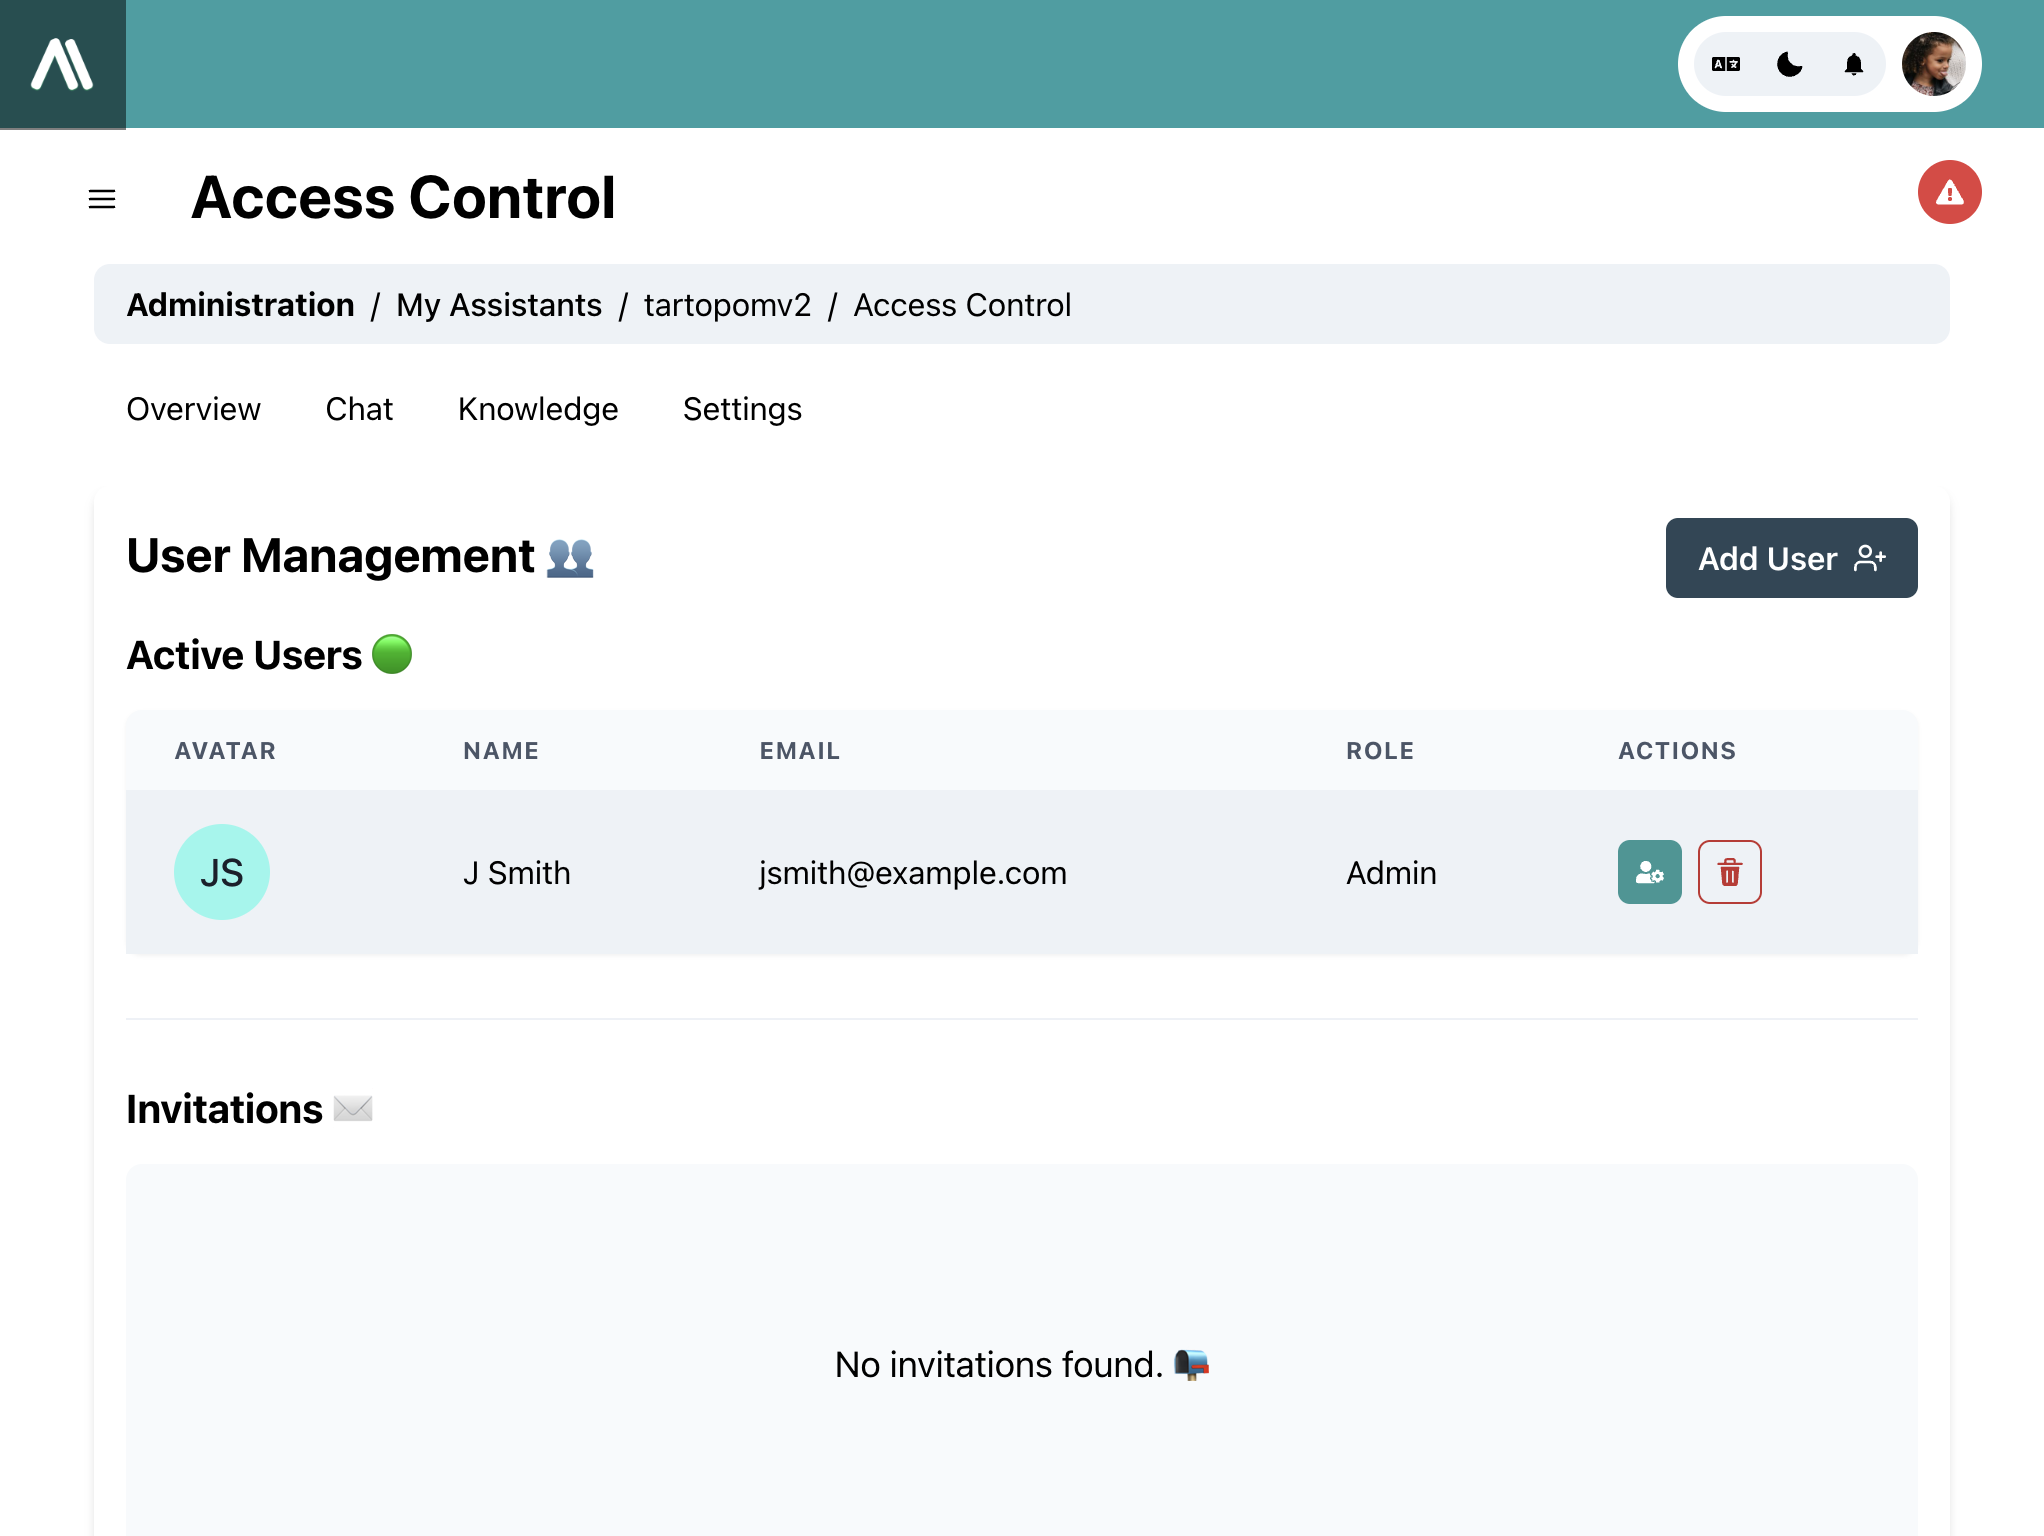
Active Users 🟢
This section displays a list of users currently active in the system. For each user, the following information is presented:
- Avatar: The icon representing the user.
- Name: The user's full name.
- Email: The user's email address.
- Role: The role assigned to the user (e.g., Admin).
- Actions: Icons to edit or delete the user.
To add a new user, click the "Add User" button at the top right of this section.
Invitations ✉️
This section displays the invitations sent to users to join the system. If no invitations have been sent, a message indicating "No invitations found" will be displayed.
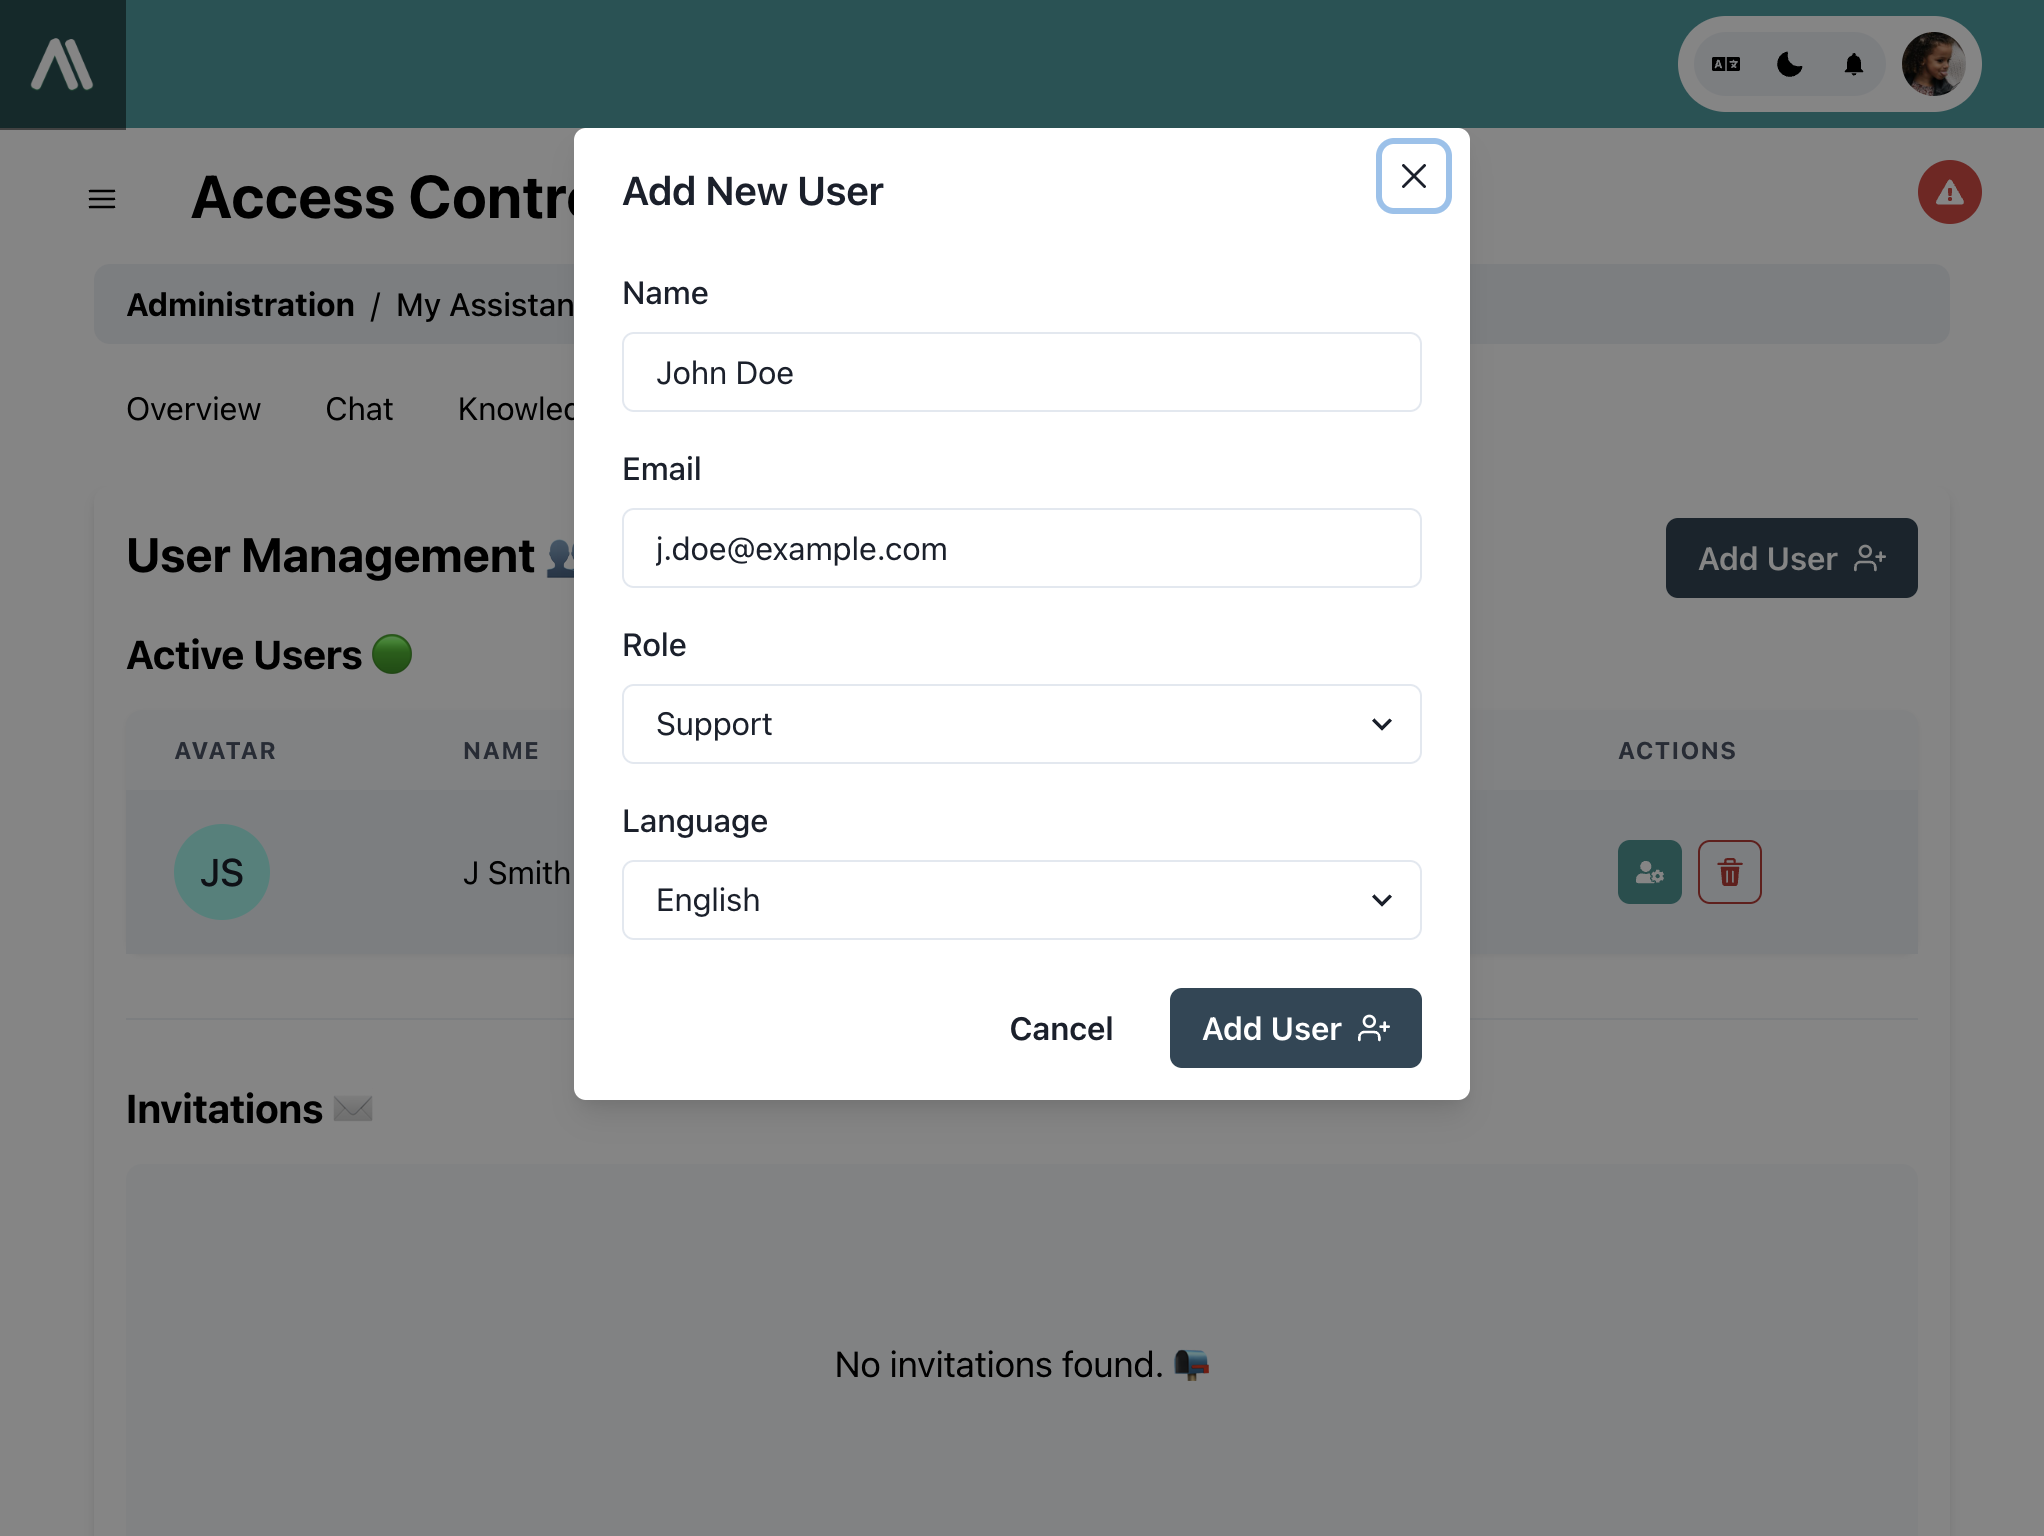
Adding a User
To add a user, follow these steps:
- Click the "Add User" button
- Fill in the user's information in the form:
- Name: Enter the user's full name (e.g., John Doe).
- Email: Enter the user's email address (e.g., j.doe@example.com).
- Role: Select the user's role from the dropdown menu (e.g., Support).
- Language: Select the user's preferred language (optional).
- Click "Add User" to save the new user.
Deleting a User
To delete a user, follow these steps:
- Click the delete icon to the right of the user you want to delete.
- Confirm the deletion in the dialog that appears.
Editing a User
To edit a user's information, follow these steps:
- Click the edit icon to the right of the user you want to edit.
- Update the user's information in the form that appears.
- Click "Save" to save the changes.
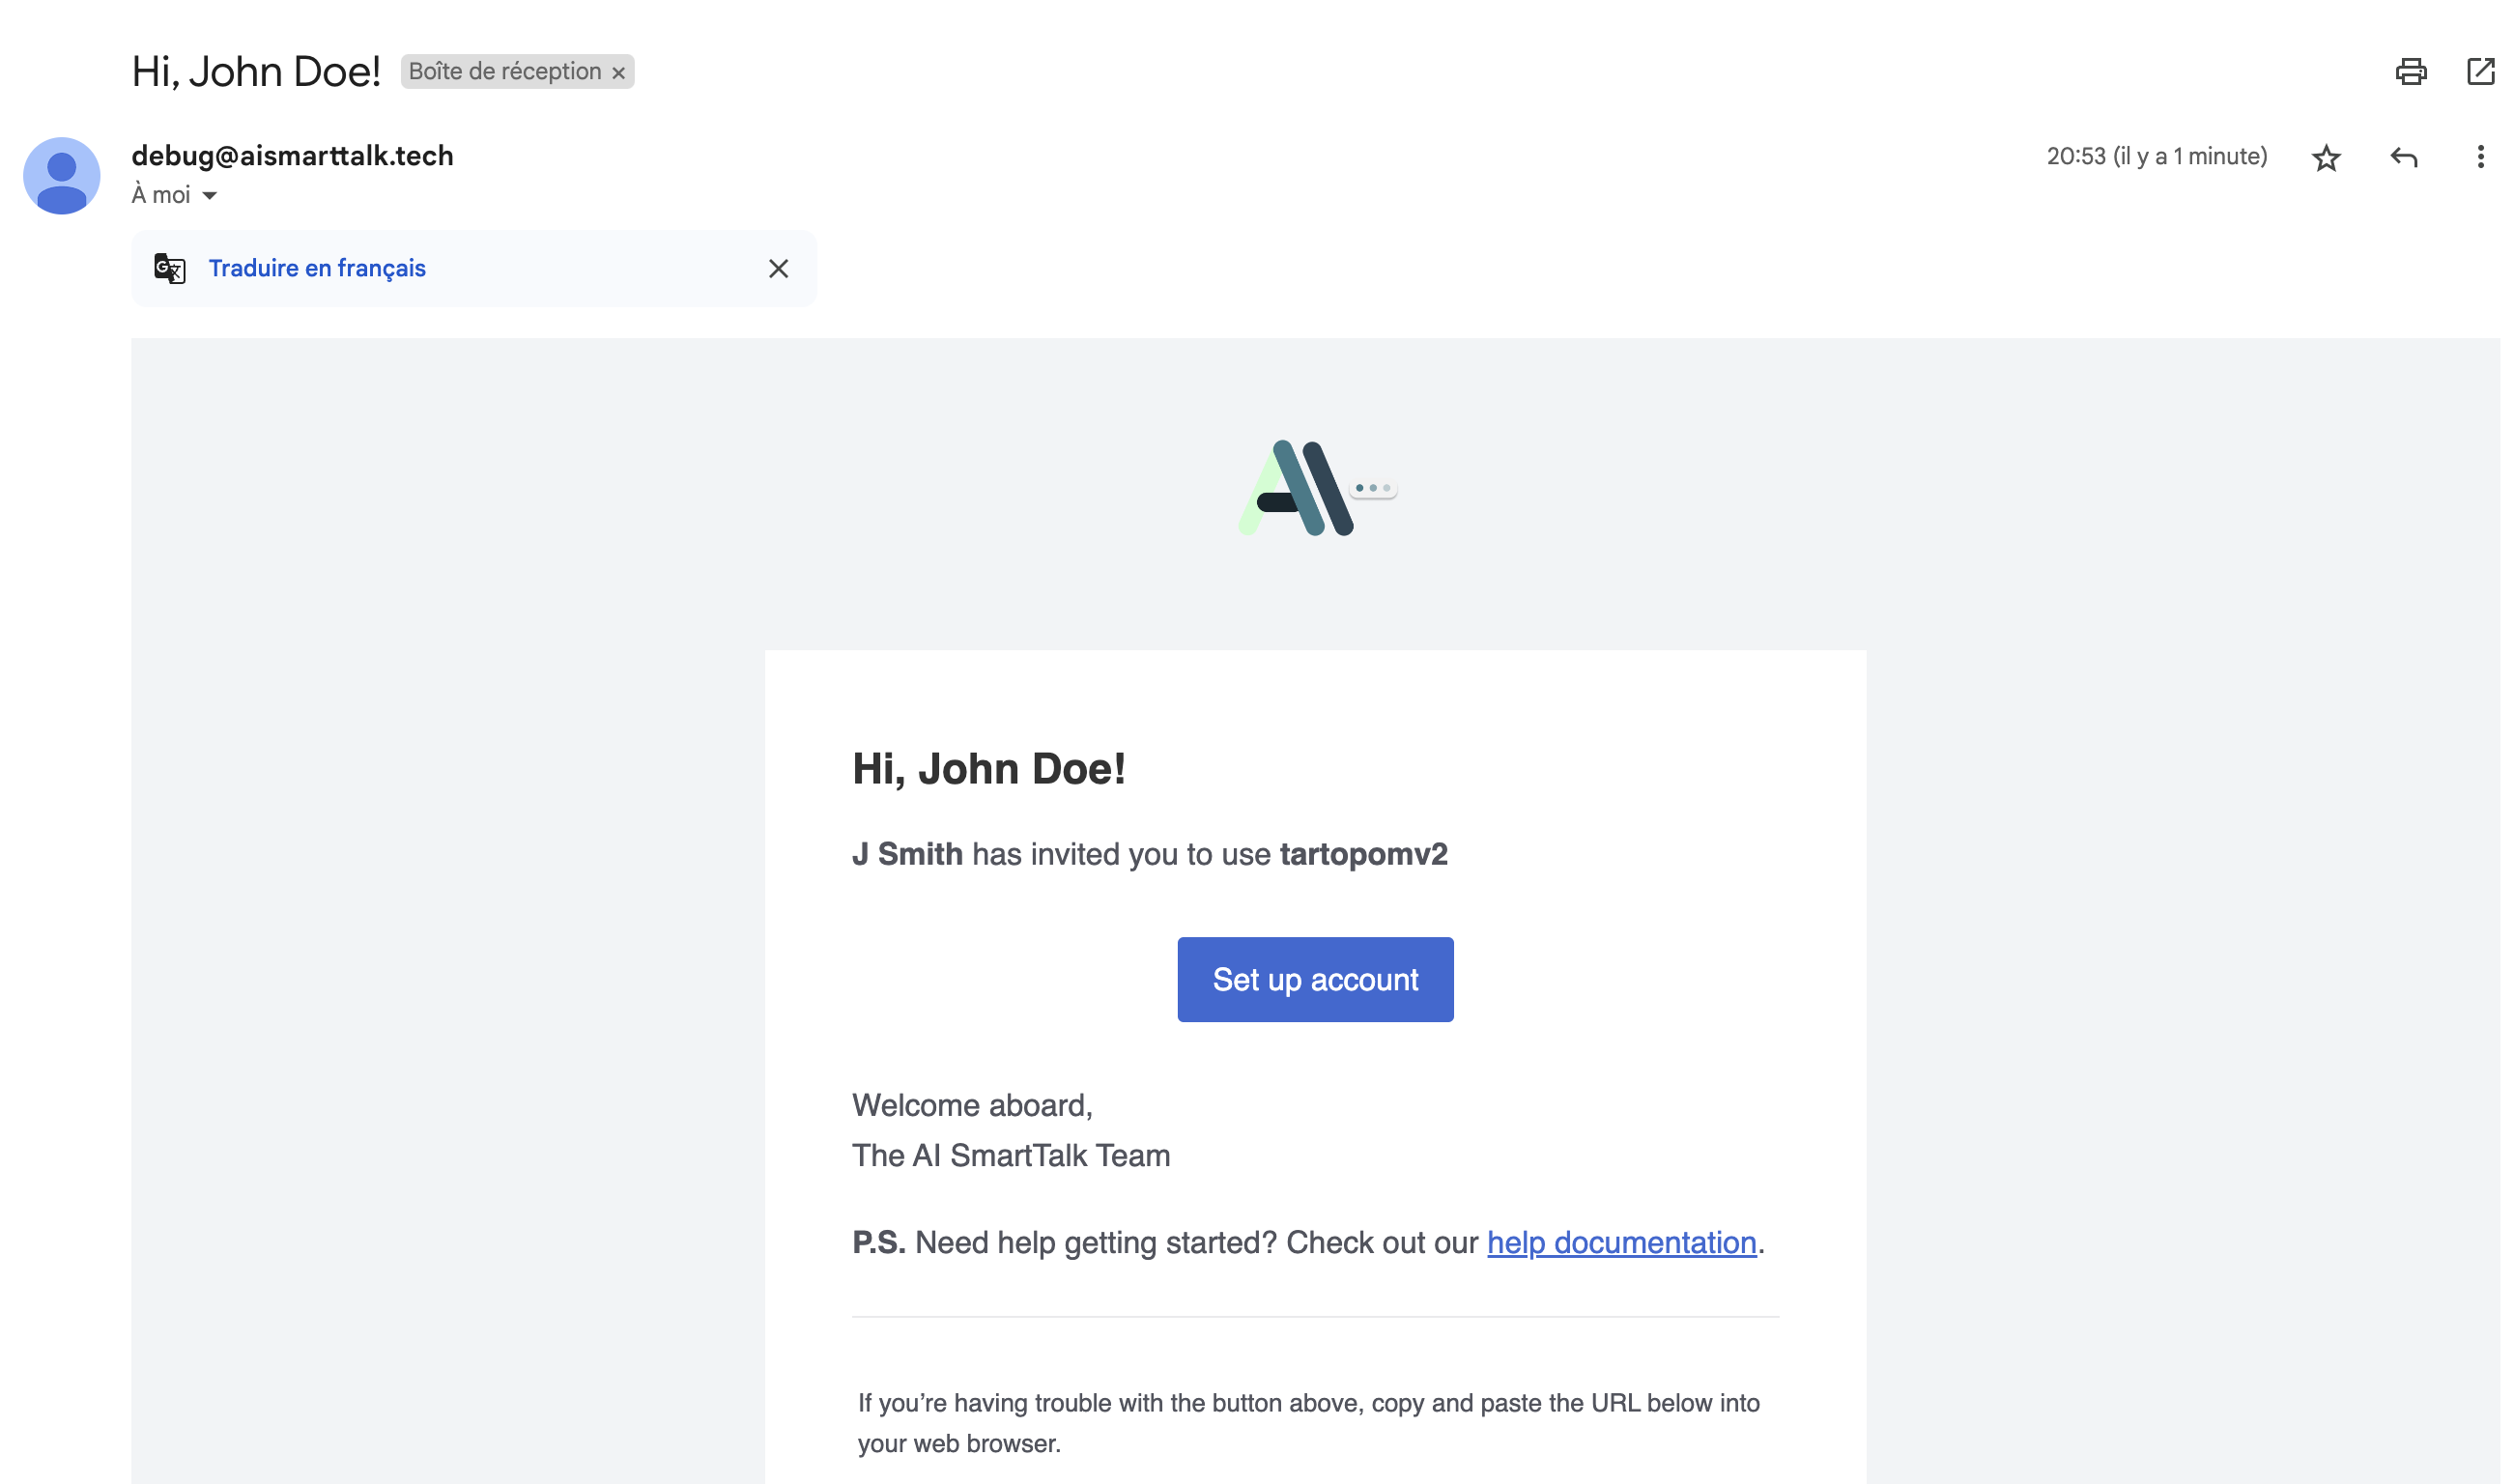
Invitation Email
When a new user is added, they receive an invitation email containing a link to set up their account. This email includes the following information:
- Email Subject: "Hi, [User's Name]!"
- Welcome Message: "[User's Name] has invited you to use [system name]."
- Link to Set Up Account: A "Set up account" button redirecting the user to the account setup page.
- Additional Information: Instructions for getting help and a link to the documentation.
This tutorial guides you through the necessary steps to manage users in your system. Follow these instructions to easily and efficiently add, edit, or delete users.