Import Clients via CSV
D'Import Clients Feature erlaabt Iech, Äert SmartCRM séier mat Clientedaten ze fëllen andeems Dir eng CSV-Datei eropluet. Dëst garantéiert eng effizient Organisatioun an eng nahtlos Onboarding.
Schrëtt 1: Bereet Är CSV-Datei vir
- Erstellt eng CSV-Datei mat de gefuerderte Spalten:
- Beispiller vun de gefuerderte Felder: Numm, E-Mail, Telefon, asw.
- Optiounen Felder: Firma, Adress, asw.
- Vergewëssert Iech, datt d'Kopfzeilen d'Struktur entspriechen, déi vun SmartCRM gefuerdert ass.
Lued den CSV Template direkt aus der Import Clients Sektioun an SmartCRM erof fir Formatfehler ze vermeiden.
Schrëtt 2: Importéiert d'Fichier
- Navigéiert zum Clients Tab an SmartCRM.
- Klickt op de Import Clients Knäppchen an der uewen-réchts Ecker.

- Wielt Äert CSV Fichier :
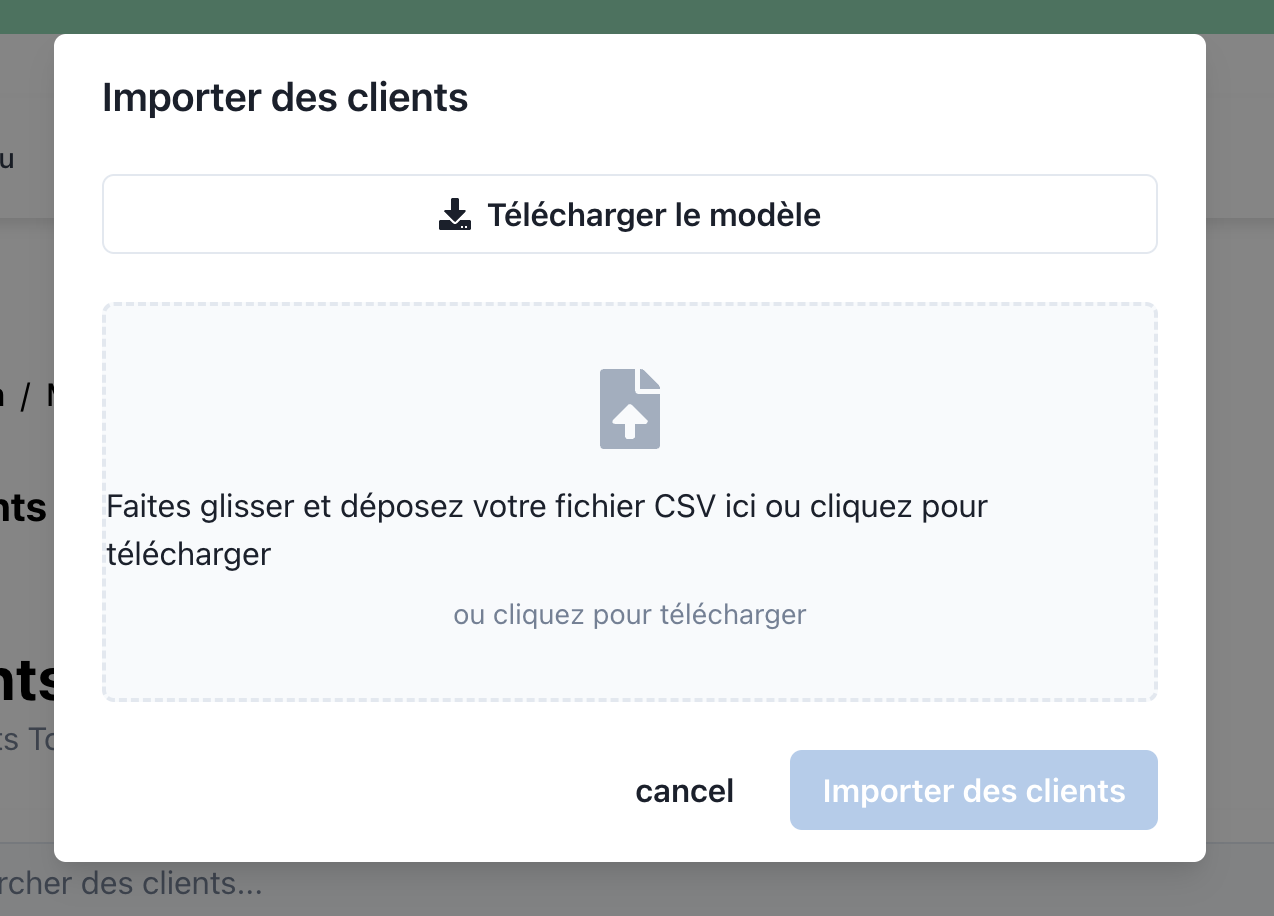
- Klickt op Import fir de Prozess ze starten.
Feeler am CSV (z.B. felegend erforderlech Felder) wäerten den Import verhënneren. Iwwerpréift de Feelerprotokoll fir Problemer ze fixéieren ier Dir et erëm eropluet.
Schrëtt 3: Verifizéiert importéiert Daten
- Nodeems den Import ofgeschloss ass, ginn d'nei bäigefüügt Clients am Clients Tab ugewisen.
- Clients sinn kategoriséiert baséiert op hirem Status:
- Aktiv: Verifizéiert an bereet fir Engagement.
- Prospect: Warten op Qualifikatioun oder Follow-up.
Benotzt Filteren fir spezifesch Gruppen vun Clients ze gesin (z.B. nëmmen "Aktiv" Clients).
Beispill Uwendungsfall
Stell der vir, dasss de e Marketingmanager bass, deen eng Kampagne fir deng Klienten preparéiert:
- De exportéiers eng Lëscht vun de Clientedaten vun dengem E-Commerce-Plattform.
- Formatéiers d'Daten an eng SmartCRM-kompatibel CSV-Datei.
- Importéiers d'Datei an SmartCRM fir:
- Klienten an Kategorien ze segmentéieren (z.B. "Wäertvoll Klienten," "Nei Abonnenten").
- Personaliséiert E-Mail-Kampagnen mat Templates ze verschécken.
D'Importéiere vun de Klienten garantéiert, datt all deng Clientedaten zentraliséiert an handlungsfäeg an SmartCRM sinn.
Troubleschéier
Gemeinsch Problems während dem Import
-
Feeler: Feelen néideg Felder
- Stellt sécher, datt all néideg Felder (z.B. Numm, E-Mail) am CSV enthalen sinn.
-
Feeler: Ongëlteg Dateiformat
- Vérifizéiert, datt d'Datei am
.csvFormat gespäichert ass.
- Vérifizéiert, datt d'Datei am
Tipps fir e erfollegräichen Import
- Validéiert d'Daten an Ärem CSV ier Dir importéiert.
- Benotzt d'Probe-Vorlage fir Formatéierungsfeeler ze minimiséieren.
Vermeit et, sensibel Daten (z.B. Kreditkaartnummeren) ze uploaden, ausser et ass néideg a konform mat Privatsphärreglementer.
Nächste Schrëtt
Wann Är Clienten importéiert sinn:
- Organiséiert si an Kategorien fir Segmentatioun.
- Benotzt E-Mail- an SMS-Vorlagen, fir si direkt ze engagéieren.
- Verfollegt hir Aufgaben, Evenementer, an Engagementscores fir eng besser Nofolleg.