WordPress
Add an AI-powered chatbot to your WordPress website in just a few clicks. No technical knowledge required!
The WordPress integration is native — a dedicated plugin built specifically for AI SmartTalk. No third-party connectors, no Zapier, no middleware needed. Learn more in the Native Integrations Guide.
Prerequisites
Before you begin, make sure you have:
- Administrator access to your WordPress website
- An AI SmartTalk account (sign up for free)
Installation
Step 1: Download the Plugin
- Go to aismarttalk.tech
- Navigate to Integration in the main menu
- Find the WordPress section and click Download
Step 2: Install on WordPress
- Log in to your WordPress admin dashboard
- Go to Plugins → Add New → Upload Plugin
- Select the AI SmartTalk ZIP file
- Click Install Now, then Activate Plugin
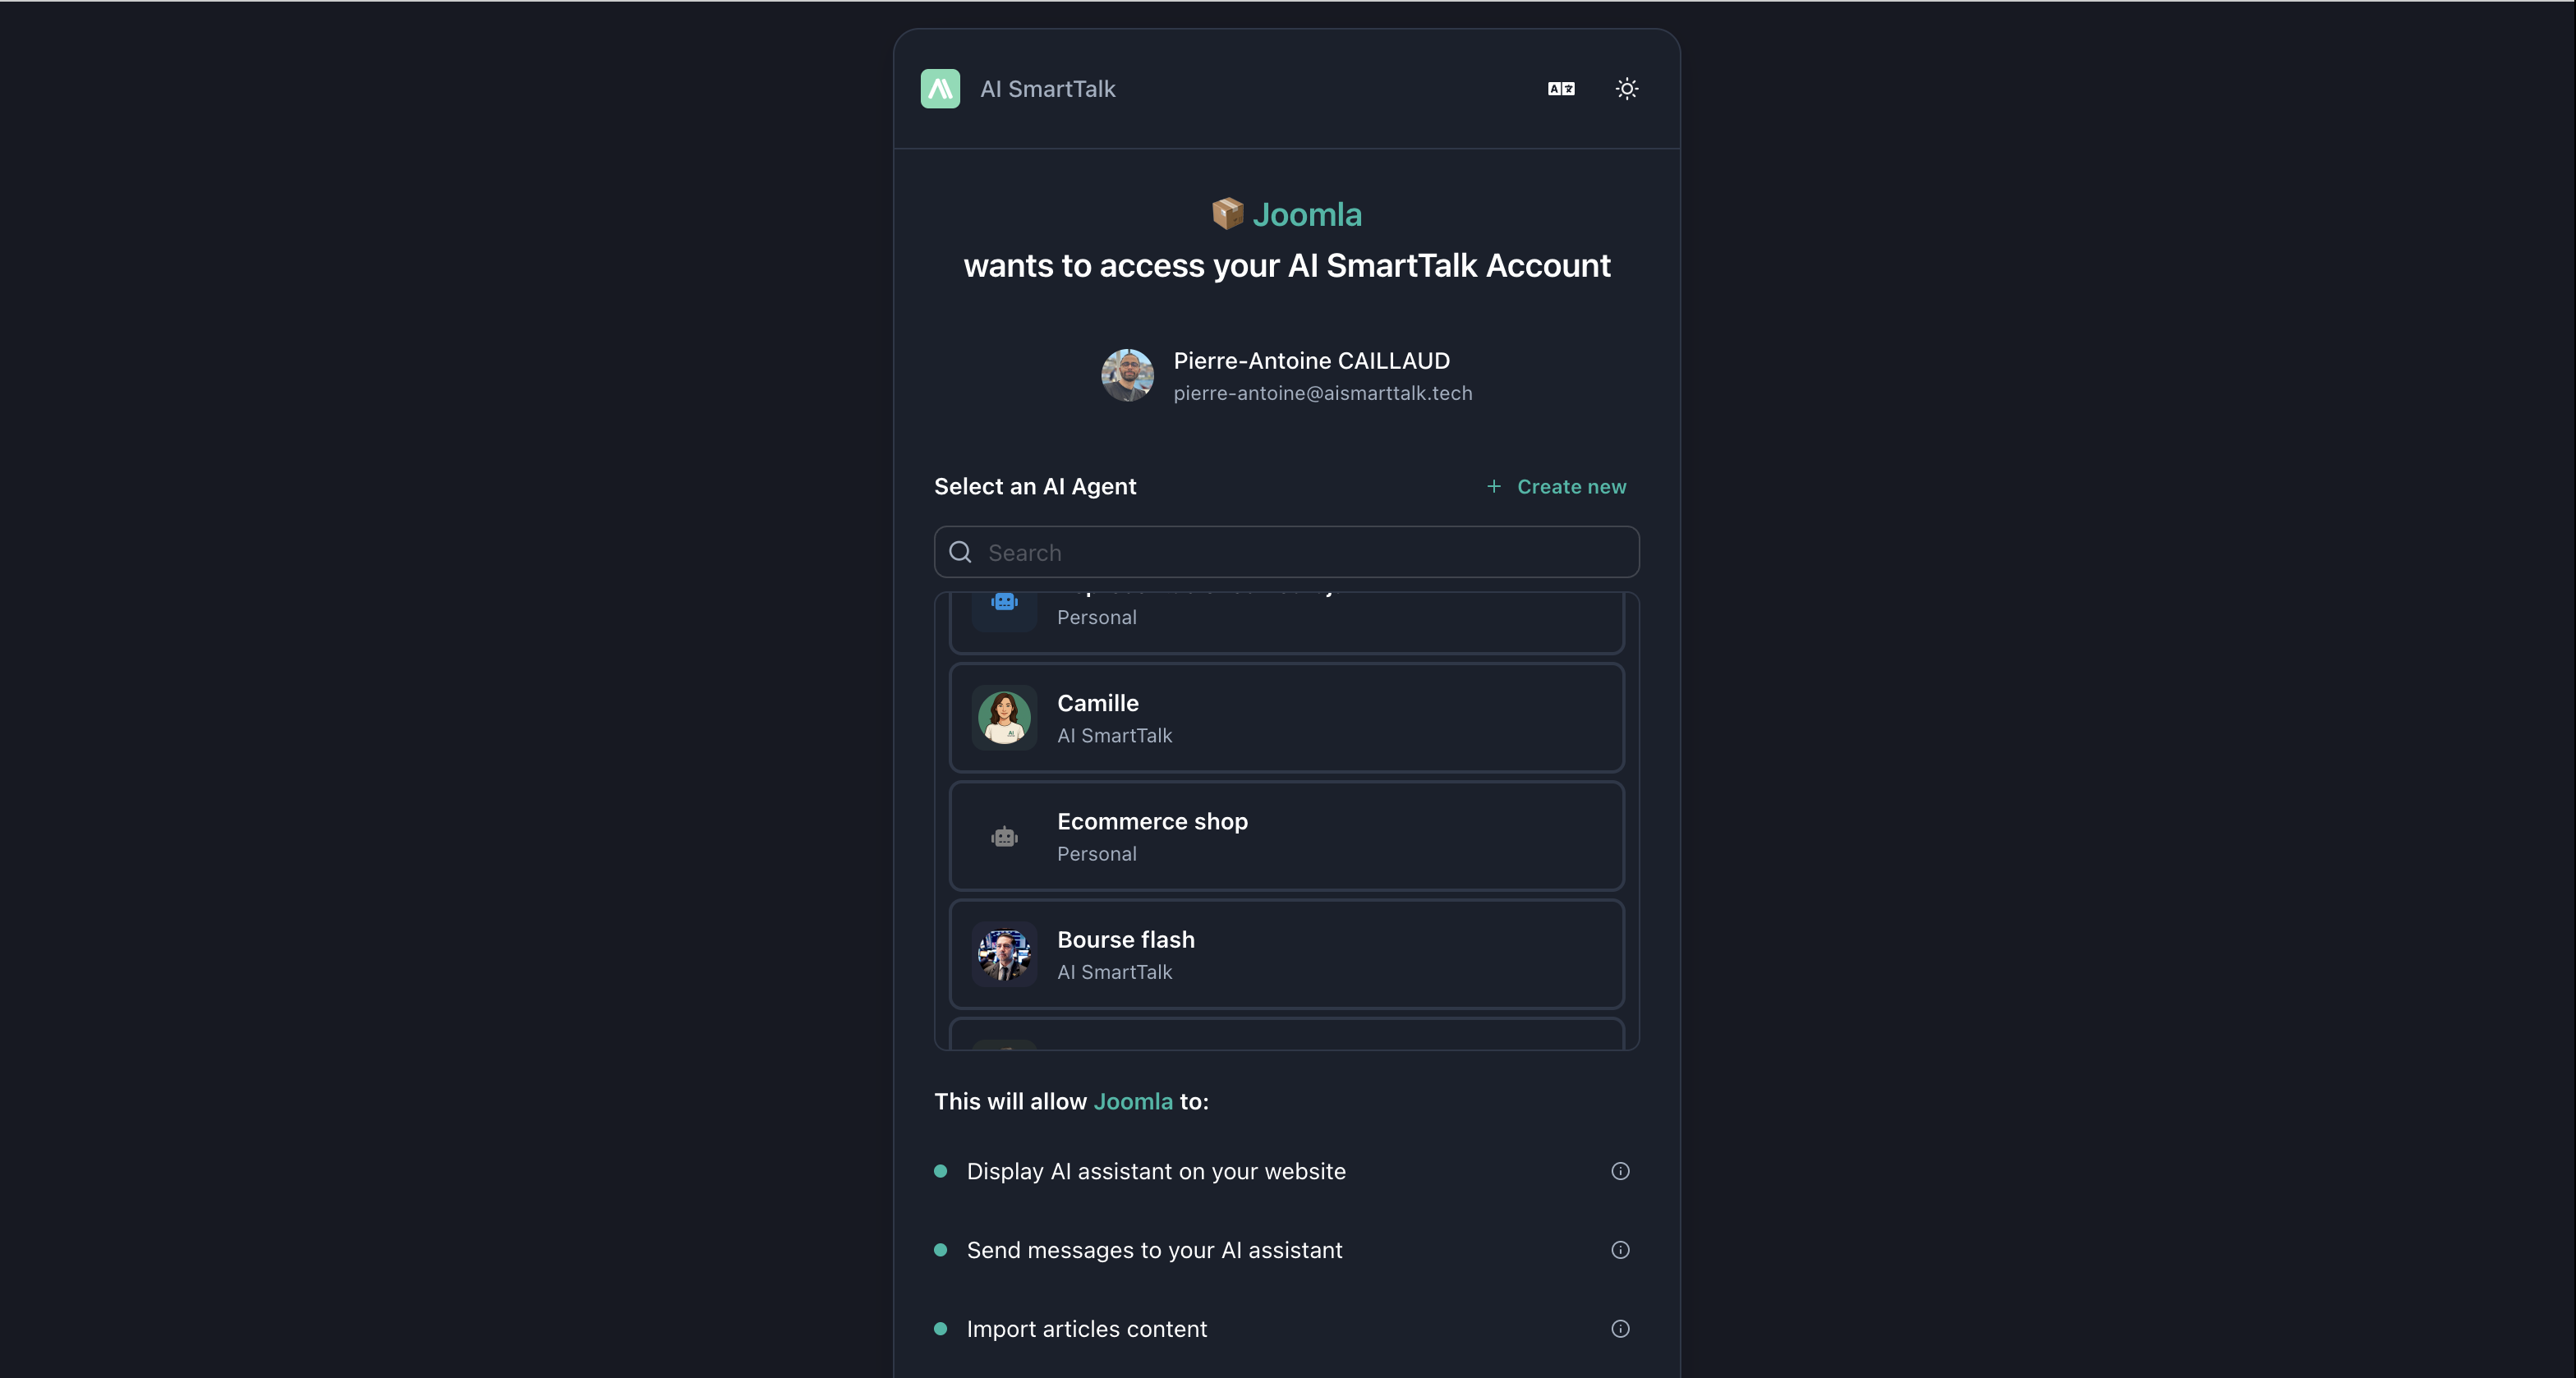
Connect Your Account
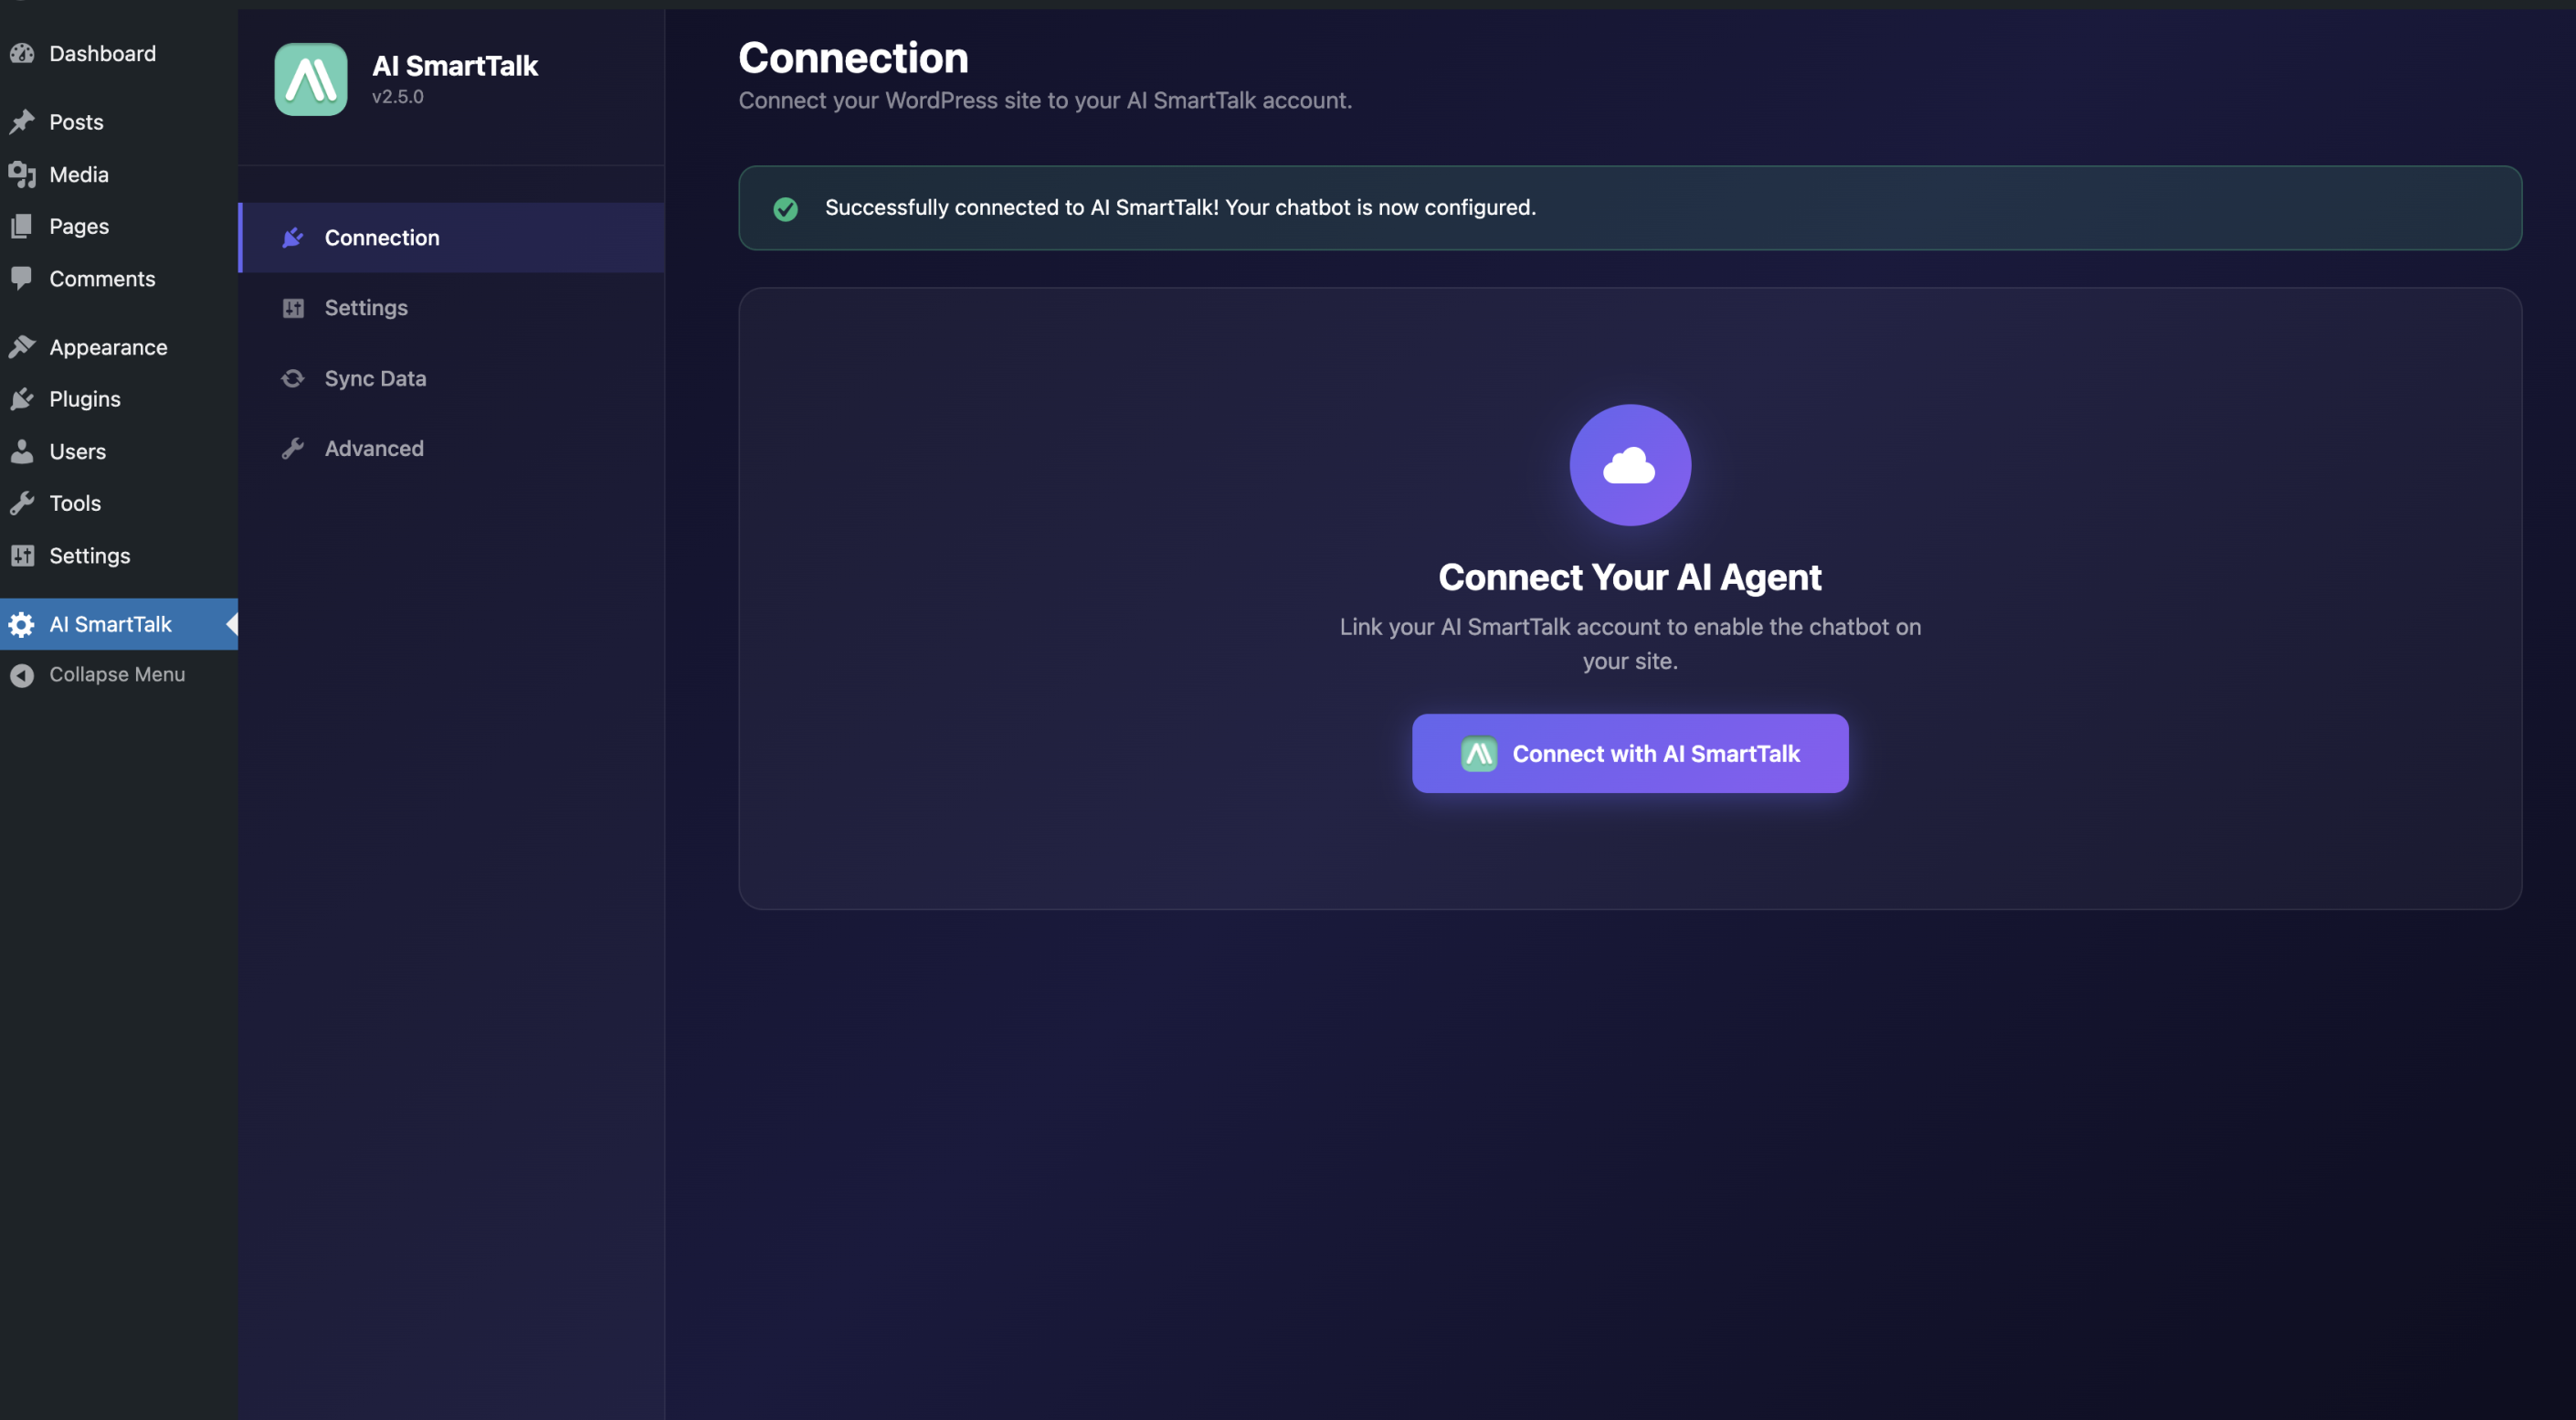
- Go to Settings → AI SmartTalk
- Click Connect with AI SmartTalk
- Log in or create an account — you'll be redirected back automatically
Once connected, you'll see your connection status and a link to open your AI SmartTalk dashboard.
Select Your Assistant
After connecting, choose which AI assistant will power your chatbot:
Use an existing assistant:
- Select it from the dropdown and click Save
Create a new assistant:
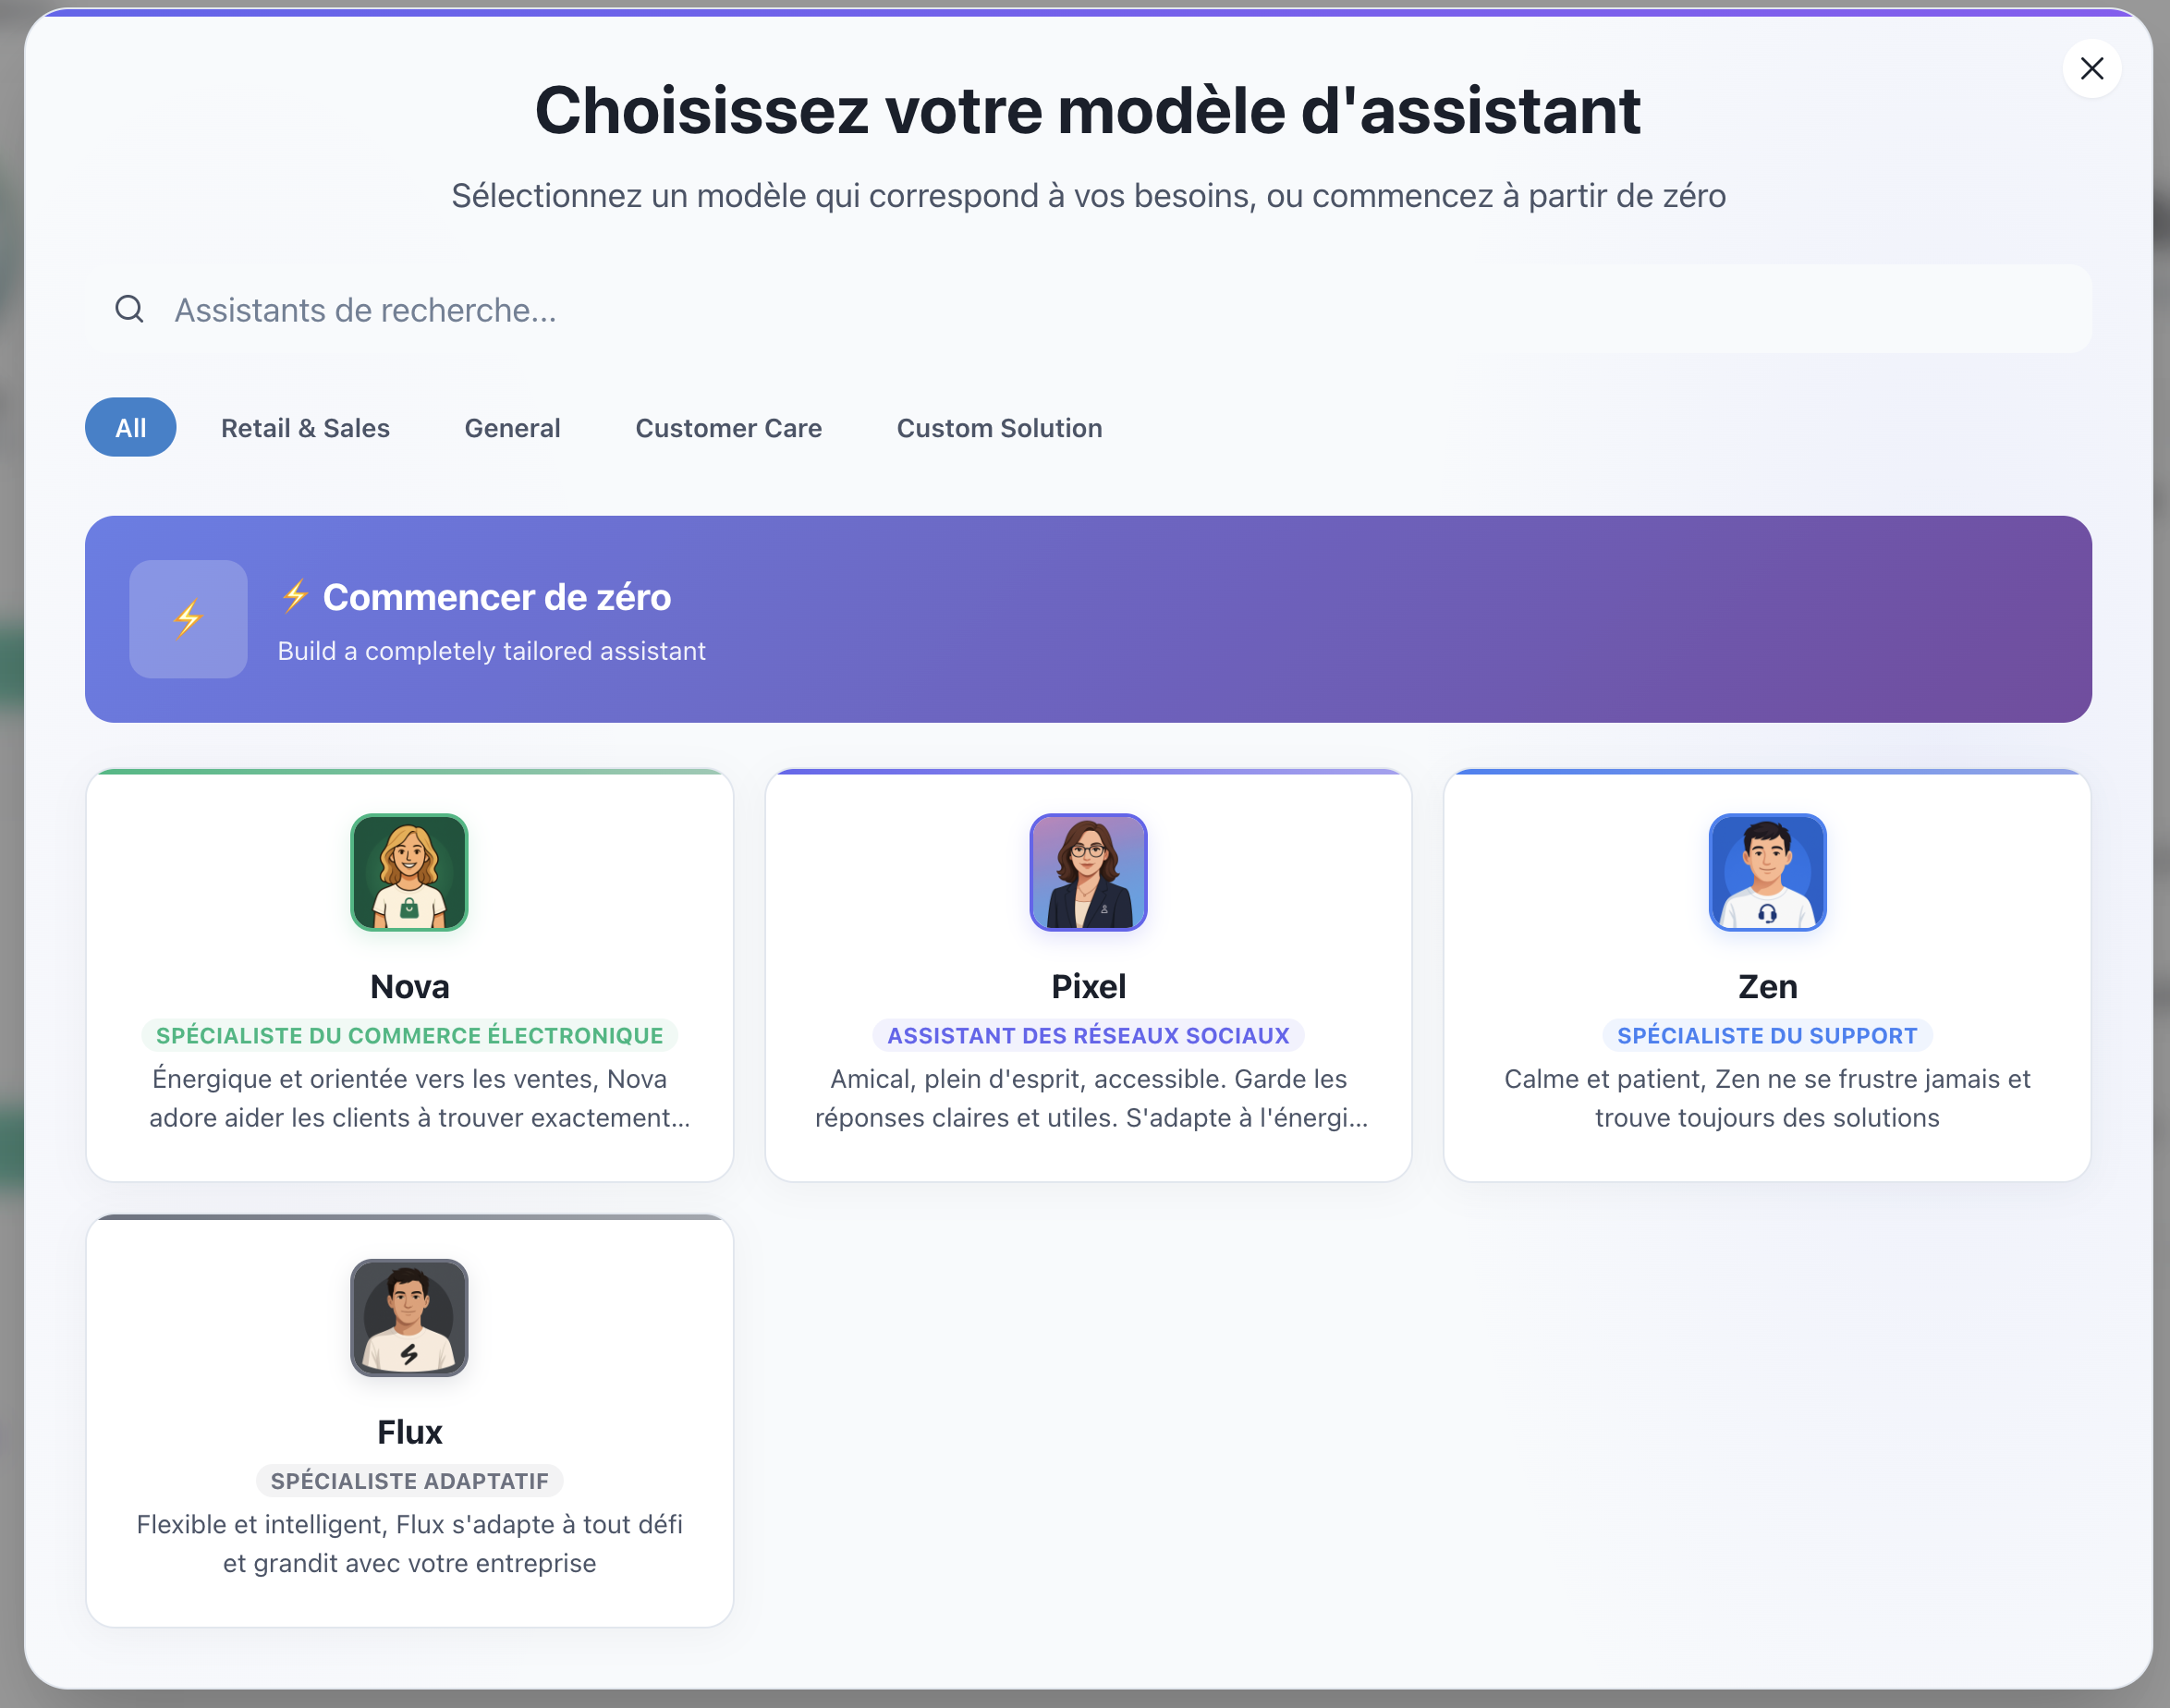
- Click the Create button
- Choose a template (Customer Support, E-commerce, etc.)
- Your assistant is created and automatically selected
- Click Save
Configure Your Chatbot
Go to the Settings tab to customize your chatbot appearance and features.
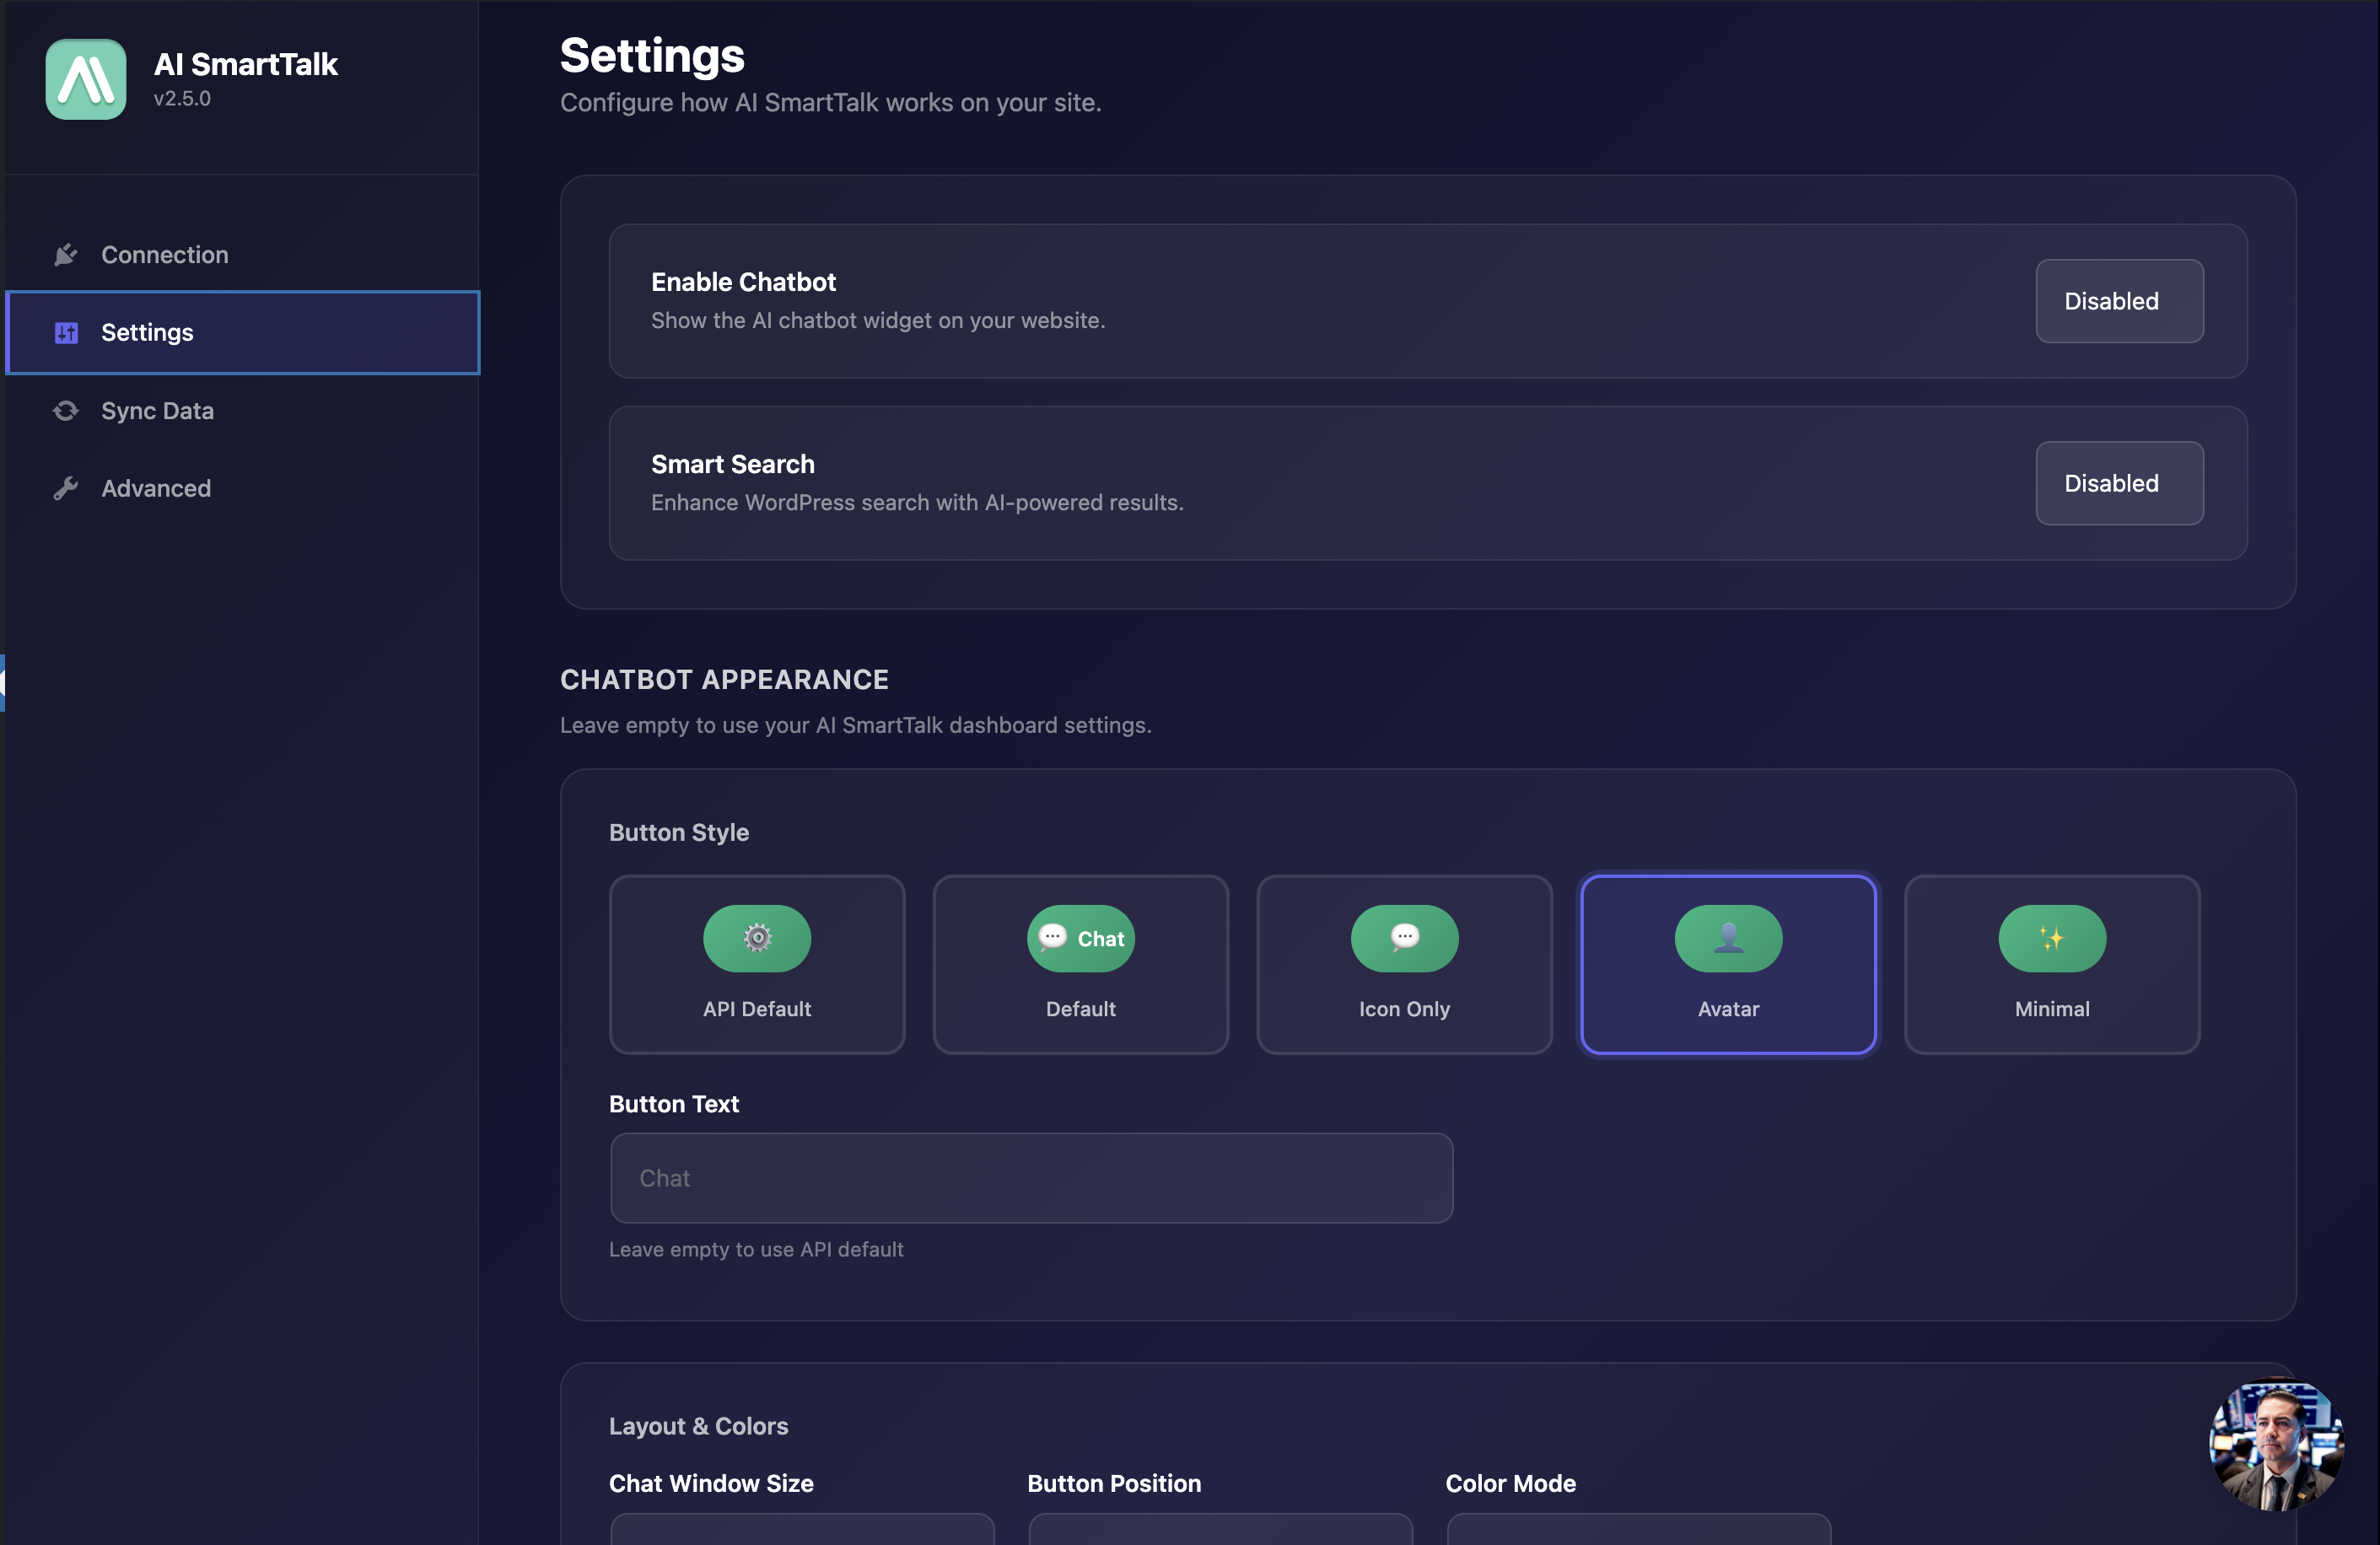
Appearance Options
| Setting | Options |
|---|---|
| Button Style | Default, Icon Only, Avatar, Minimal |
| Button Text | Custom text displayed on the chat button |
| Window Size | Small, Medium, Large |
| Position | Bottom Right, Bottom Left |
| Color Mode | Light, Dark, Auto (system) |
| Brand Colors | Override primary and secondary colors |
Feature Toggles
- File Attachments — Allow users to upload files
- Feedback System — Enable thumbs up/down on responses
- Voice Input — Let users speak their questions
- Voice Conversation — Enable full voice chat mode
- Smart Search — Enhance WordPress search with AI
Sync Your Content
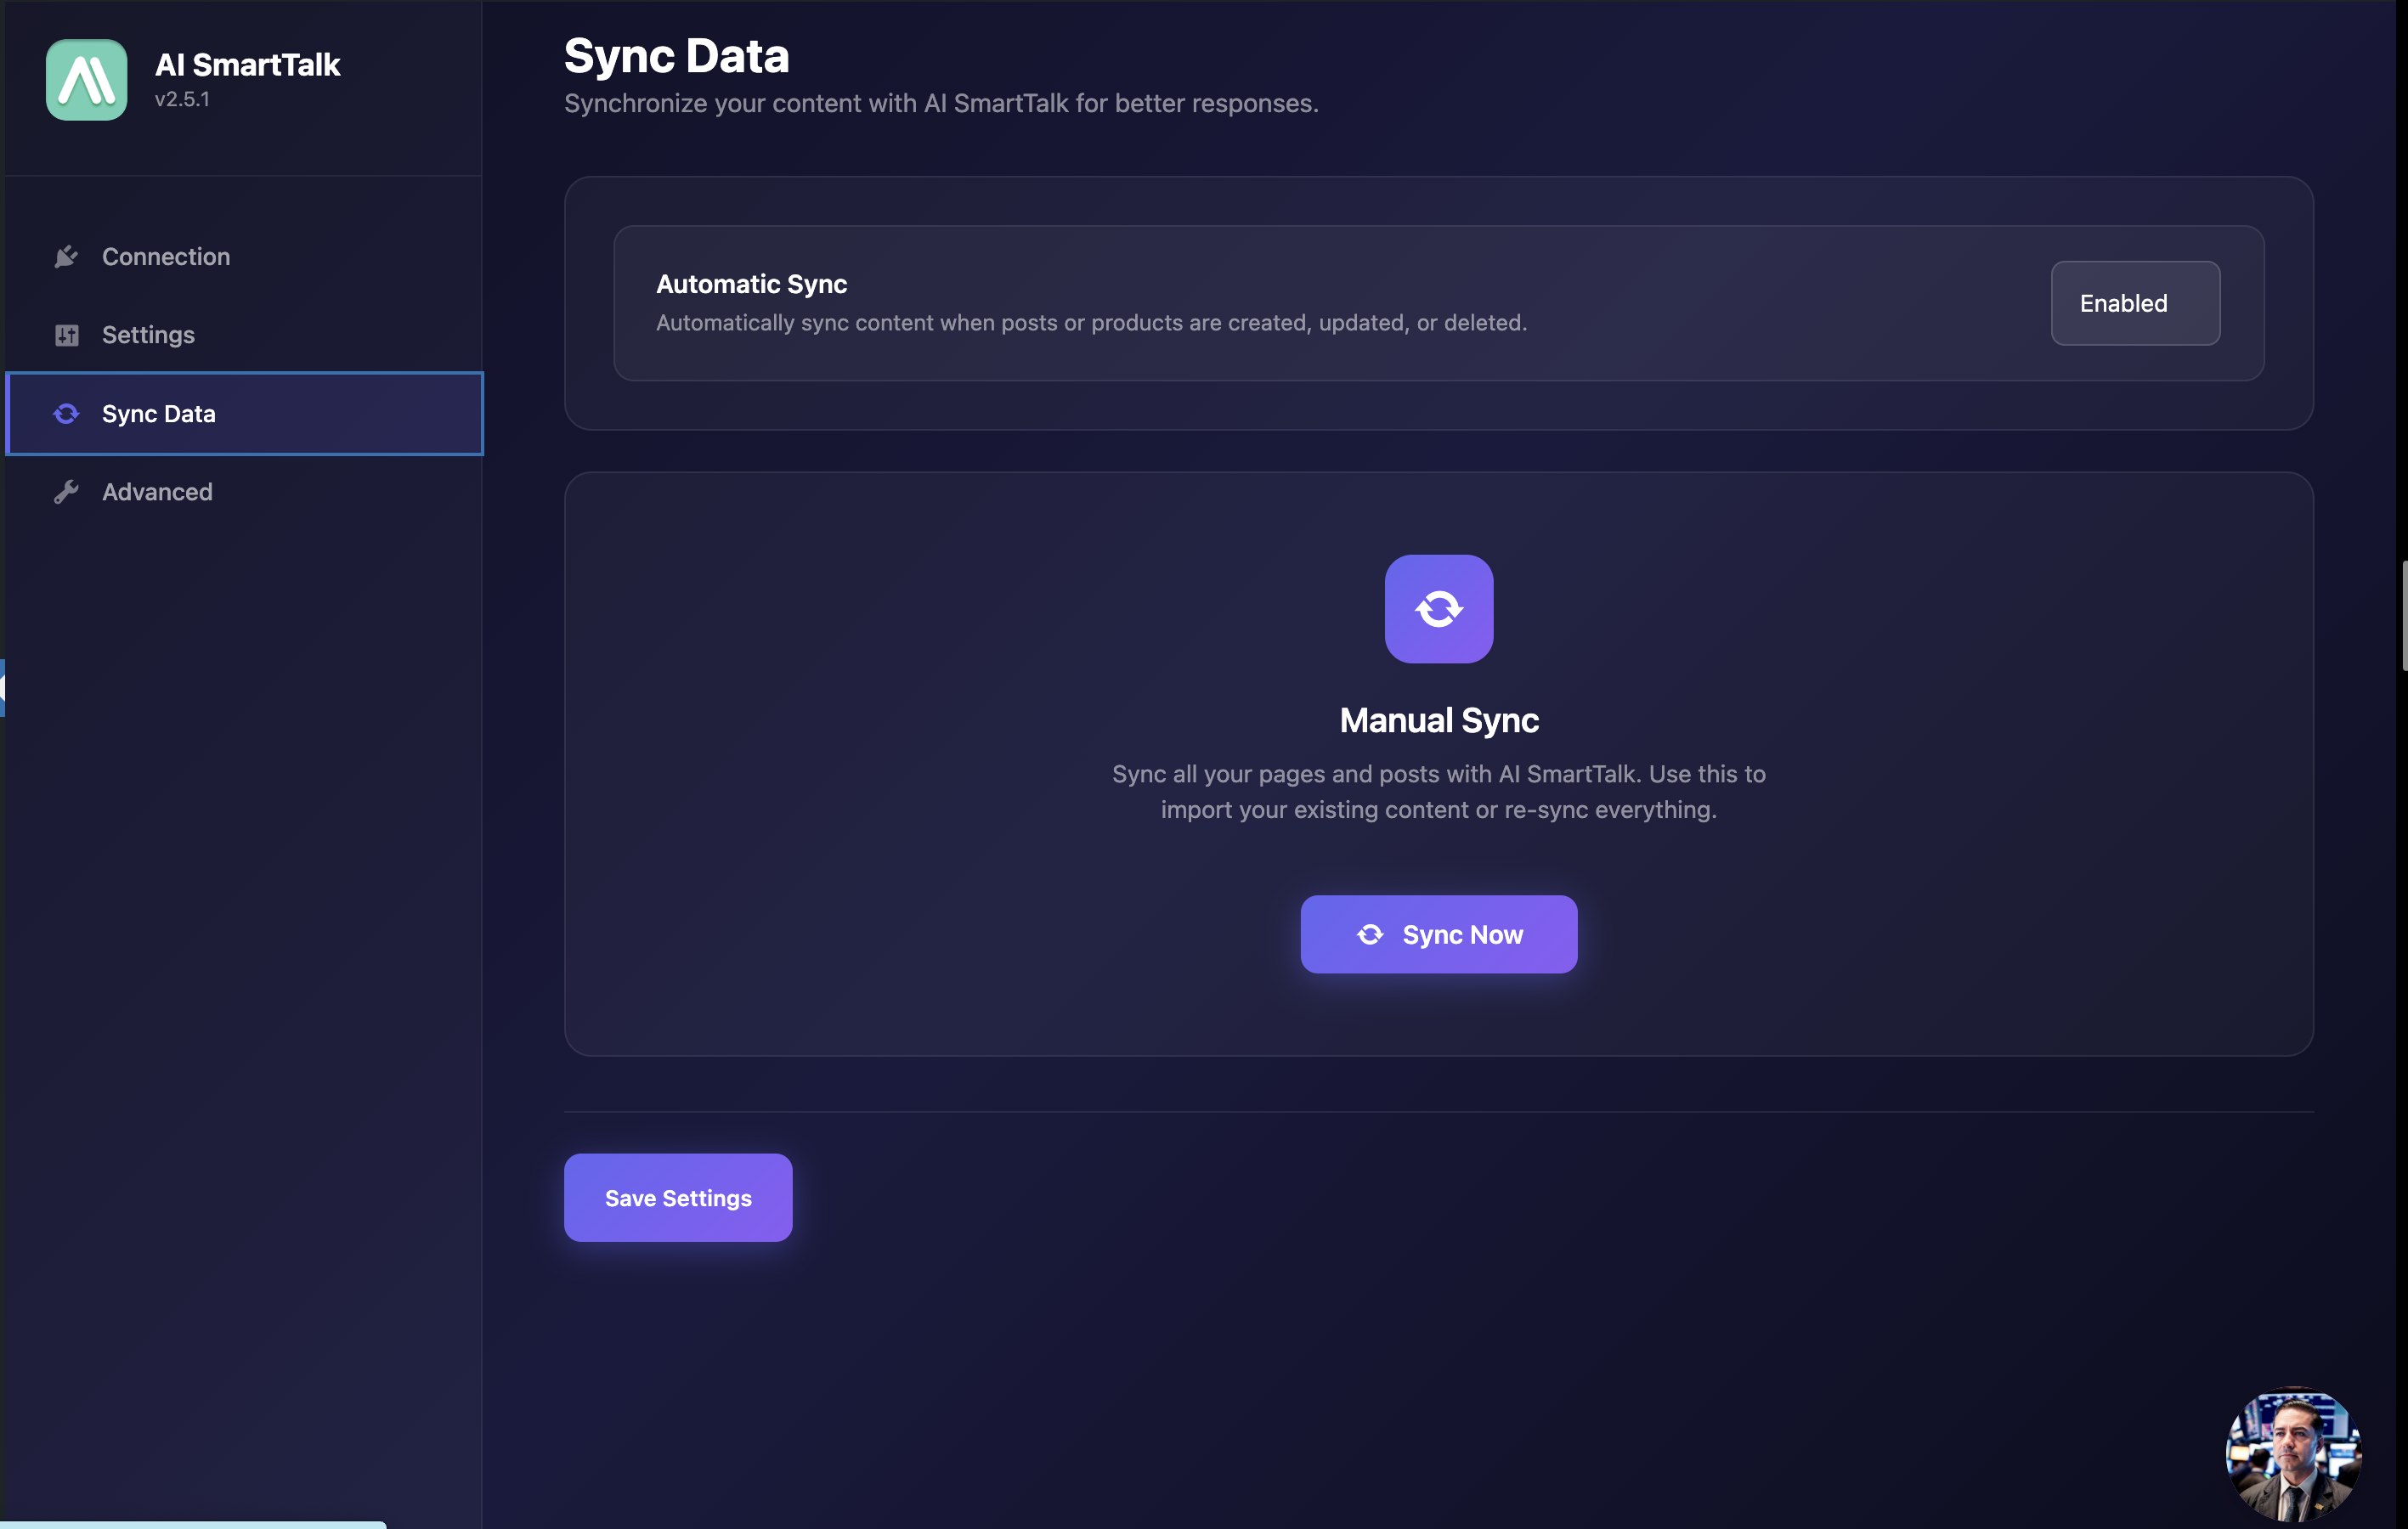
Go to the Sync Data tab to train your chatbot on your website content.
- Enable Automatic Sync to keep content updated when you publish or edit posts
- Click Synchronize Data to sync all existing content
Your pages, posts, and WooCommerce products will be sent to your AI assistant's knowledge base.
View your synced content in the Knowledge section of your AI SmartTalk dashboard.
Auto-Sync: Always Up-to-Date
When Automatic Sync is enabled, your knowledge base updates in real-time:
- Publish a new post → automatically added to the knowledge base
- Edit an existing page → knowledge base entry updated
- Add a WooCommerce product → product info synced immediately
- Delete content → removed from the knowledge base
This means your AI assistant always has the latest information from your website — no manual re-sync needed.
Advanced Settings
The Advanced tab is for whitelabel deployments only. You can configure:
- Custom API Base URL
- Custom CDN Base URL
- Custom WebSocket URL
Most users can skip this section.
Shortcodes
SmartFAQ
Create SEO-optimized FAQ sections with schema markup:
[smartfaq]
[Q]What is your return policy?[/Q]
[A]We offer 30-day returns on all products.[/A]

[Q]How long does shipping take?[/Q]
[A]Standard shipping takes 3-5 business days.[/A]
[/smartfaq]
Parameters:
hidden="yes"— Hide visual FAQ, output schema onlydefault_open="yes"— Expand all answers by defaultanimation_speed="300"— Animation speed in ms
SmartCalendar
Add a booking calendar widget:
[smartcalendar calendar_id="bookings" dark_mode="true" lang="en"]
Elementor Widgets
If you use Elementor, five widgets are available:
- SmartFAQ — Build FAQ sections visually
- SmartHowTo — Create step-by-step guides
- SmartFactCheck — Add fact-check blocks with ratings
- SmartReview — Display product/service reviews
- SmartCalendar — Add booking calendars
All widgets include schema.org markup for better SEO.
WooCommerce Integration
The plugin automatically detects WooCommerce and enables:
- Product synchronization to the AI knowledge base
- Cart management through the chatbot
- Order history retrieval
- Product recommendations
No additional configuration needed — just sync your content.
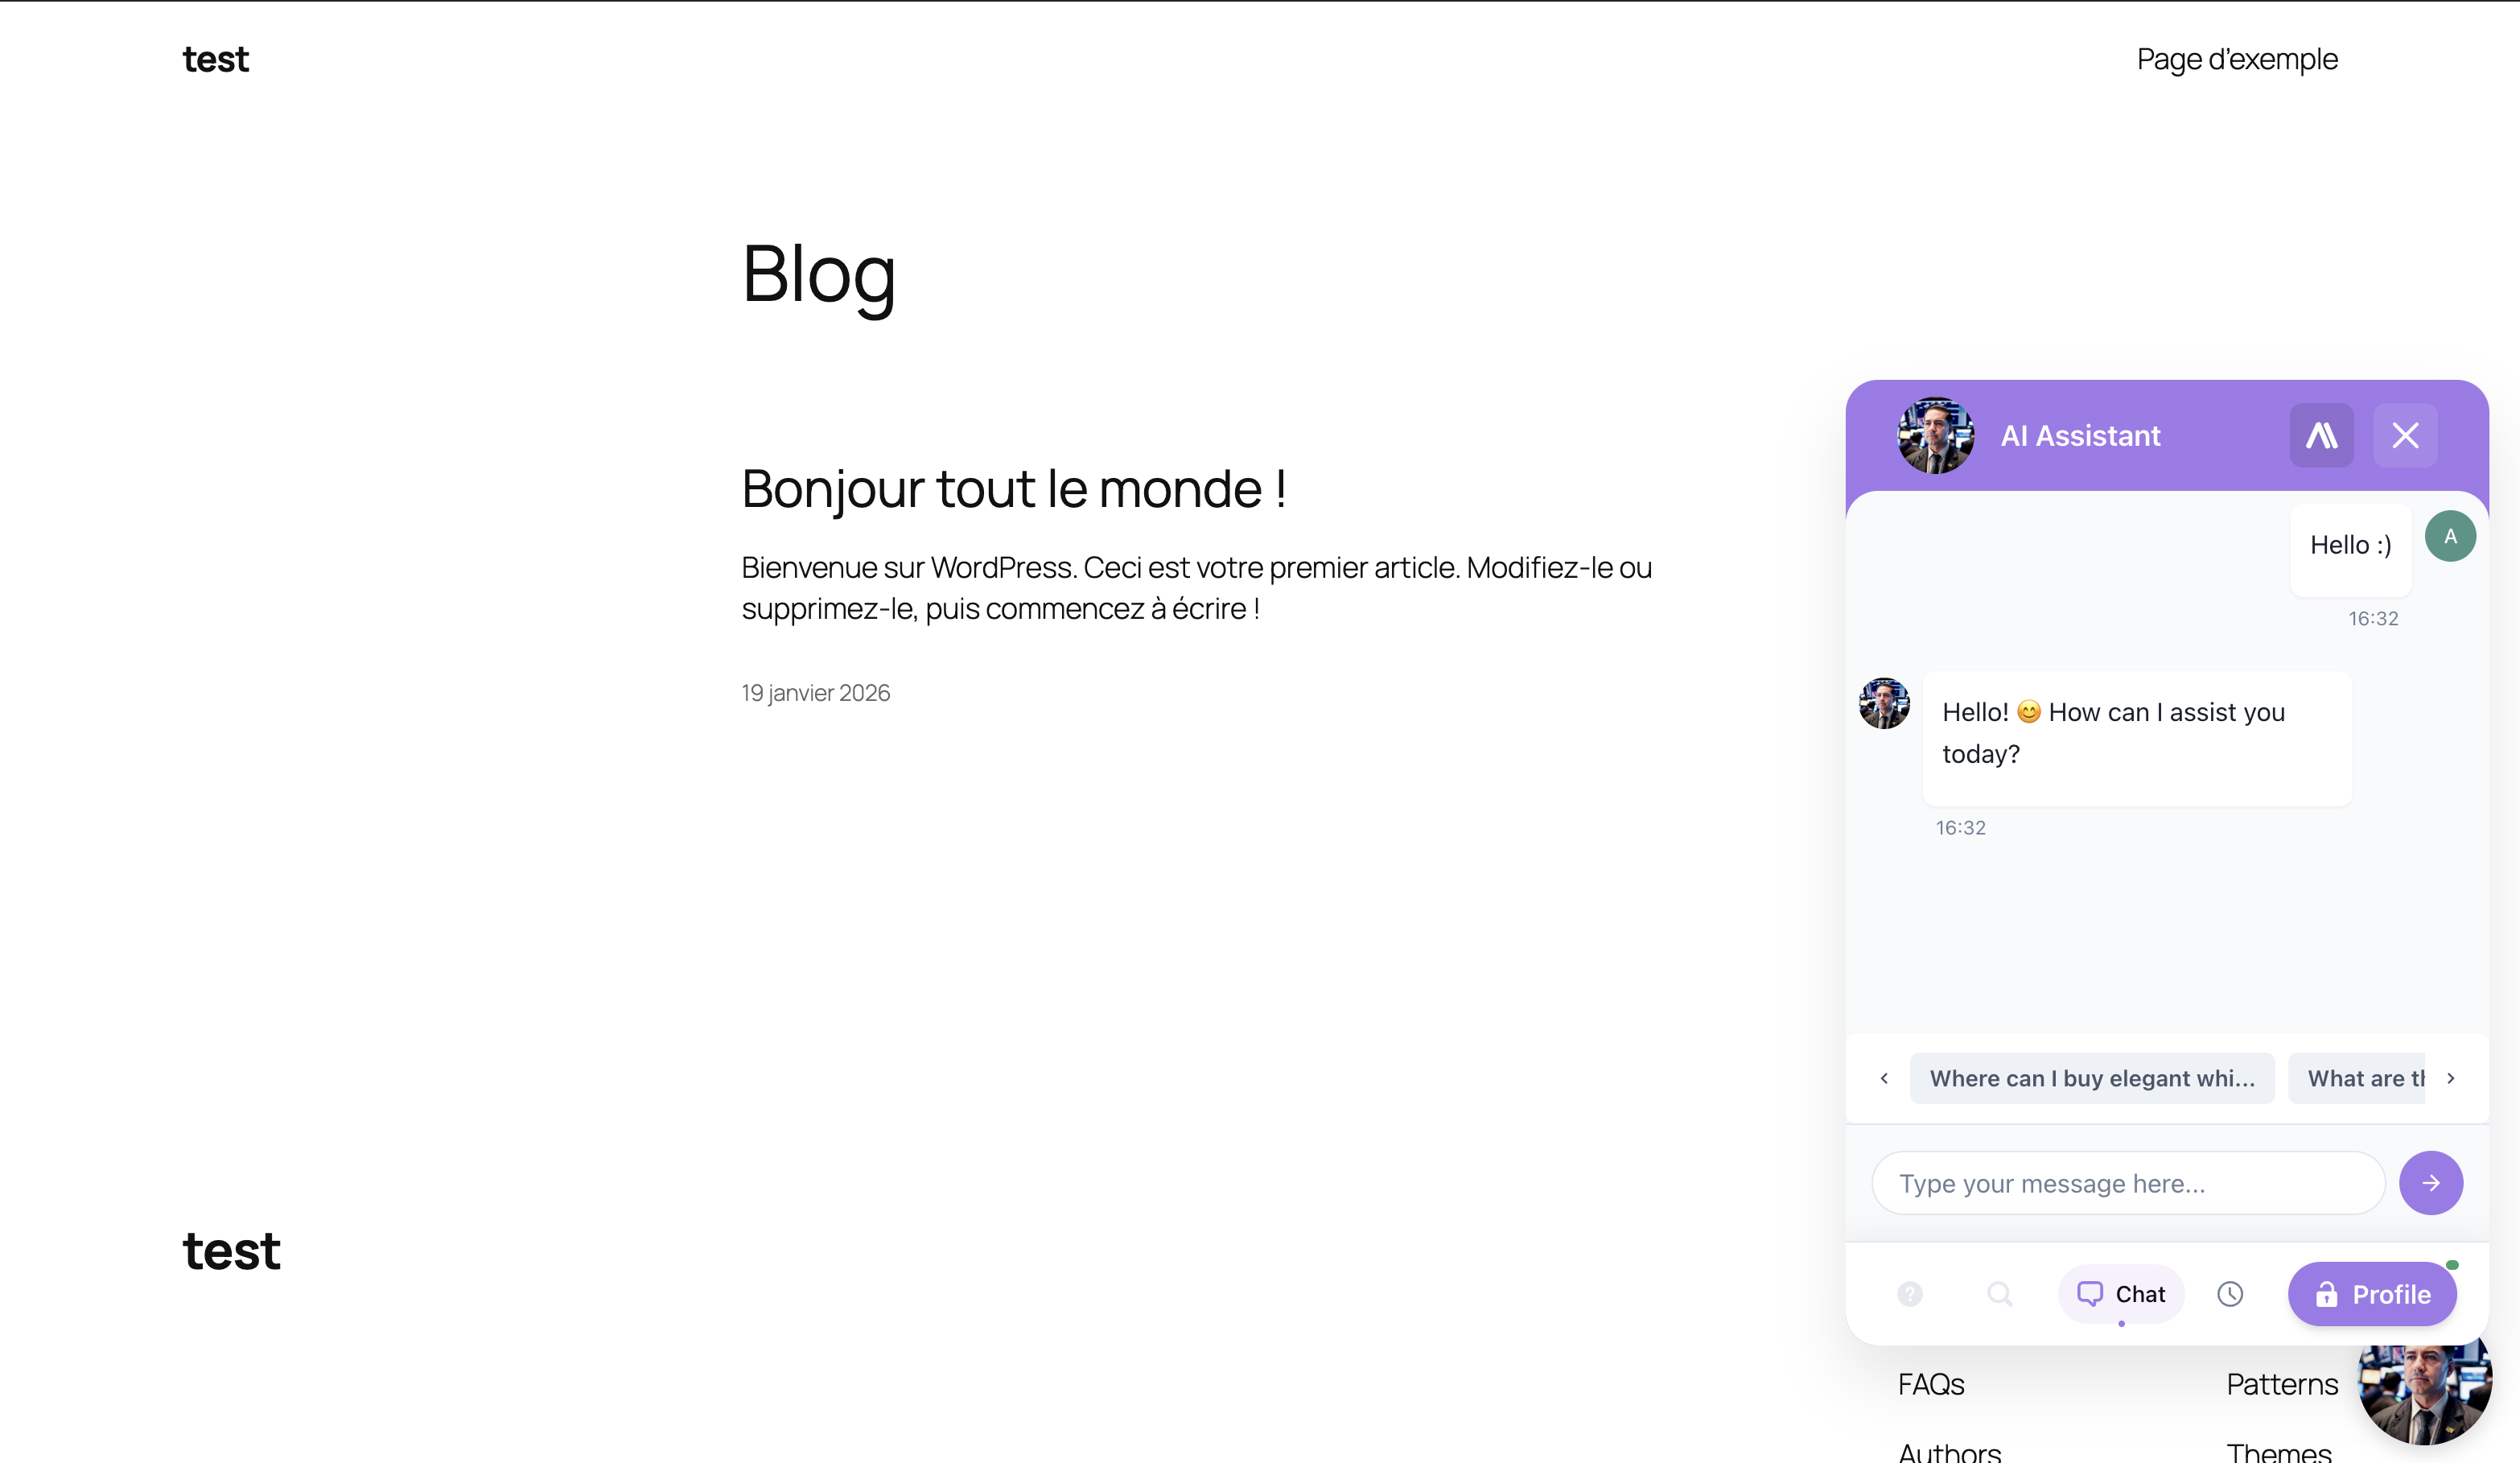
That's It!
Your chatbot is now live! Visit your website to see it in action:
- Look for the chat bubble (bottom-right by default)
- Click to open the chat window
- Ask a question about your content
Troubleshooting
Chatbot doesn't appear
- Verify the plugin is activated in Plugins → Installed Plugins
- Check that you've selected an assistant in Settings
- Clear your browser cache and any WordPress cache plugins
- Ensure Enable Chatbot is turned on in the Settings tab
Content not showing in chatbot responses
- Run synchronization again from the Sync Data tab
- Make sure content is published (not draft)
- Wait a few minutes for the AI to process large sites
Connection issues
- Ensure your server allows outbound HTTPS connections
- Try disconnecting and reconnecting
- Check that your AI SmartTalk subscription is active
Related Documentation
- Native Integrations Guide — All integrations are built-in
- Knowledge Base — How synced content powers AI responses
- E-commerce Use Case — AI-powered e-commerce support
Need Help?
Contact us at contact+support@aismarttalk.tech