SmartFlow
SmartFlow is the visual node-based workflow builder for AI SmartTalk. Create powerful automations by dragging nodes onto a canvas and connecting them together.
Make your AI agent ACT · SmartFlow basics
The Interface
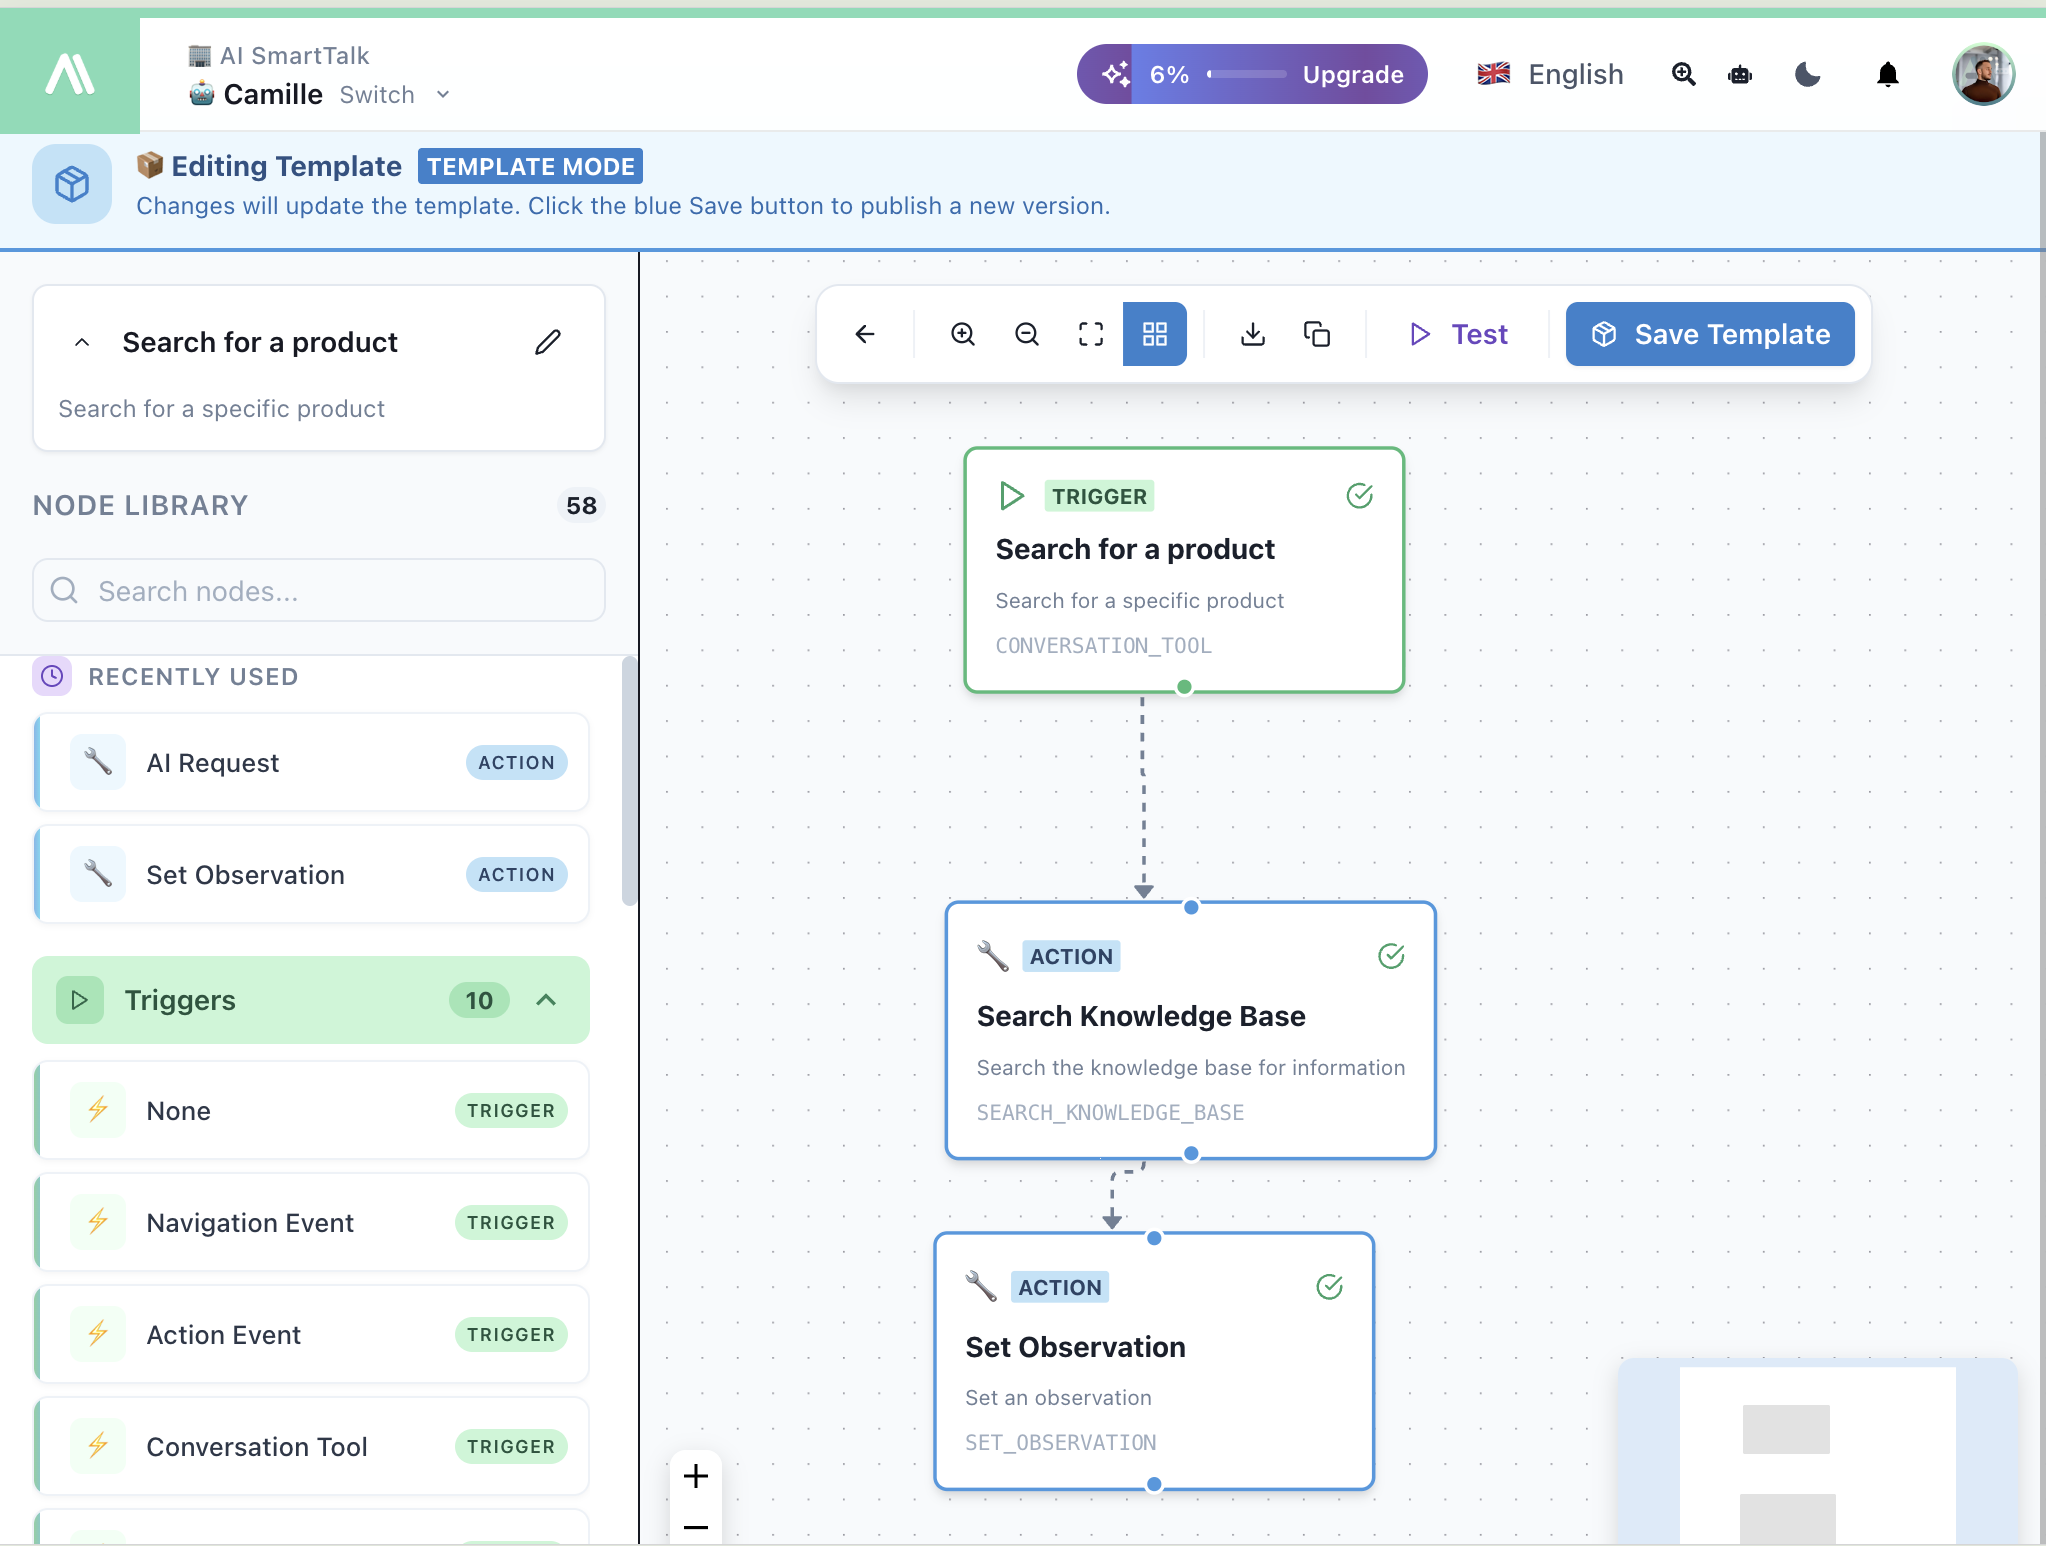
Canvas
The main workspace where you build your flows:
- Drag nodes from the library onto the canvas
- Connect nodes by dragging from output to input ports
- Click a node to open its configuration panel
- Zoom & Pan using the toolbar or mouse scroll
Node Library (Left Panel)
Access 58 nodes organized by category:
- Recently Used — Quick access to your most used nodes
- Triggers — 10 trigger types that start your flows
- Actions — All the actions your flow can perform
Search for nodes by name using the search bar.
Configuration Panel (Right Panel)
When you click a node, the configuration panel appears:
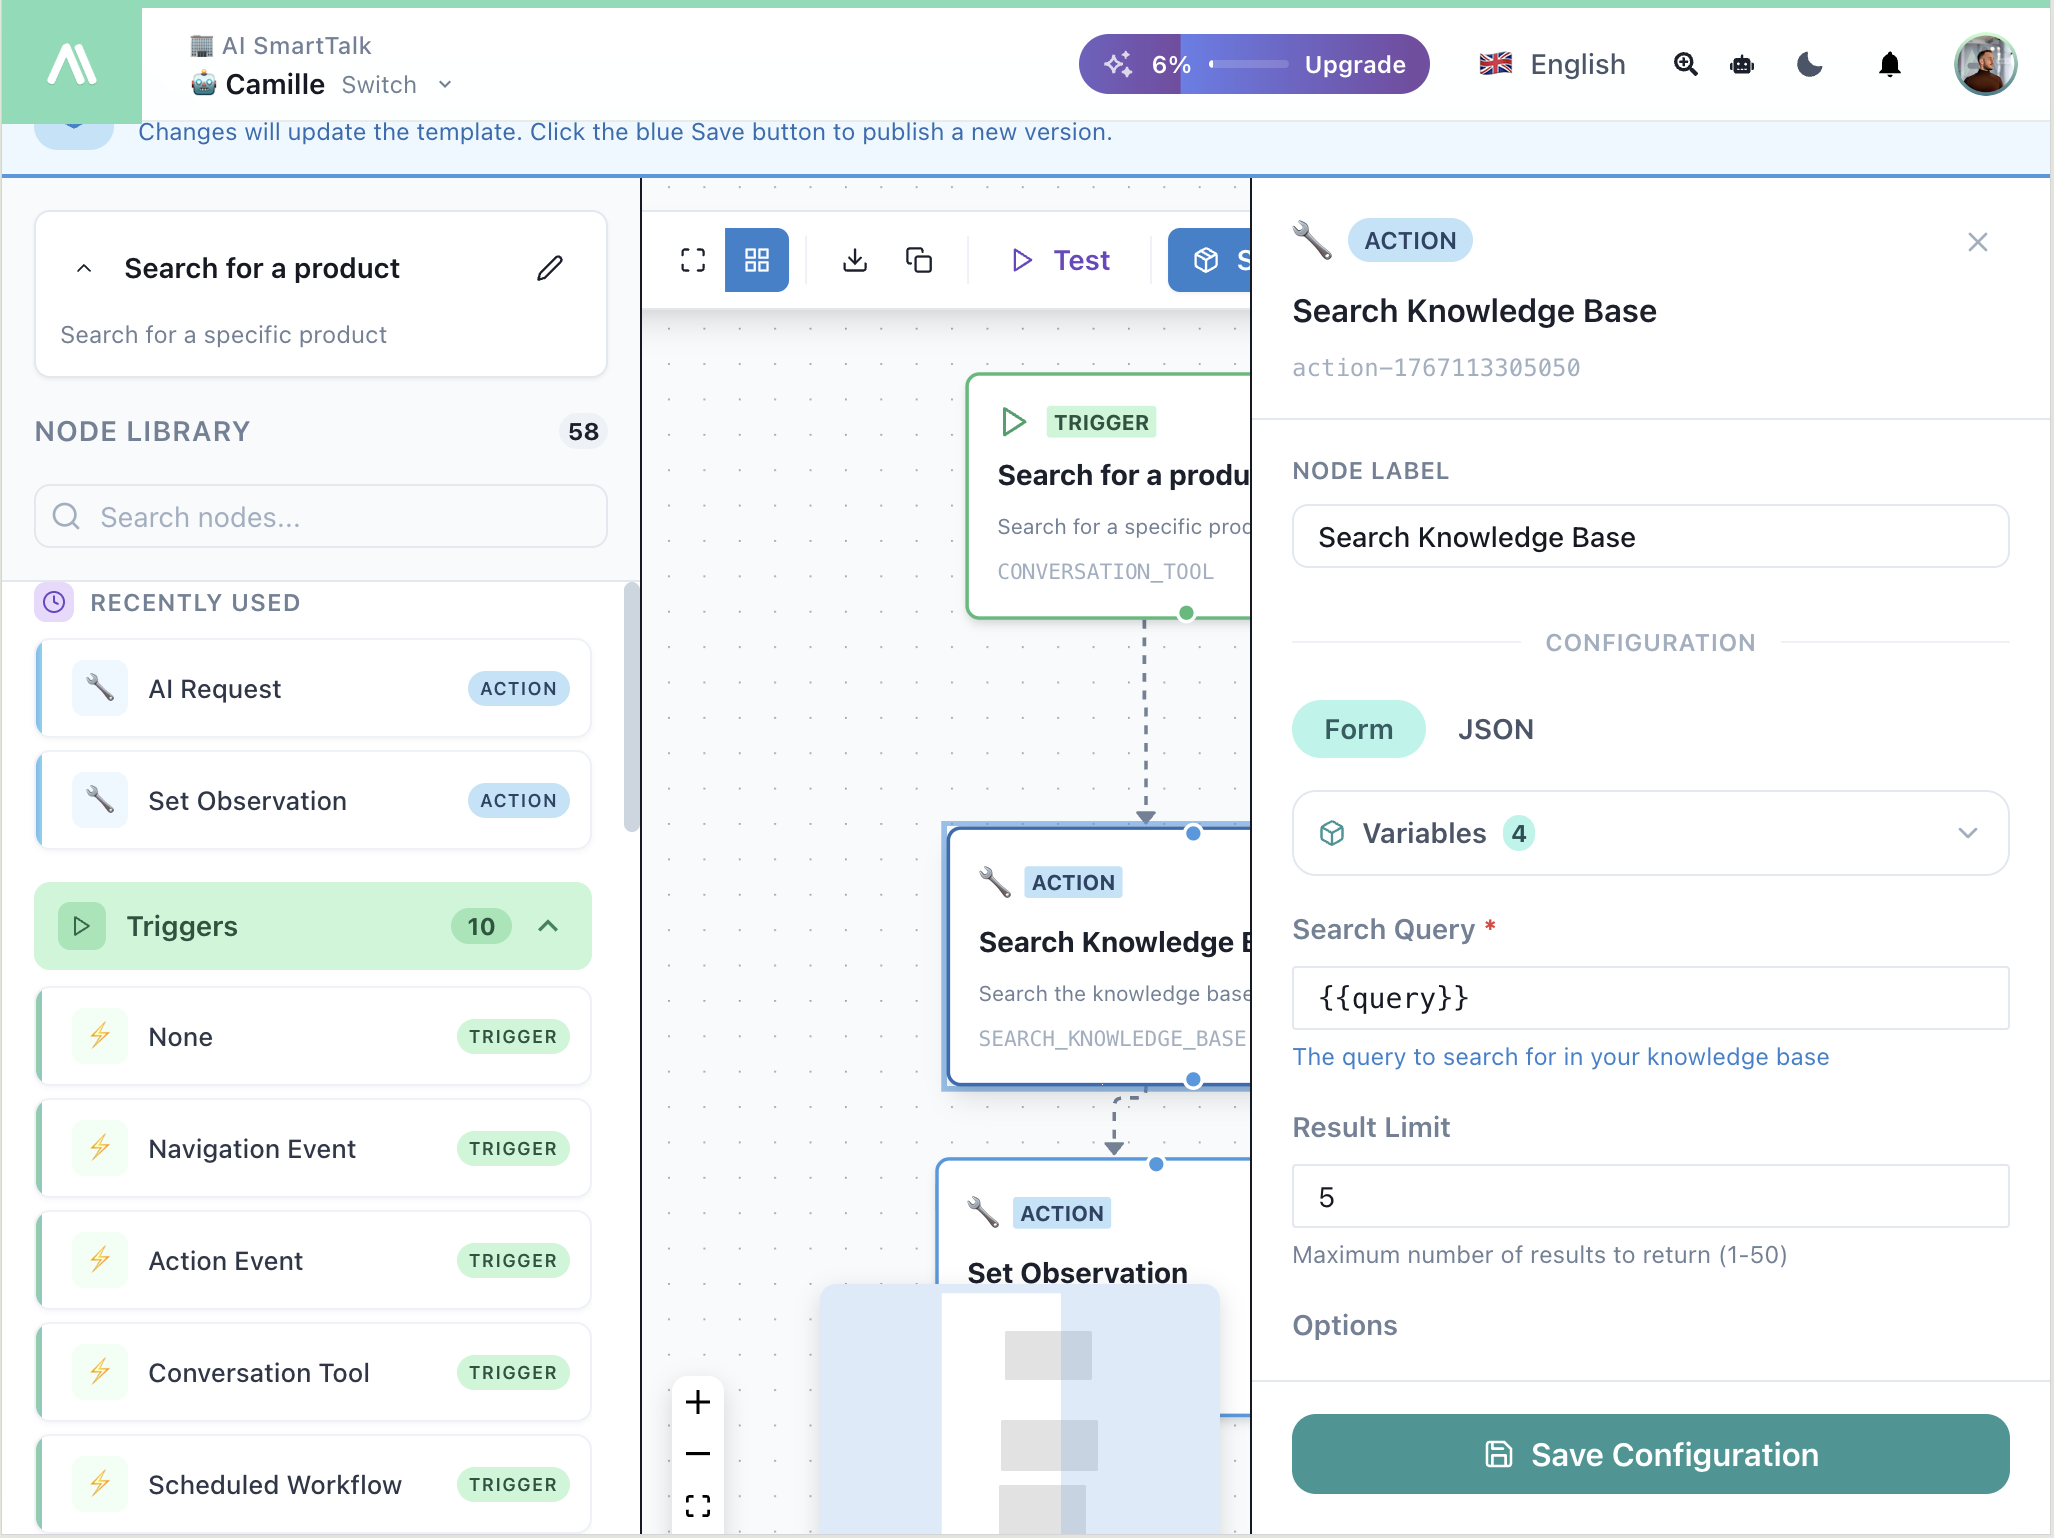
- Node Label — Give your node a descriptive name
- Form / JSON toggle — Configure visually or with raw JSON
- Variables — Use
{{variableName}}syntax to reference data - Save Configuration — Apply your changes
Toolbar
| Button | Action |
|---|---|
| ← | Go back |
| 🔍+/- | Zoom in/out |
| ⛶ | Fit to screen |
| ⬇ | Download flow |
| 📋 | Copy flow |
| ▶ Test | Run the flow in test mode |
| 💾 Save Template | Save to template store |
Building a Flow
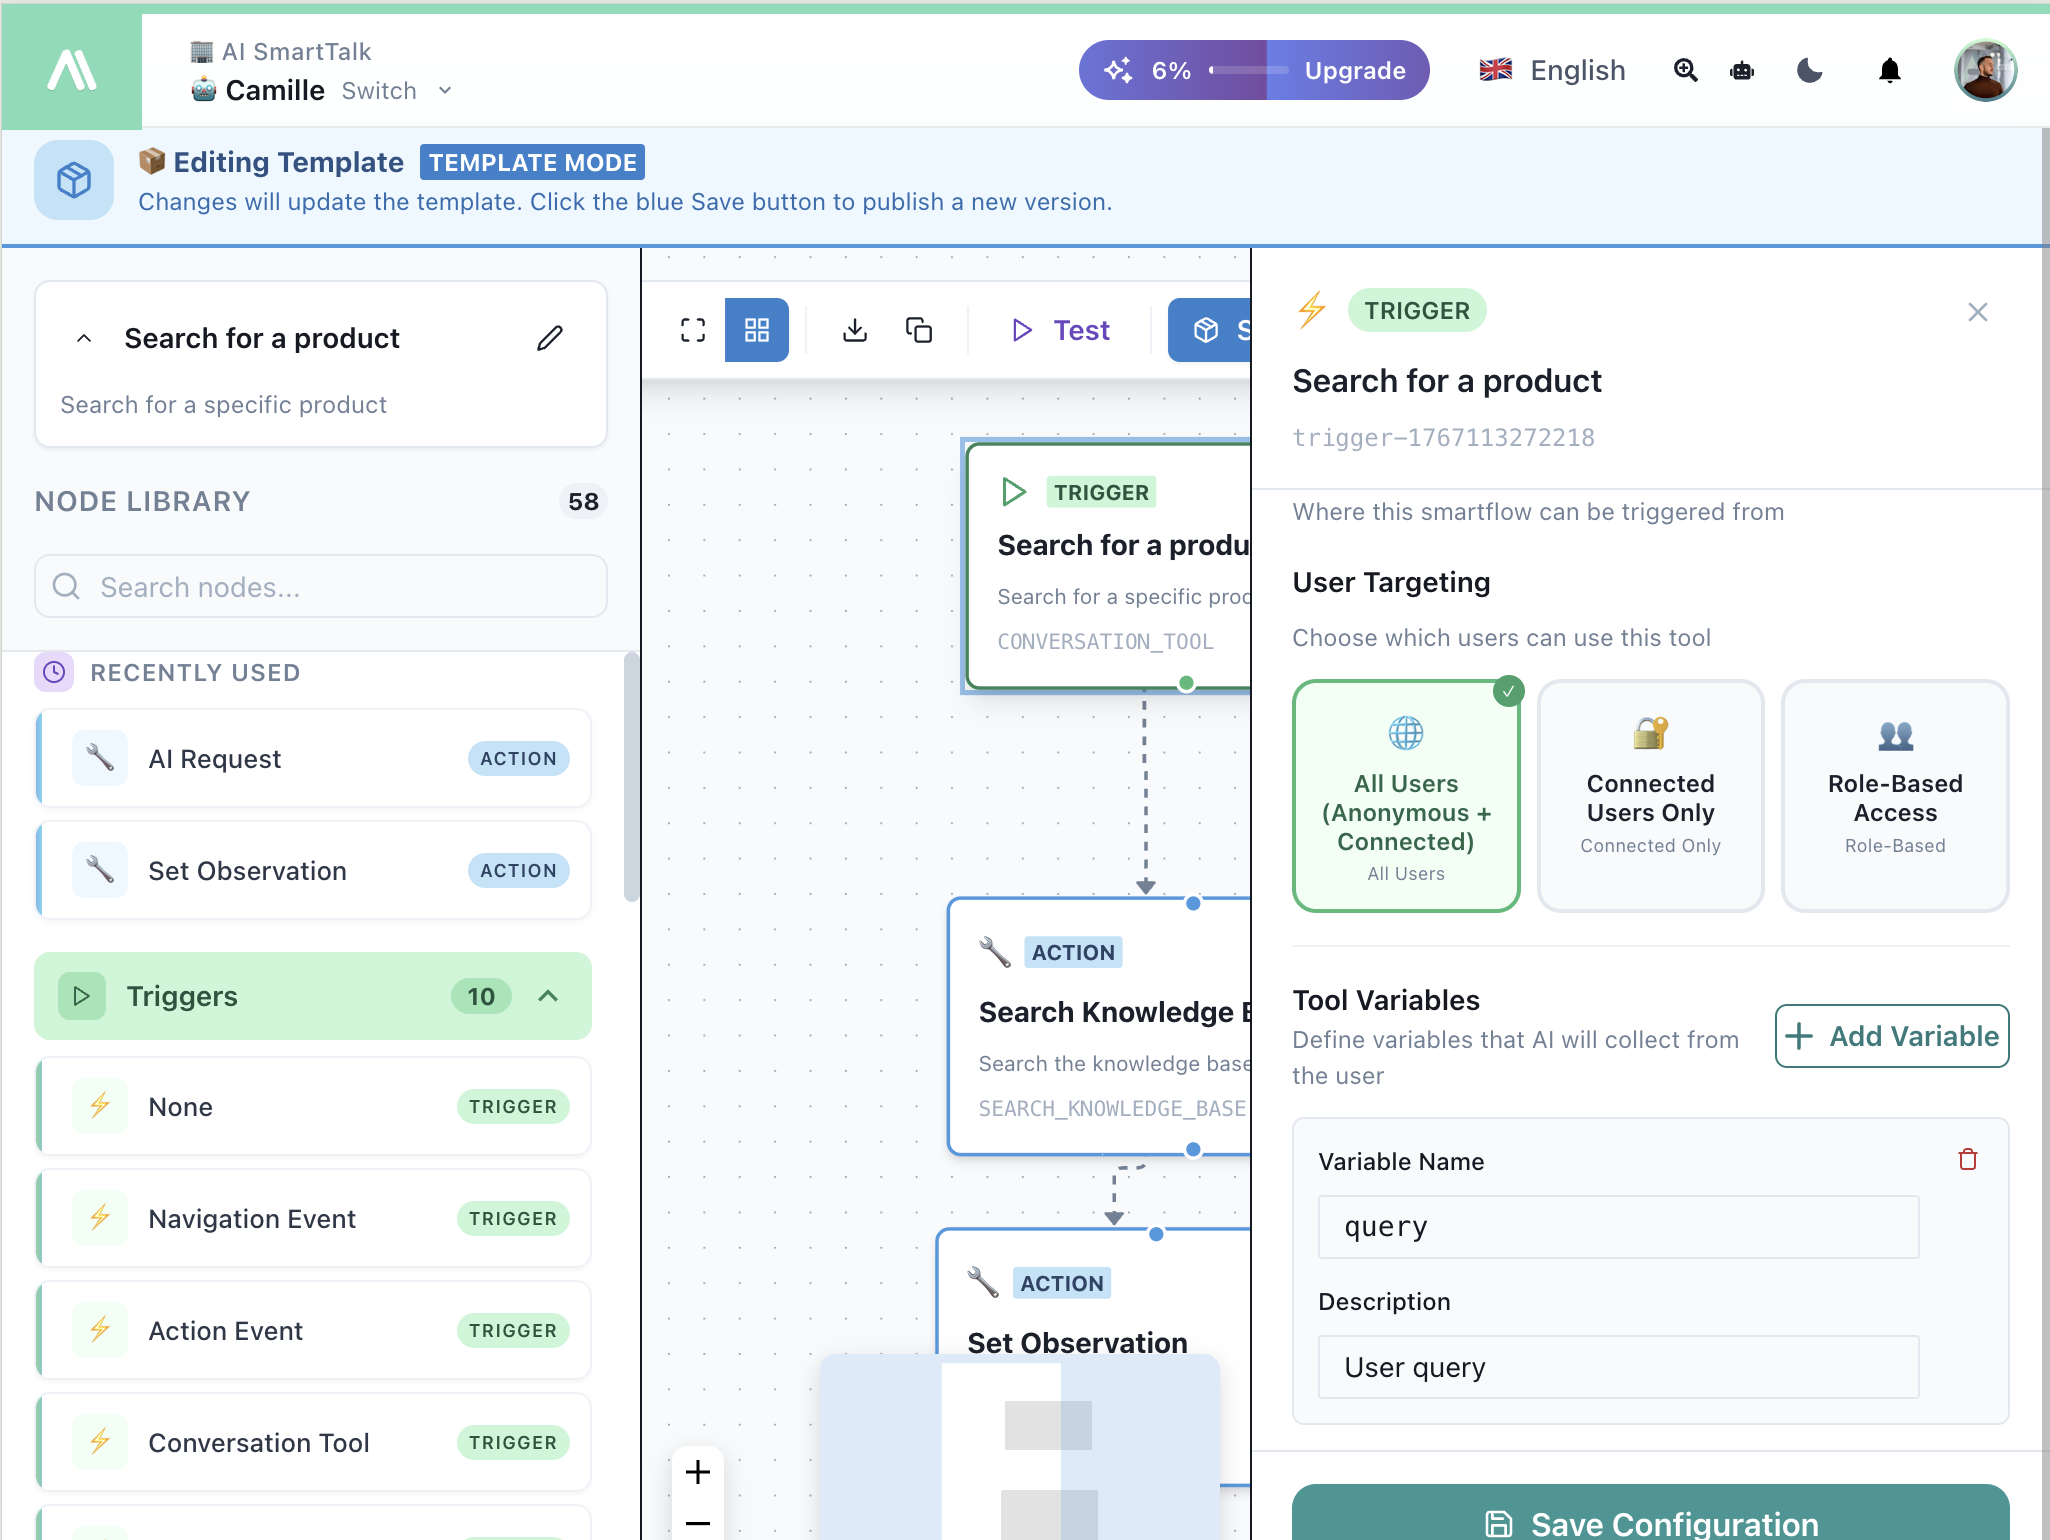
1. Add a Trigger
Every flow starts with a Trigger node. Drag one from the library:
Common triggers:
| Trigger | Use Case |
|---|---|
| Conversation Tool | Give your AI new capabilities |
| Chat Service Override | Customize AI for a specific channel |
| SmartForm Workflow | Process form submissions |
| Scheduled Workflow | Run daily/hourly tasks |
| Webhook | Receive external events |
| Navigation Event | React to page visits |
2. Add Actions
Connect Action nodes to perform tasks:
| Category | Actions |
|---|---|
| Chat | Send Message, Search Knowledge, Add Tag, Set Suggestions |
| AI | AI Request, AI Condition |
| Send Email, Gmail actions | |
| API | API Call, Webhooks |
| Knowledge | Search, Save, Sync Connector |
| Control | If Condition, Parallel Execution |
| Connectors | JIRA, ClickUp, Google Drive |
3. Connect the Nodes
- Drag from the output port (bottom of a node) to the input port (top of the next node)
- Connections appear as dashed lines
- Nodes execute in order from top to bottom
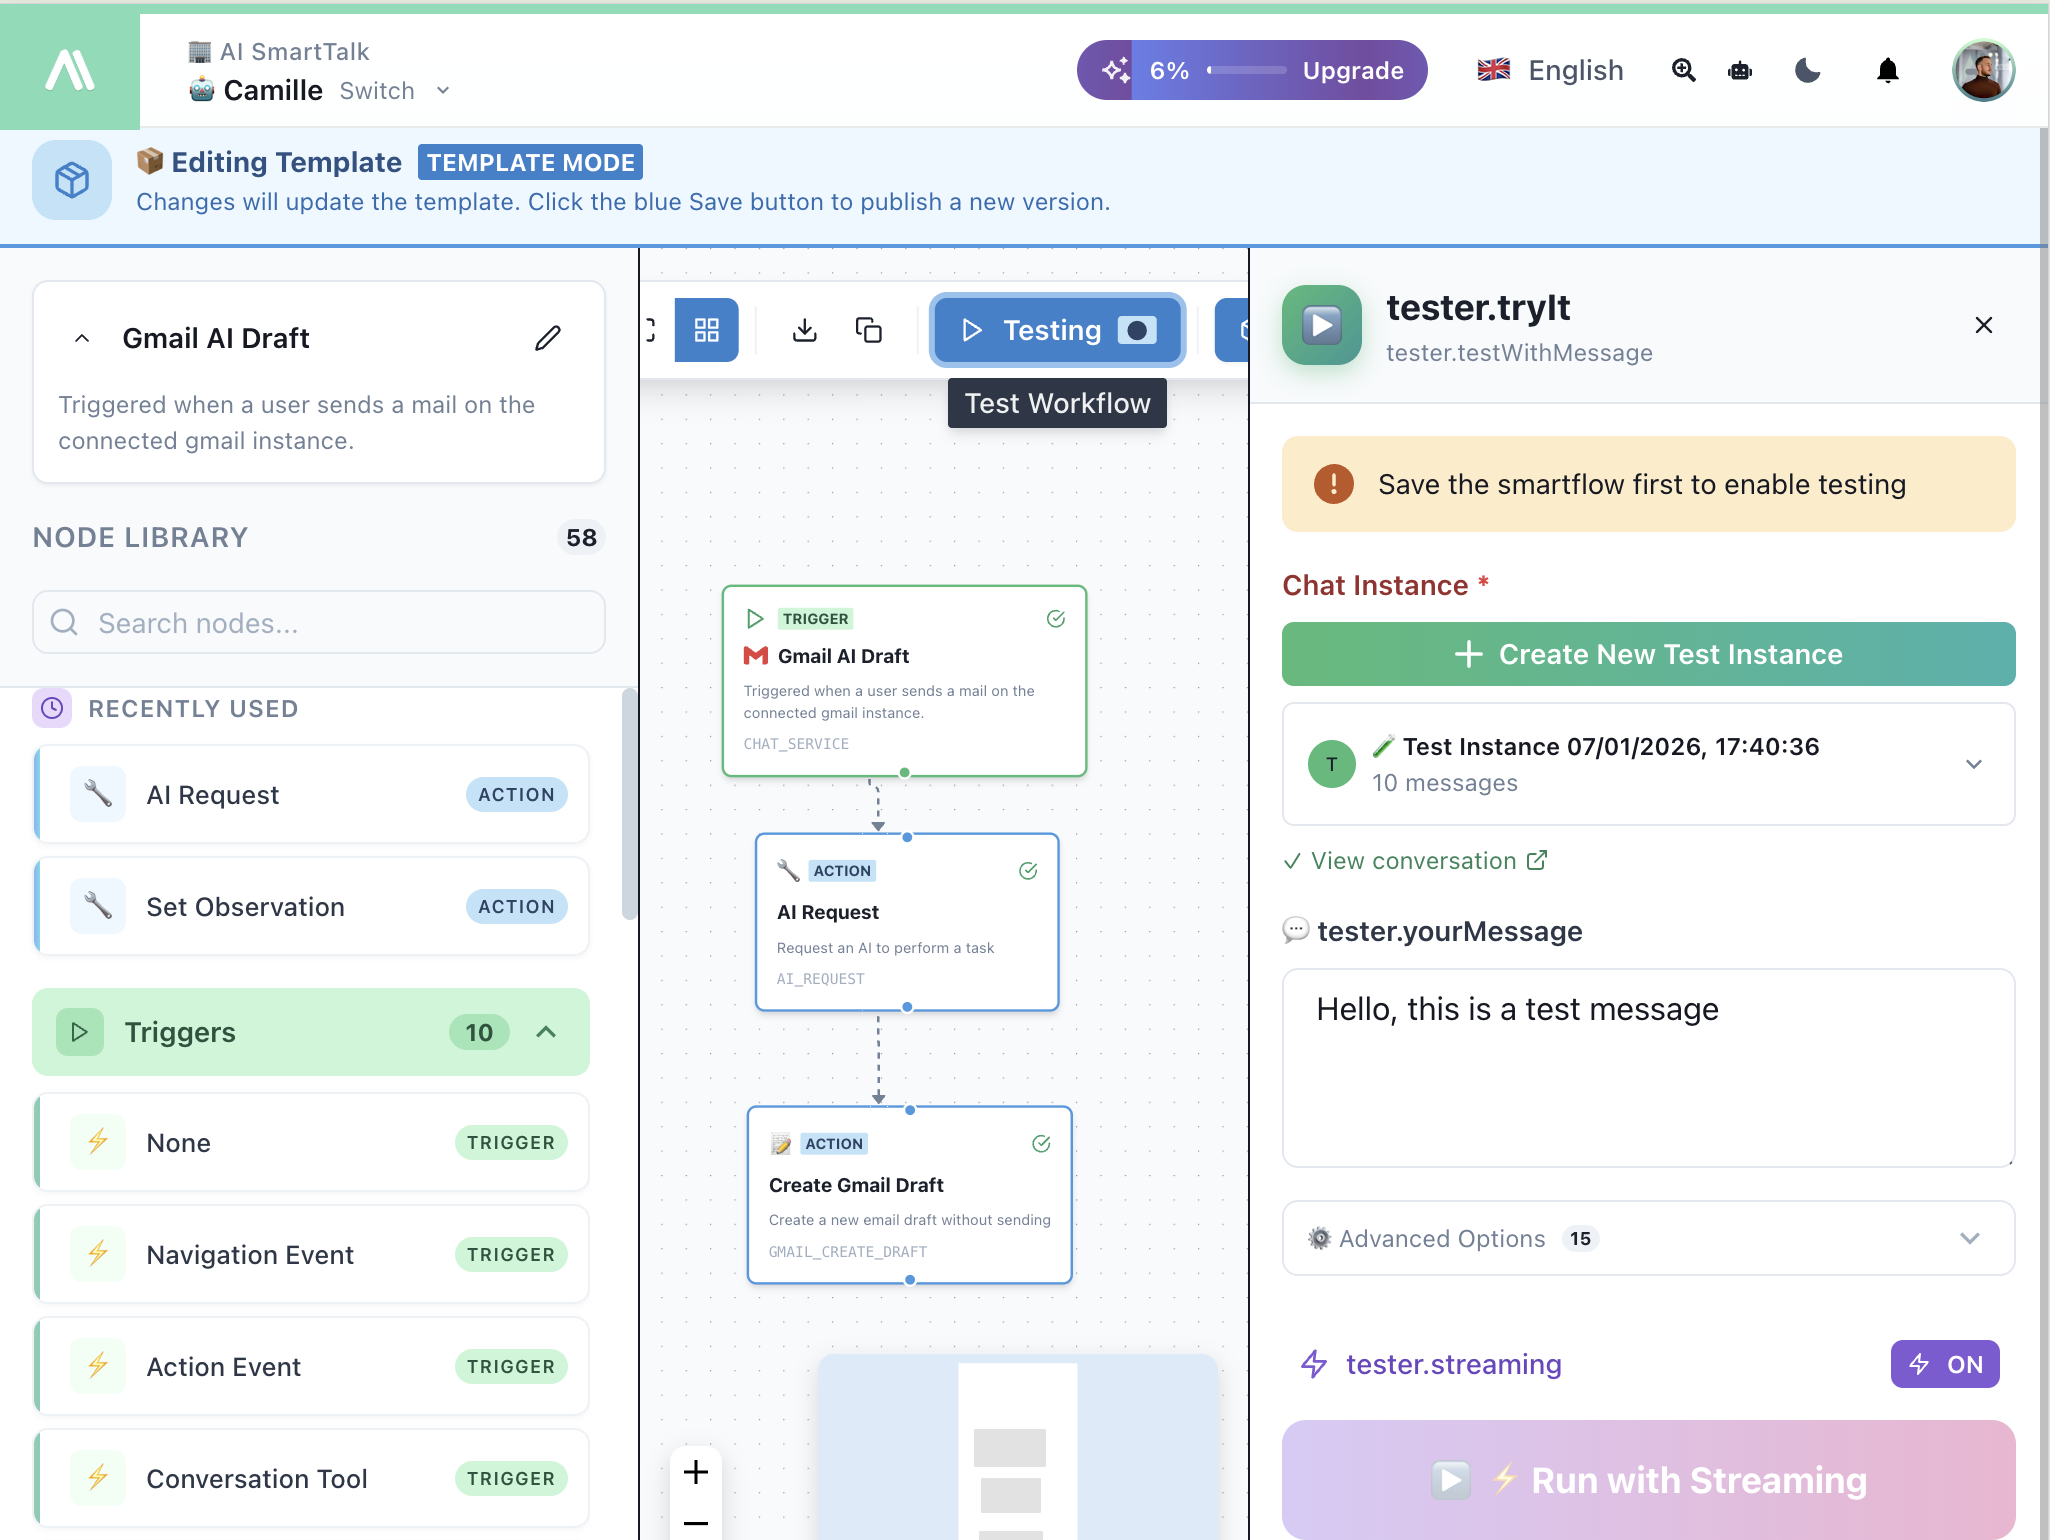
4. Test Your Flow
Click ▶ Testing in the toolbar to open the test panel.
Testing with Gmail
Testing with Messenger
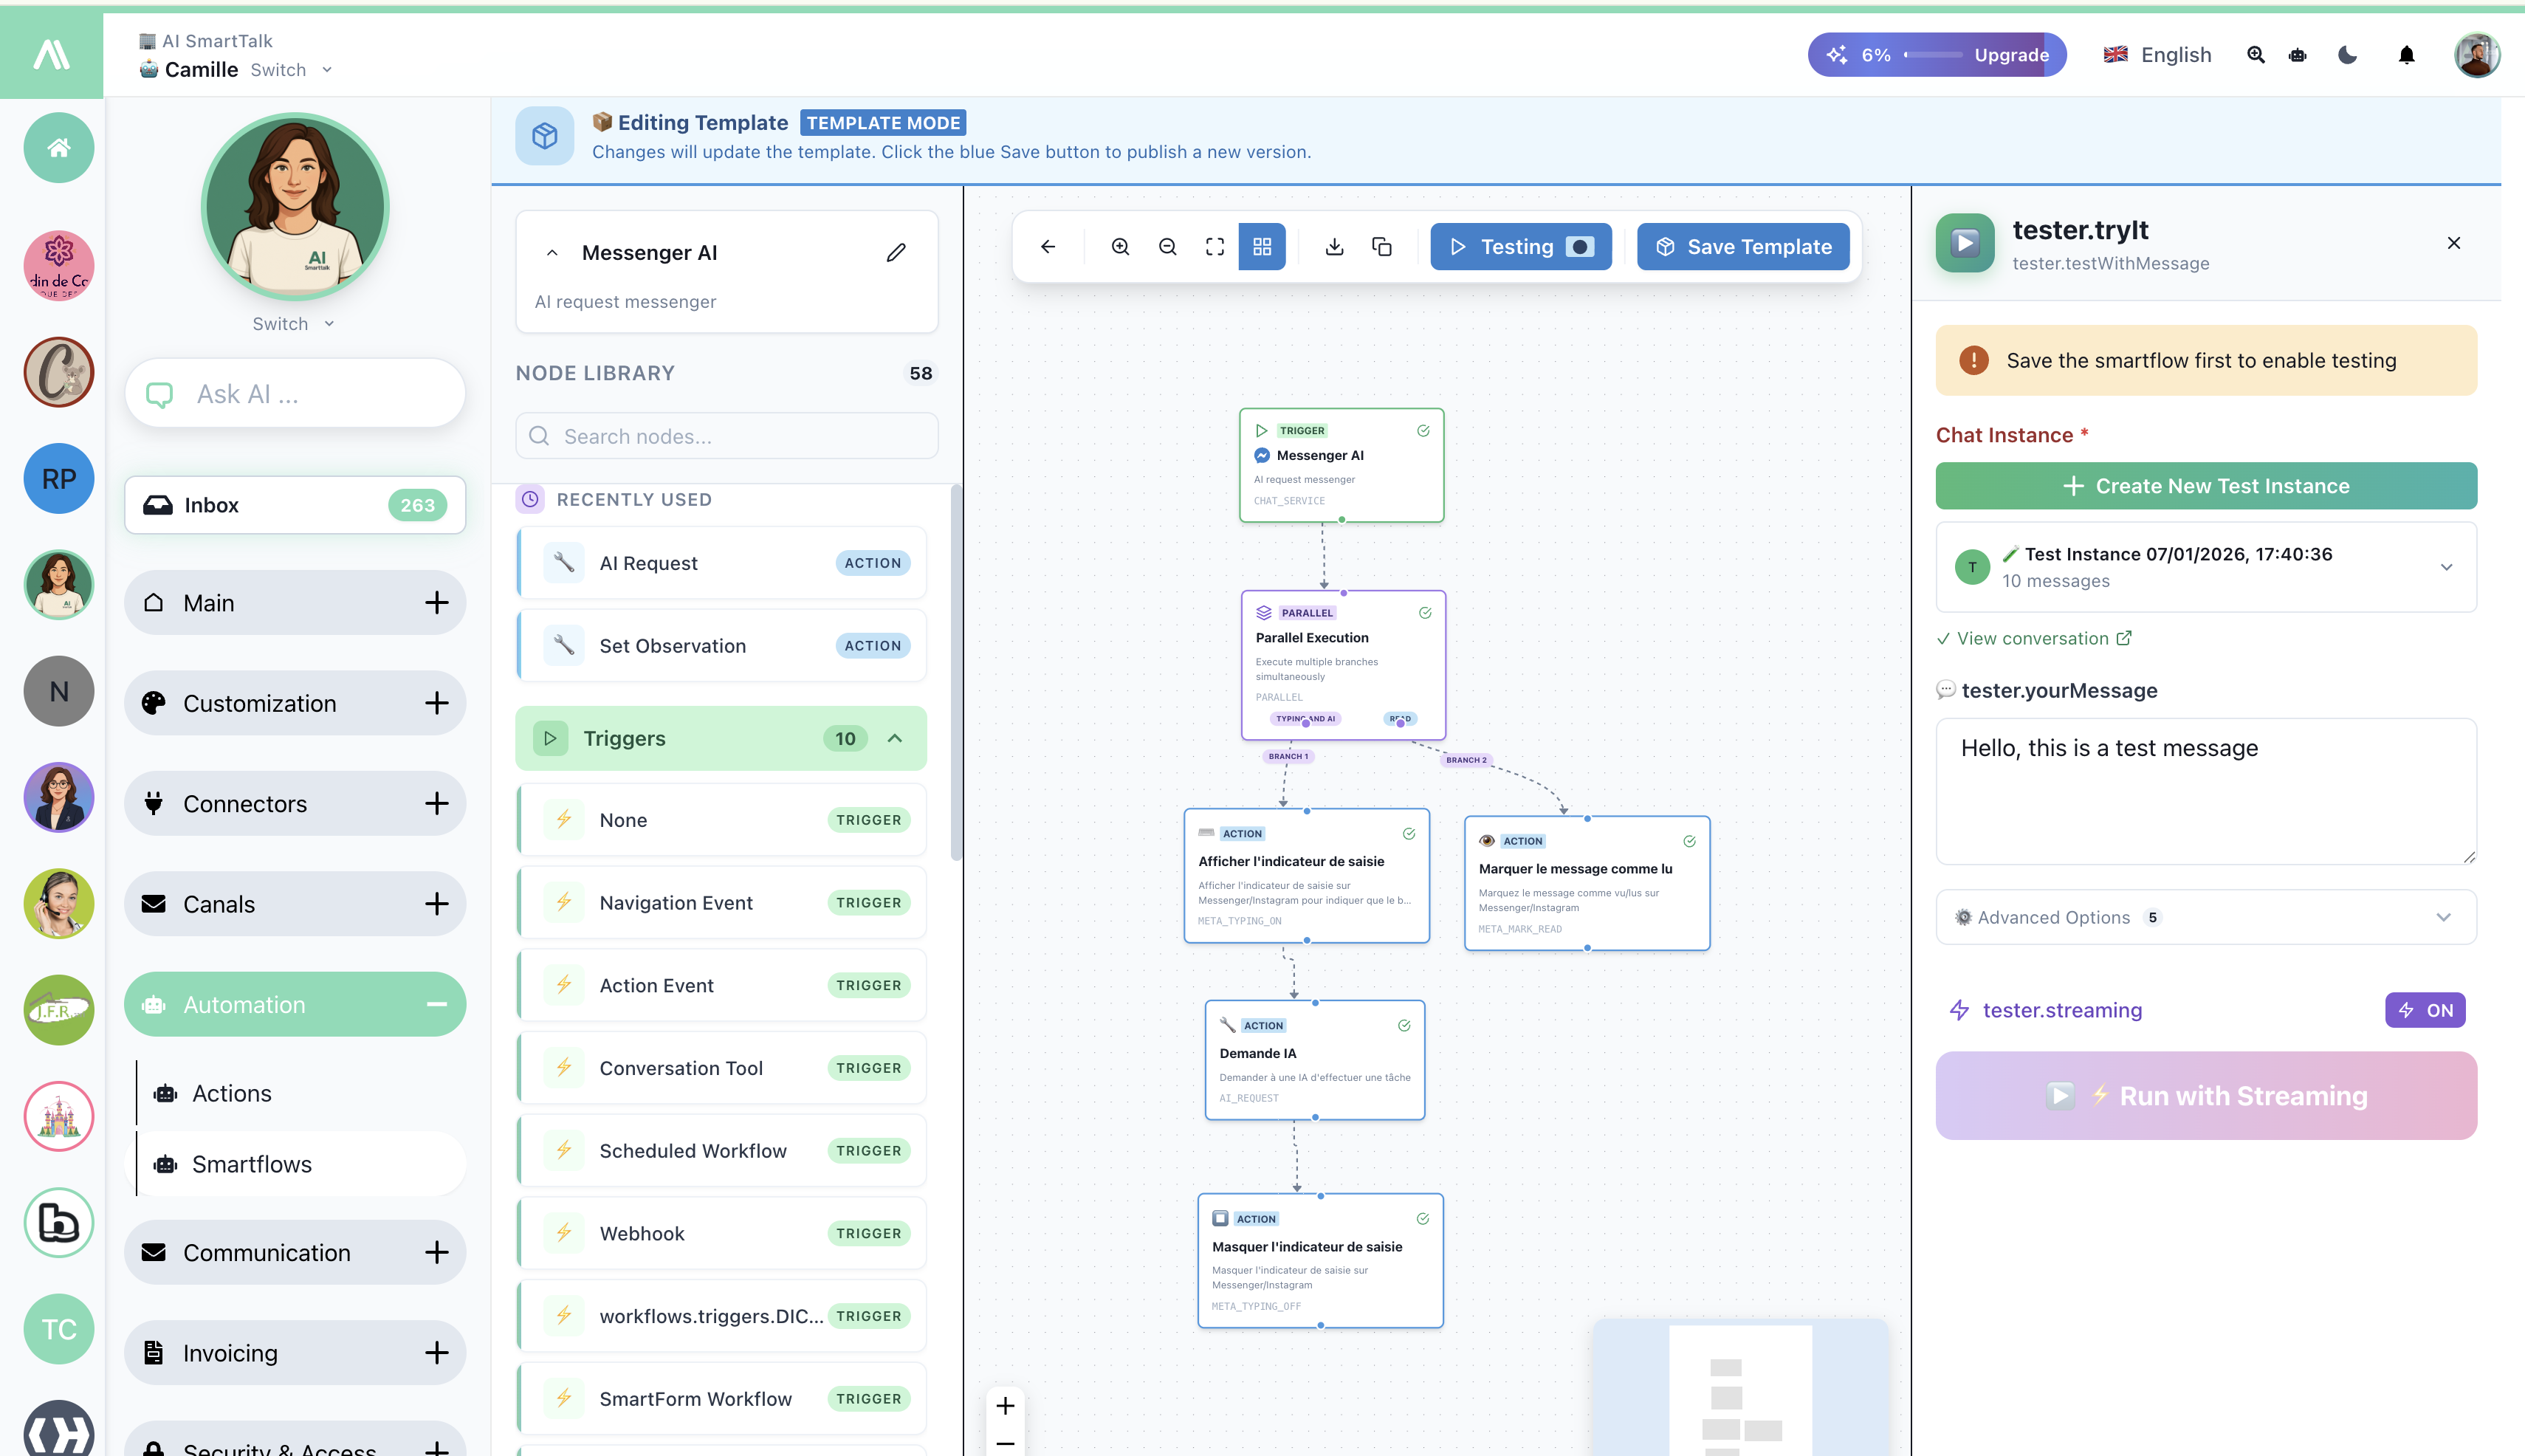
Test Panel Features:
| Element | Description |
|---|---|
| Chat Instance | Create or select a test conversation |
| tester.yourMessage | Input a test message |
| Advanced Options | Configure test parameters (varies by channel) |
| Run with Streaming | Execute and watch nodes in real-time |
The test panel adapts to your connected channels: Messenger, WhatsApp, Instagram, Discord, Slack, Gmail, Email, and more. CMS integrations (WordPress, PrestaShop, Joomla, Webflow) use the Web chat service.
5. Save & Activate
- Click Save Template to save your work
- Toggle the flow to Live to activate it
Monitoring & Analytics
Each SmartFlow has its own Usage Statistics page:
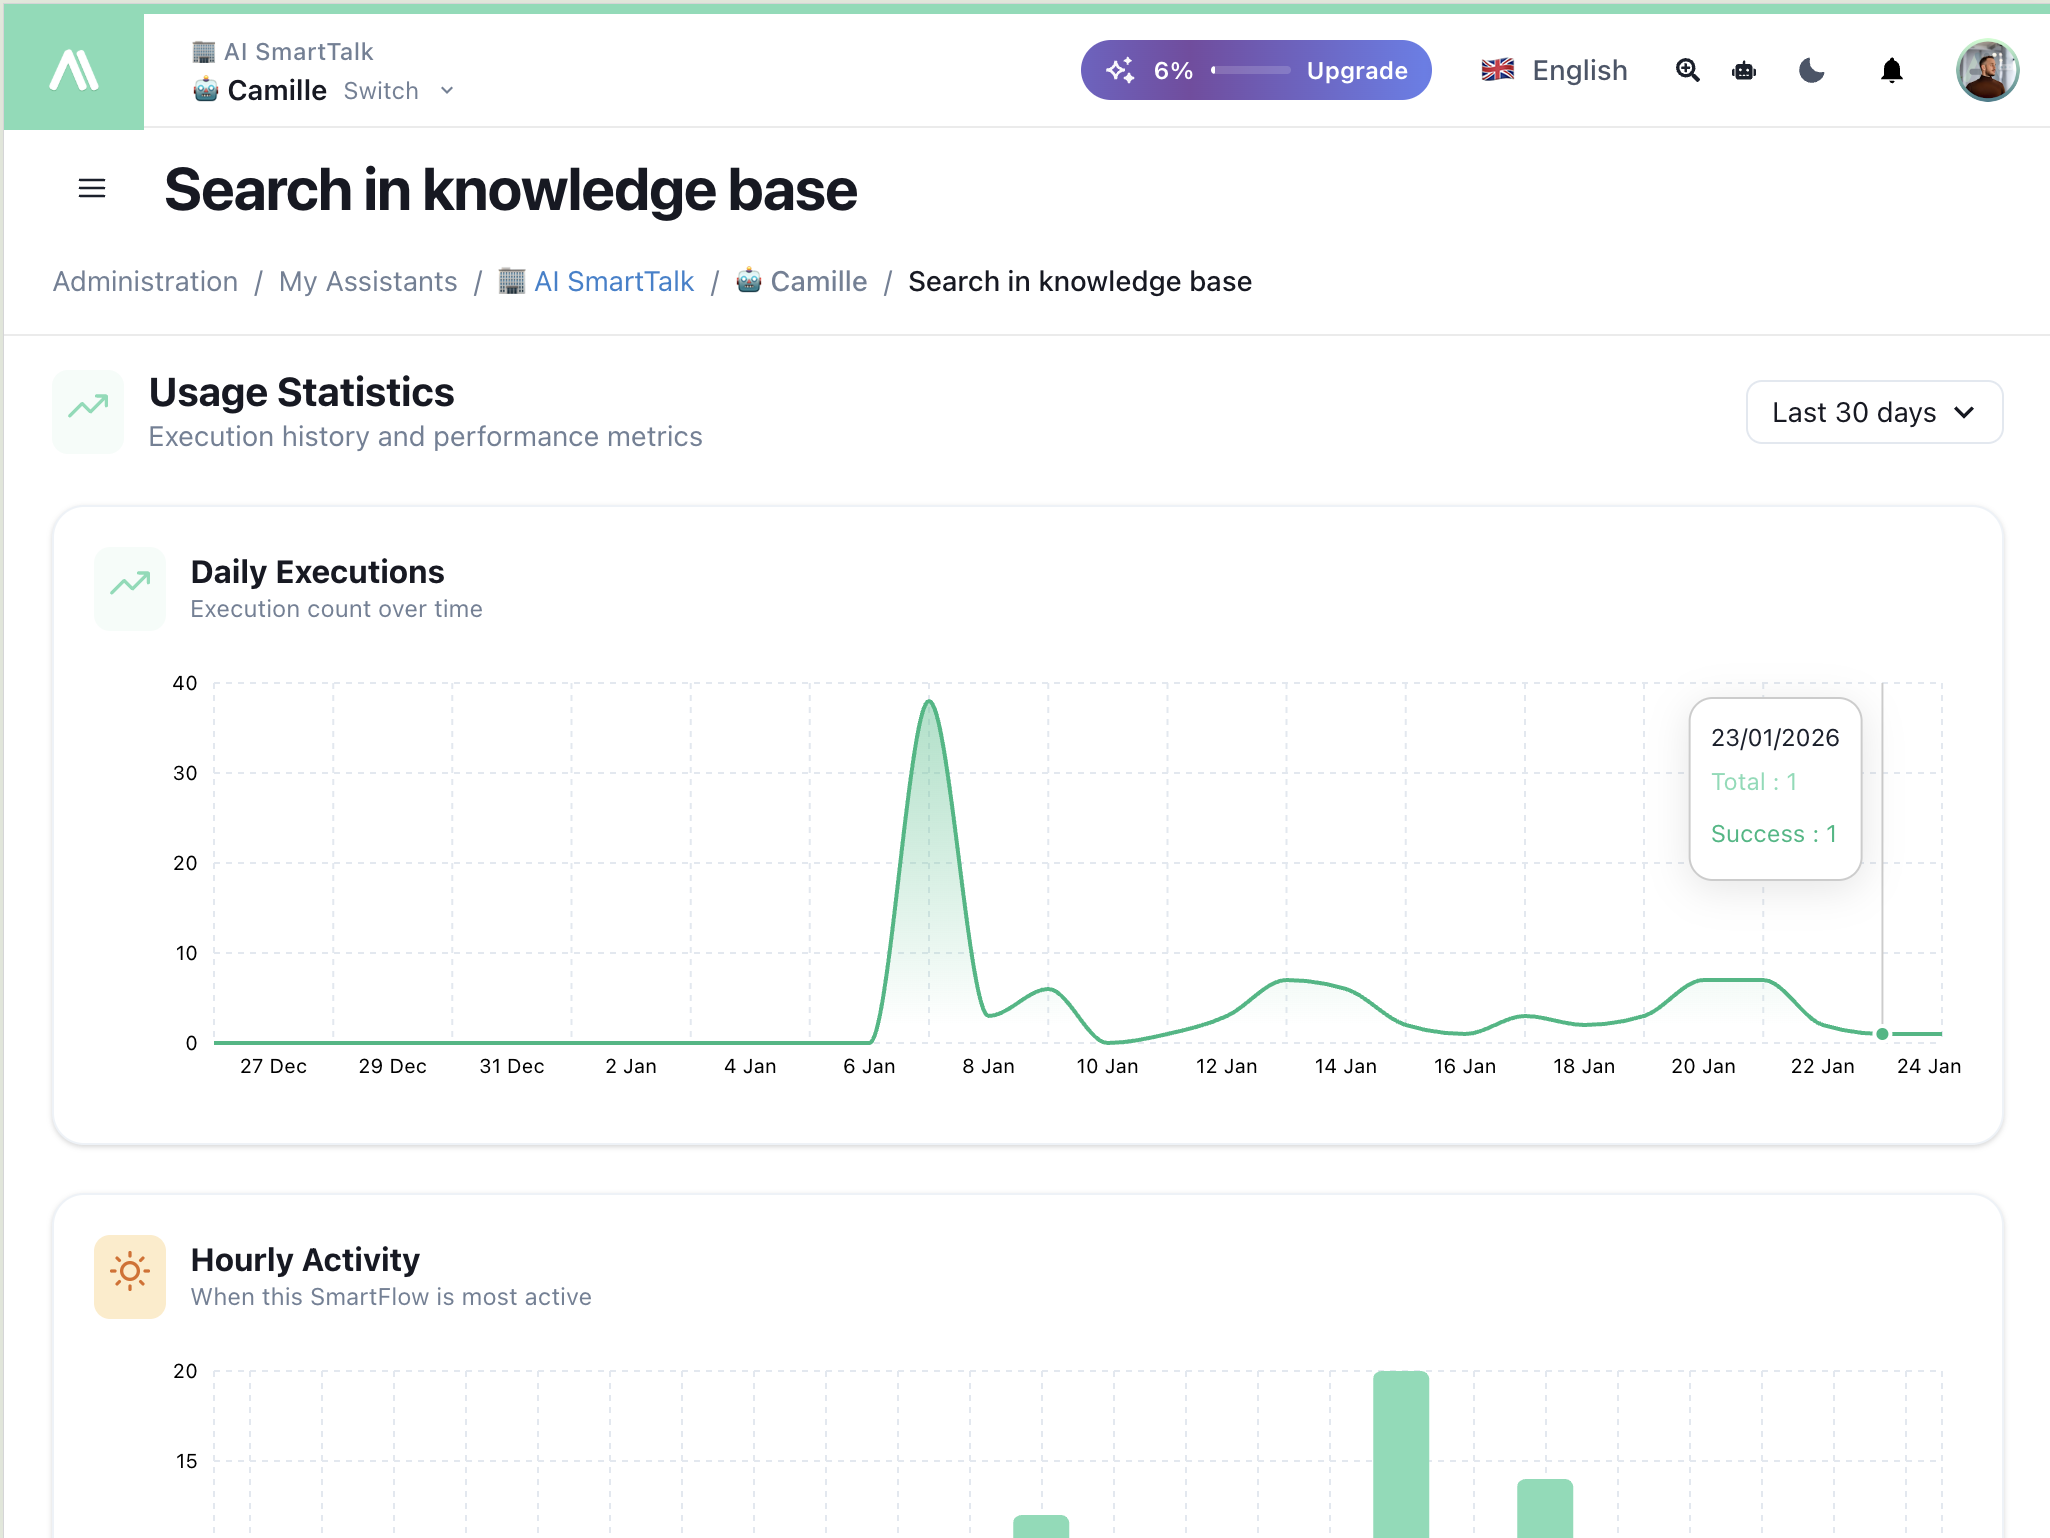
| Metric | Description |
|---|---|
| Daily Executions | Execution count over time |
| Hourly Activity | When this SmartFlow is most active |
| Success Rate | Successful vs failed executions |
Filter by Last 30 days, Last 7 days, or custom range.
Parallel Execution
Split your workflow into multiple branches that run simultaneously:
Use the Parallel Start node to create branches. Each branch executes independently, then reconnects.
Example: A Messenger AI workflow that:
- Triggers on message received
- Splits into parallel branches
- Branch 1: Show typing indicator
- Branch 2: Mark message as read
- Reconnects to process with AI
- Hides typing indicator
Template Store
Start quickly with pre-built templates from the community:
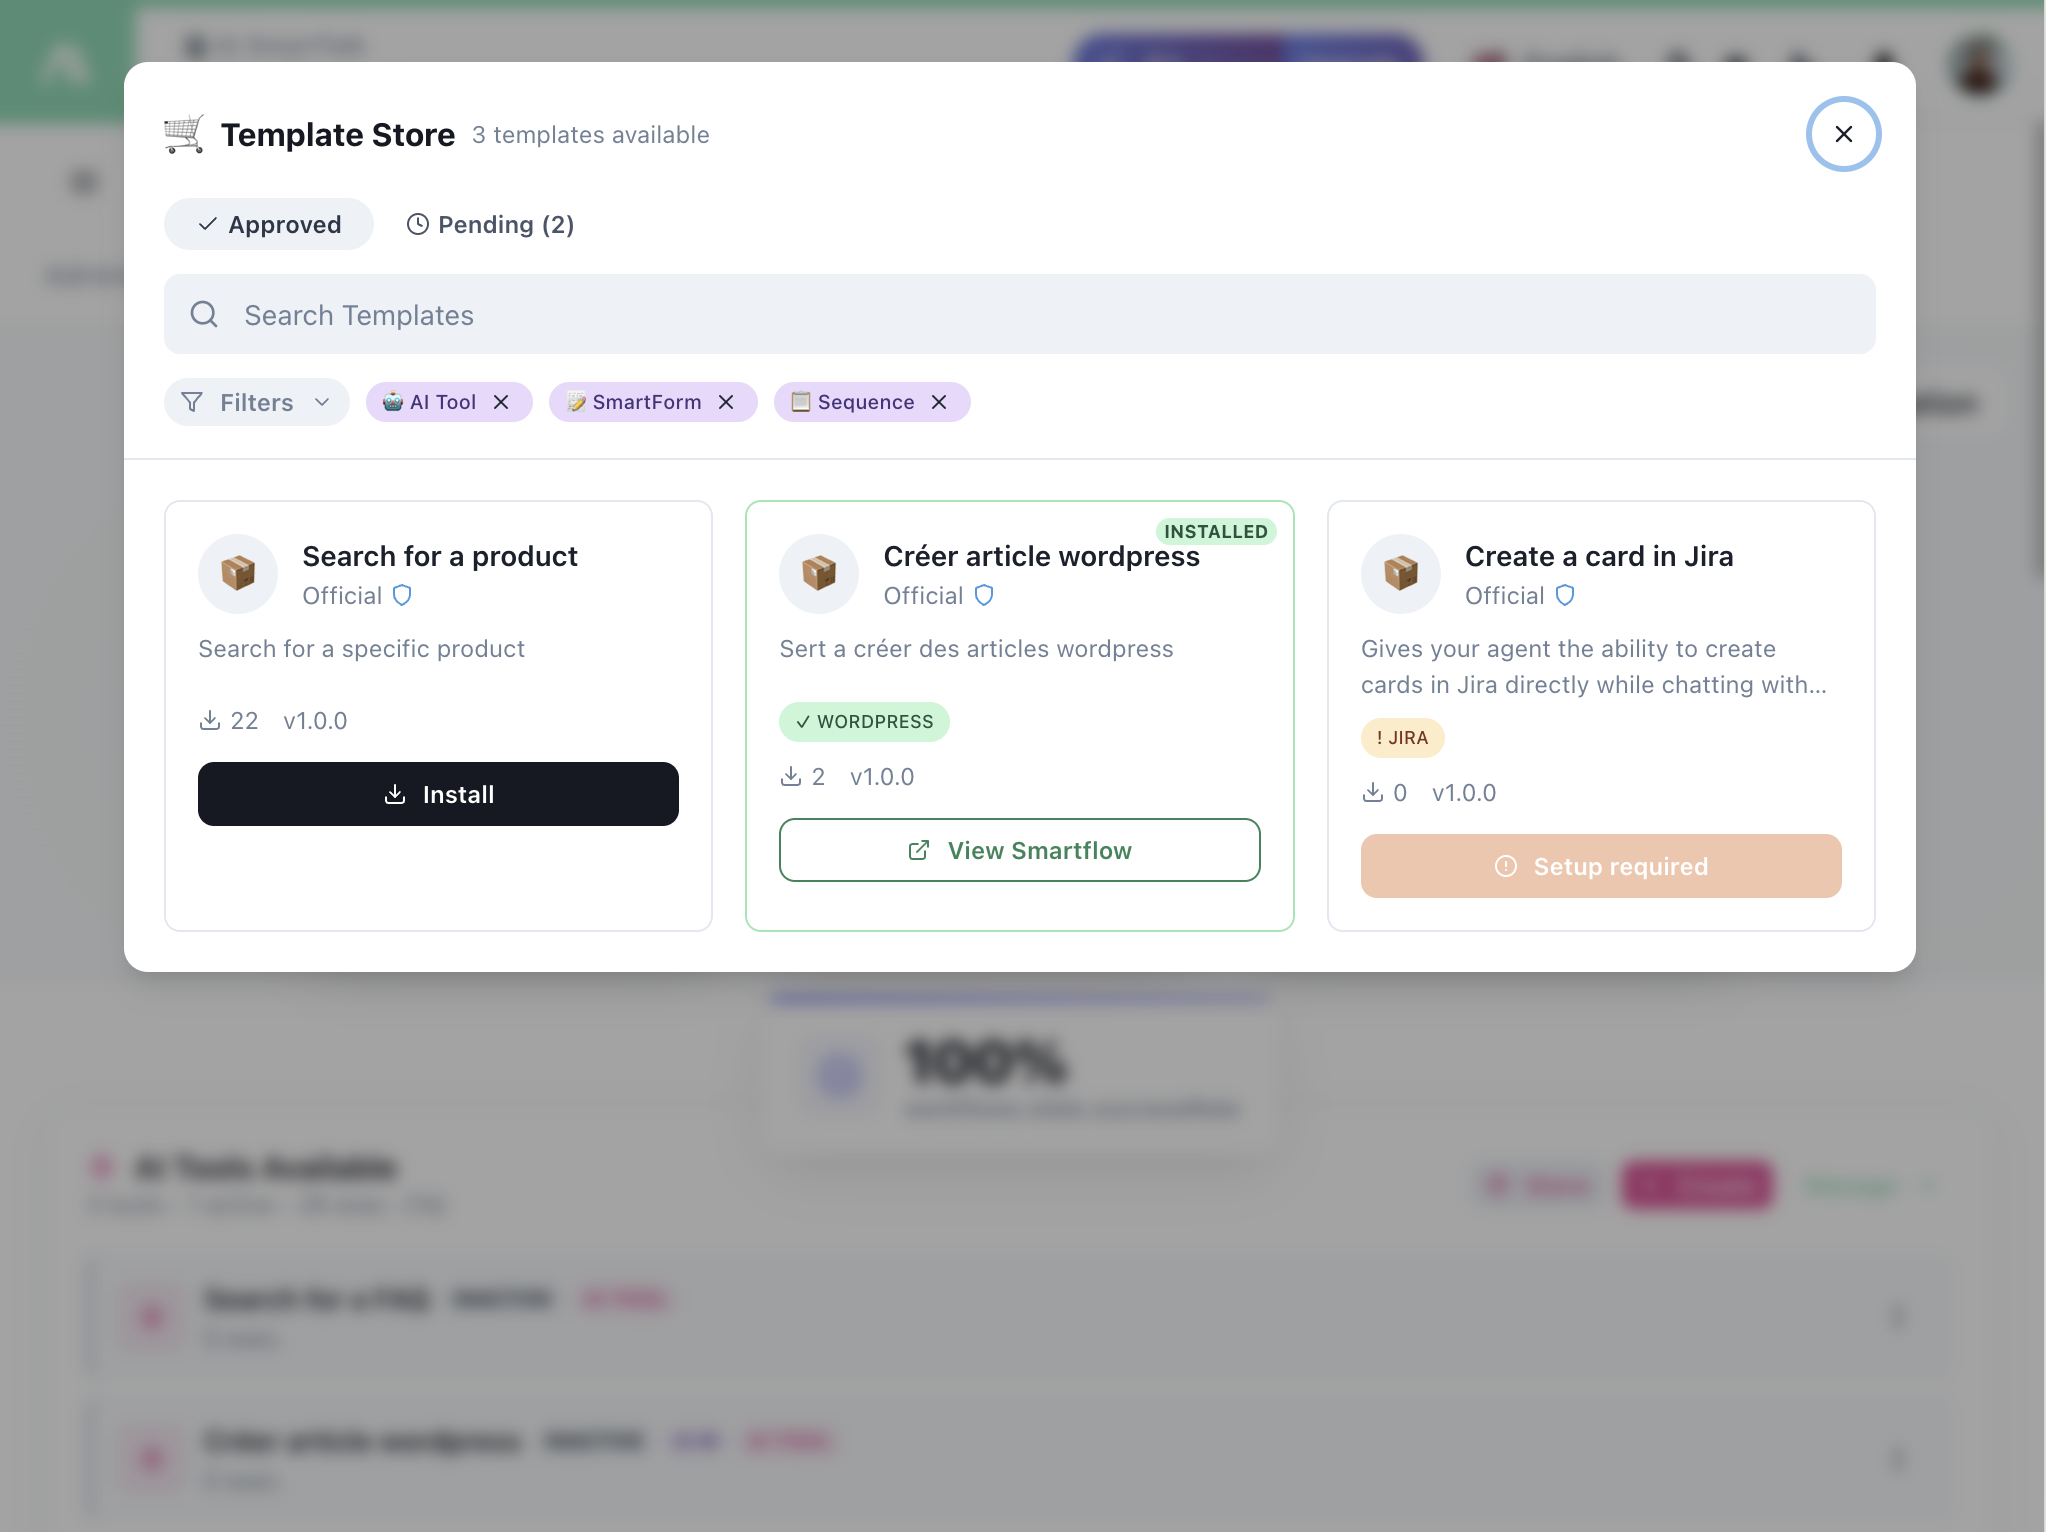
- Browse approved templates
- Filter by AI Tool, SmartForm, Sequence, etc.
- Install with one click
- View the SmartFlow before installing
Some templates require Setup (connecting accounts, API keys).
My Templates
Manage and share your own templates:
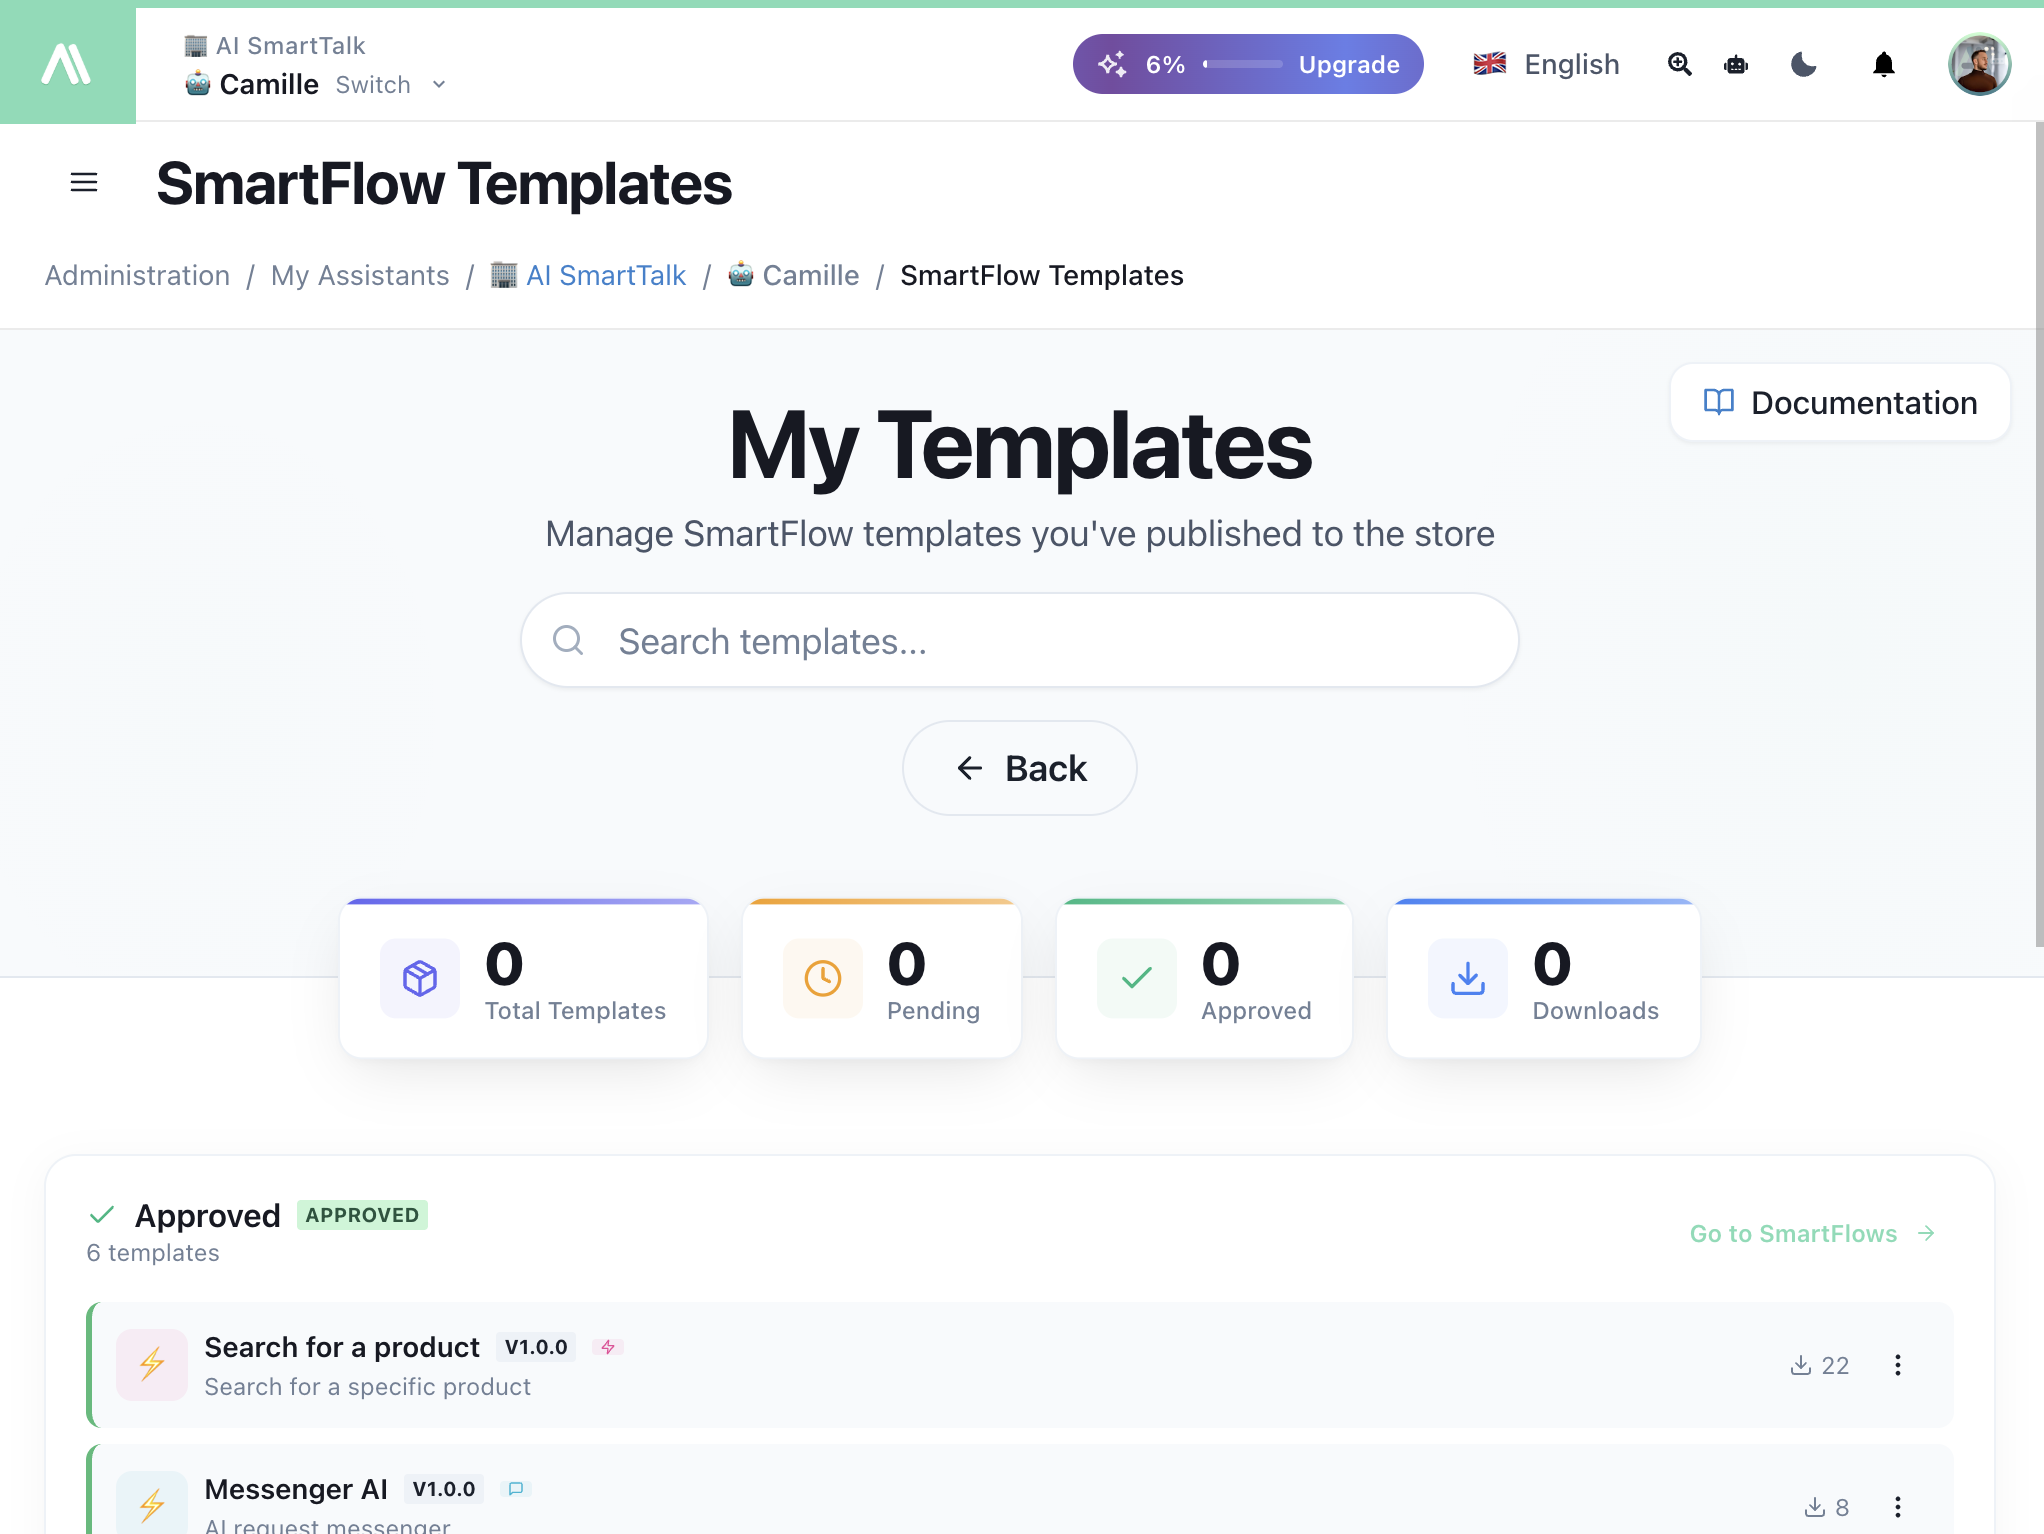
- See your Total Templates, Pending, Approved, and Downloads
- Track which templates are popular
- Submit templates for approval
Variables
Use variables to pass data between nodes:
{{variableName}}
Common variables:
| Variable | Description |
|---|---|
{{query}} | User's input from a conversation tool |
{{result}} | Output from the previous action |
{{conversation}} | Current conversation context |
{{user}} | User information |
Variables are defined in trigger configurations and accessible throughout the flow.
Getting Started
- Go to SmartFlow in your dashboard
- Click Create New Flow
- Drag a Trigger onto the canvas
- Add Actions and connect them
- Click Test to debug
- Click Save Template when done
- Toggle Live to activate
Next Steps
Looking for concrete recipes? See SmartFlow Automation Examples for ready-to-build flows including lead capture, community moderation, cross-channel notifications, and more.
- SmartFlow Examples — Concrete automation recipes
- Triggers Overview — All trigger types explained
- Actions Overview — All actions with examples
- Template Store — Browse and install templates
- OpenAPI Integration — Connect any API
- AI Intelligence Features — How AI Request and AI Condition nodes work