Configure a SmartFlow
Learn how to create and configure workflows in the SmartFlow visual node builder.
Creating a New SmartFlow
- Go to Automation → SmartFlows in your dashboard
- Click + New SmartFlow
- Enter a Name and optional Description
- Click Create
You'll be taken to the visual node editor.
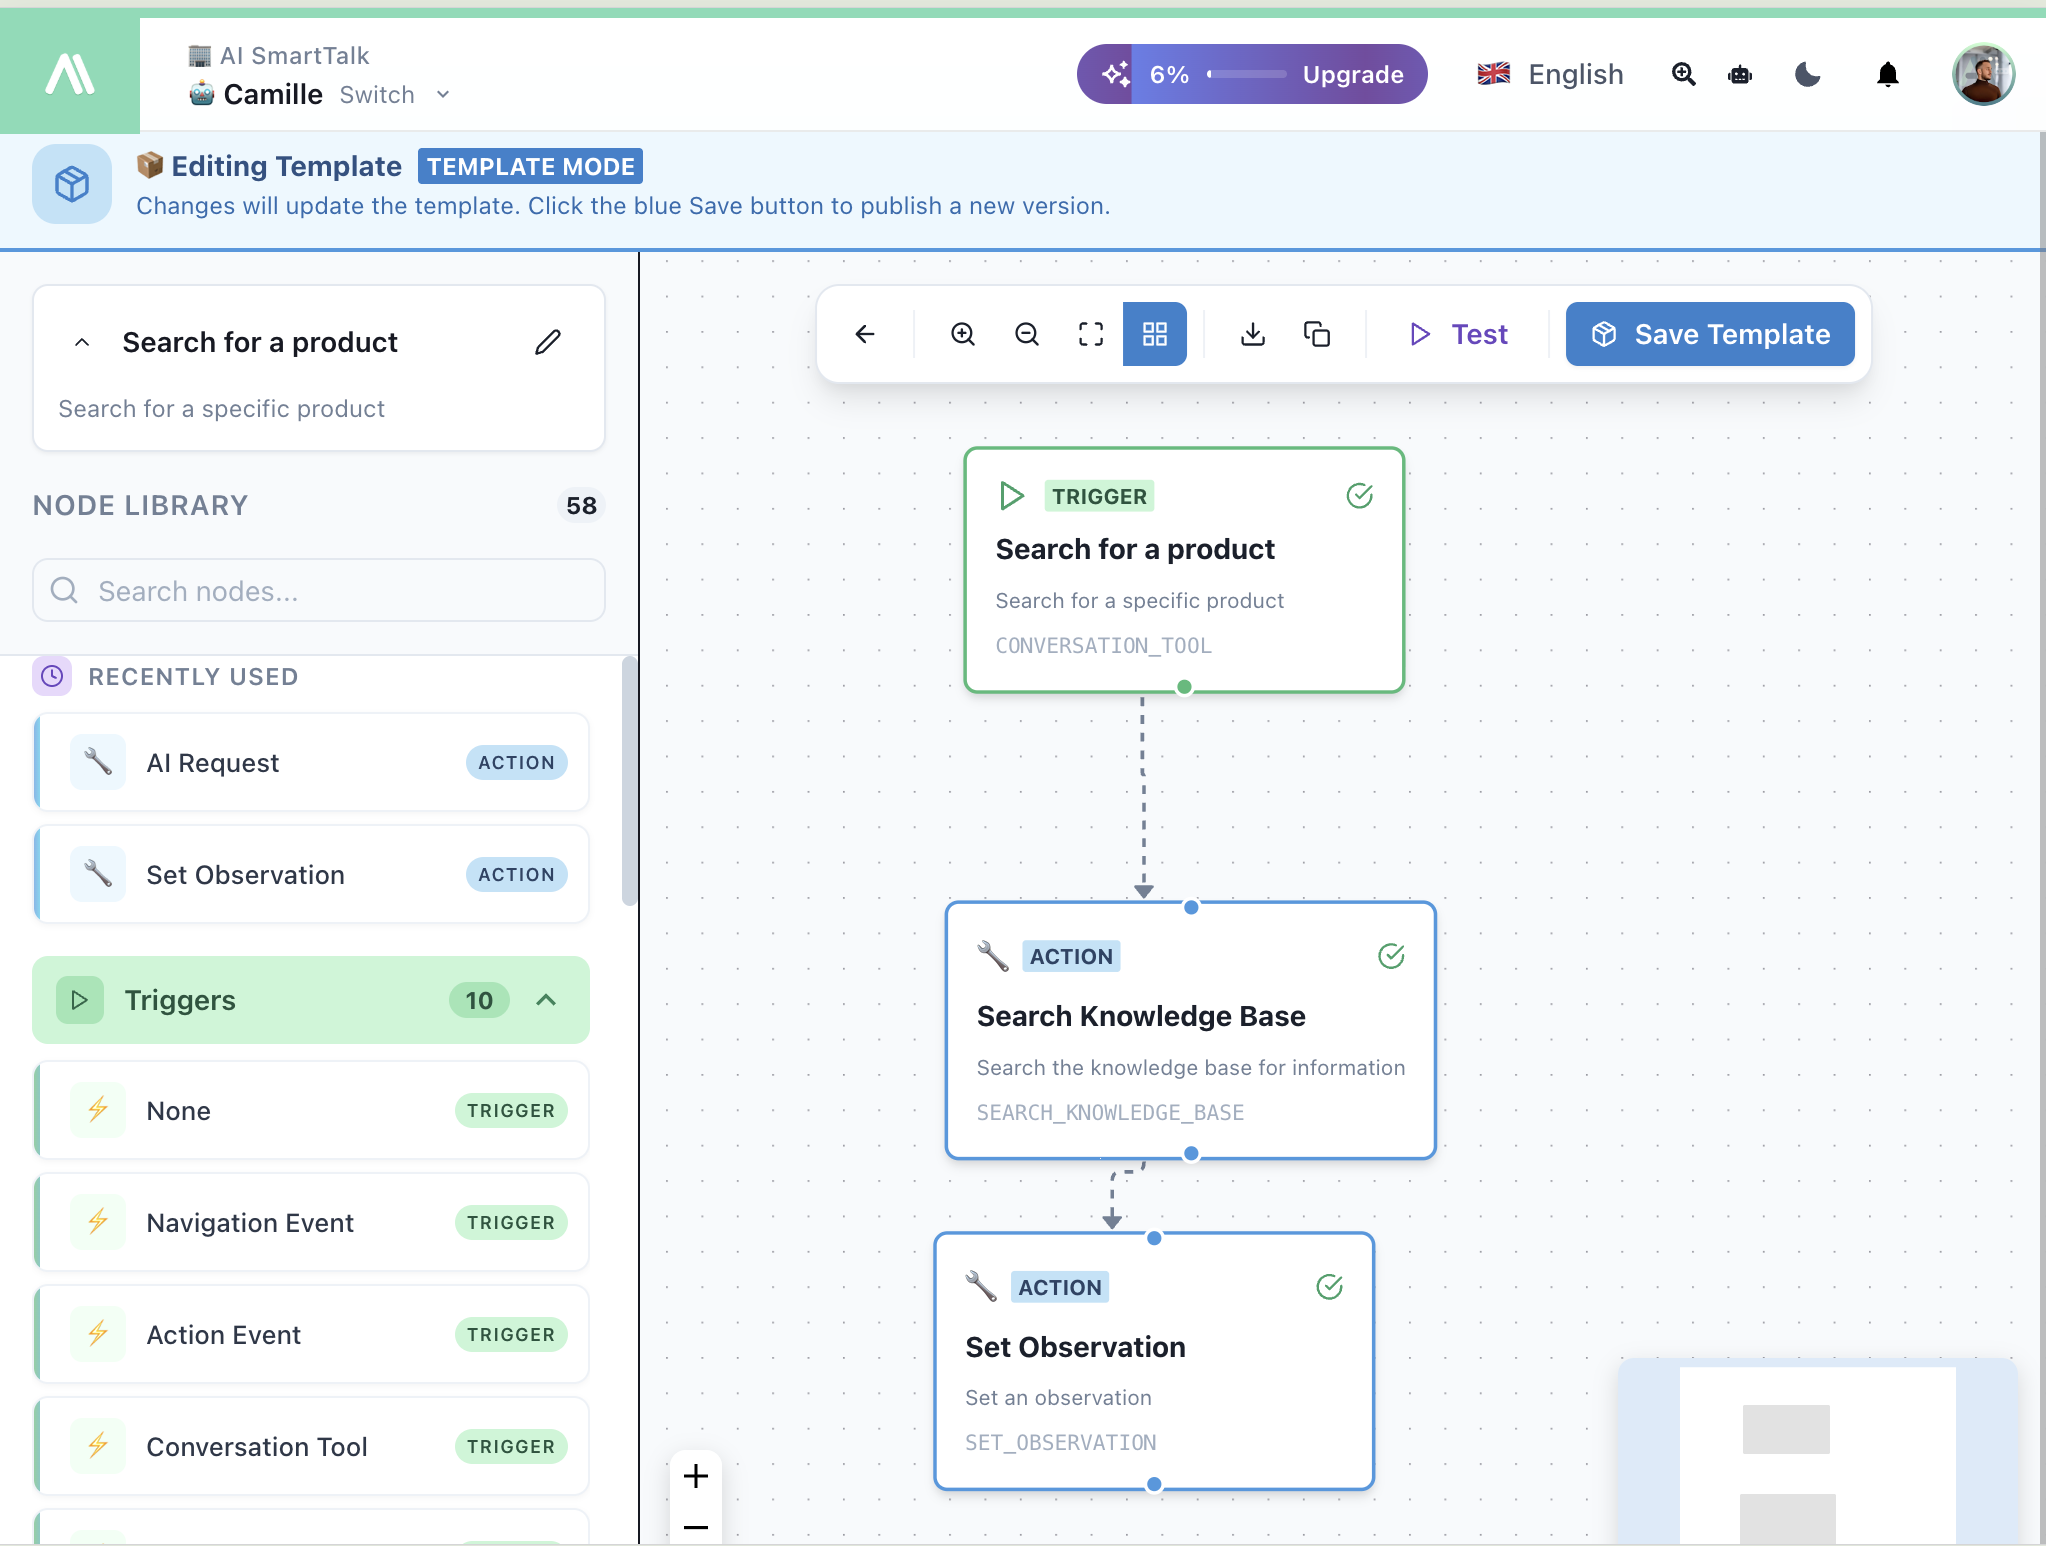
The Node Editor

| Area | Description |
|---|---|
| Canvas | Drag, drop, and connect nodes here |
| Node Library | 58 nodes organized by category |
| Configuration Panel | Configure selected node settings |
| Toolbar | Save, test, and manage your flow |
Building Your Flow
Step 1: Add a Trigger
Every flow starts with a trigger node. Drag one from the Triggers section:
| Trigger | Use Case |
|---|---|
| Conversation Tool | AI calls this flow during chat |
| Webhook | External API triggers the flow |
| Scheduled Workflow | Run on a schedule (daily, weekly) |
| Navigation Event | User visits a page |
| SmartForm Workflow | Form submission triggers flow |
Step 2: Add Actions
Drag action nodes from the library and connect them to your trigger:
- Chat — Send messages, set suggestions
- AI — AI Request, AI Condition
- Email — Send emails, create Gmail drafts
- API — Call external APIs
- Connectors — JIRA, ClickUp, Google Drive
- Knowledge — Search or save to knowledge base
- Control Flow — Conditions, loops, parallel execution
Step 3: Connect Nodes
- Click the output port (bottom) of a node
- Drag to the input port (top) of the next node
- Release to create a connection
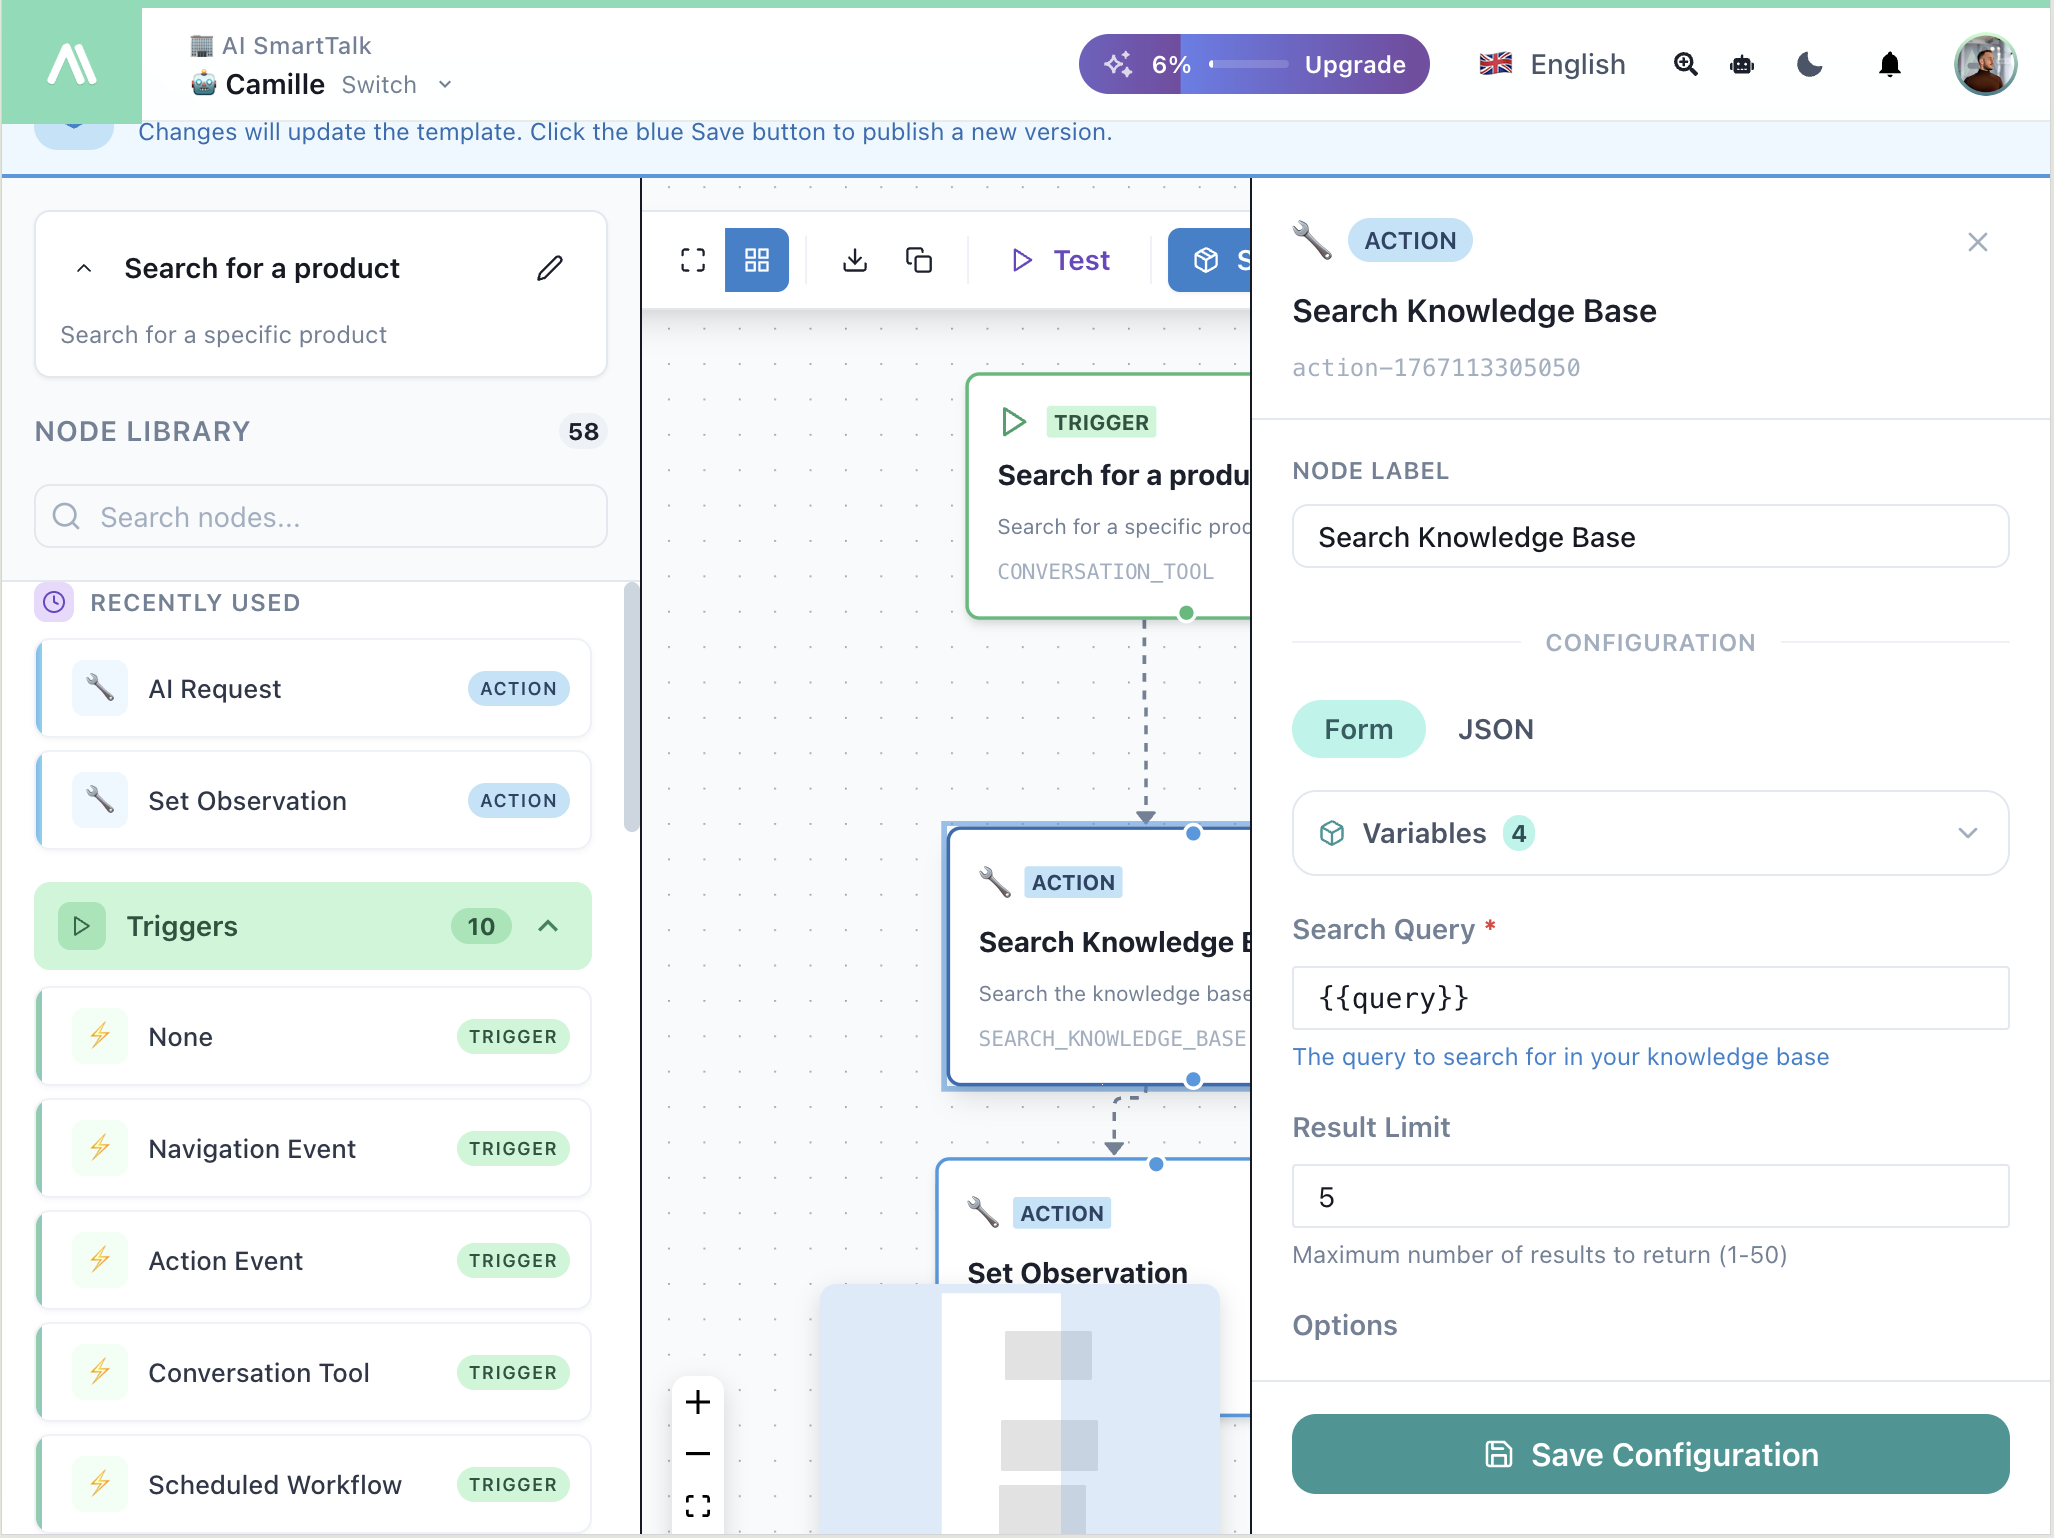
Step 4: Configure Each Node
Click a node to open its configuration panel:

| Option | Description |
|---|---|
| Label | Custom name for this node |
| Form / JSON | Toggle between visual form and raw JSON |
| Variables | Use {{variable}} syntax for dynamic values |
Testing Your Flow
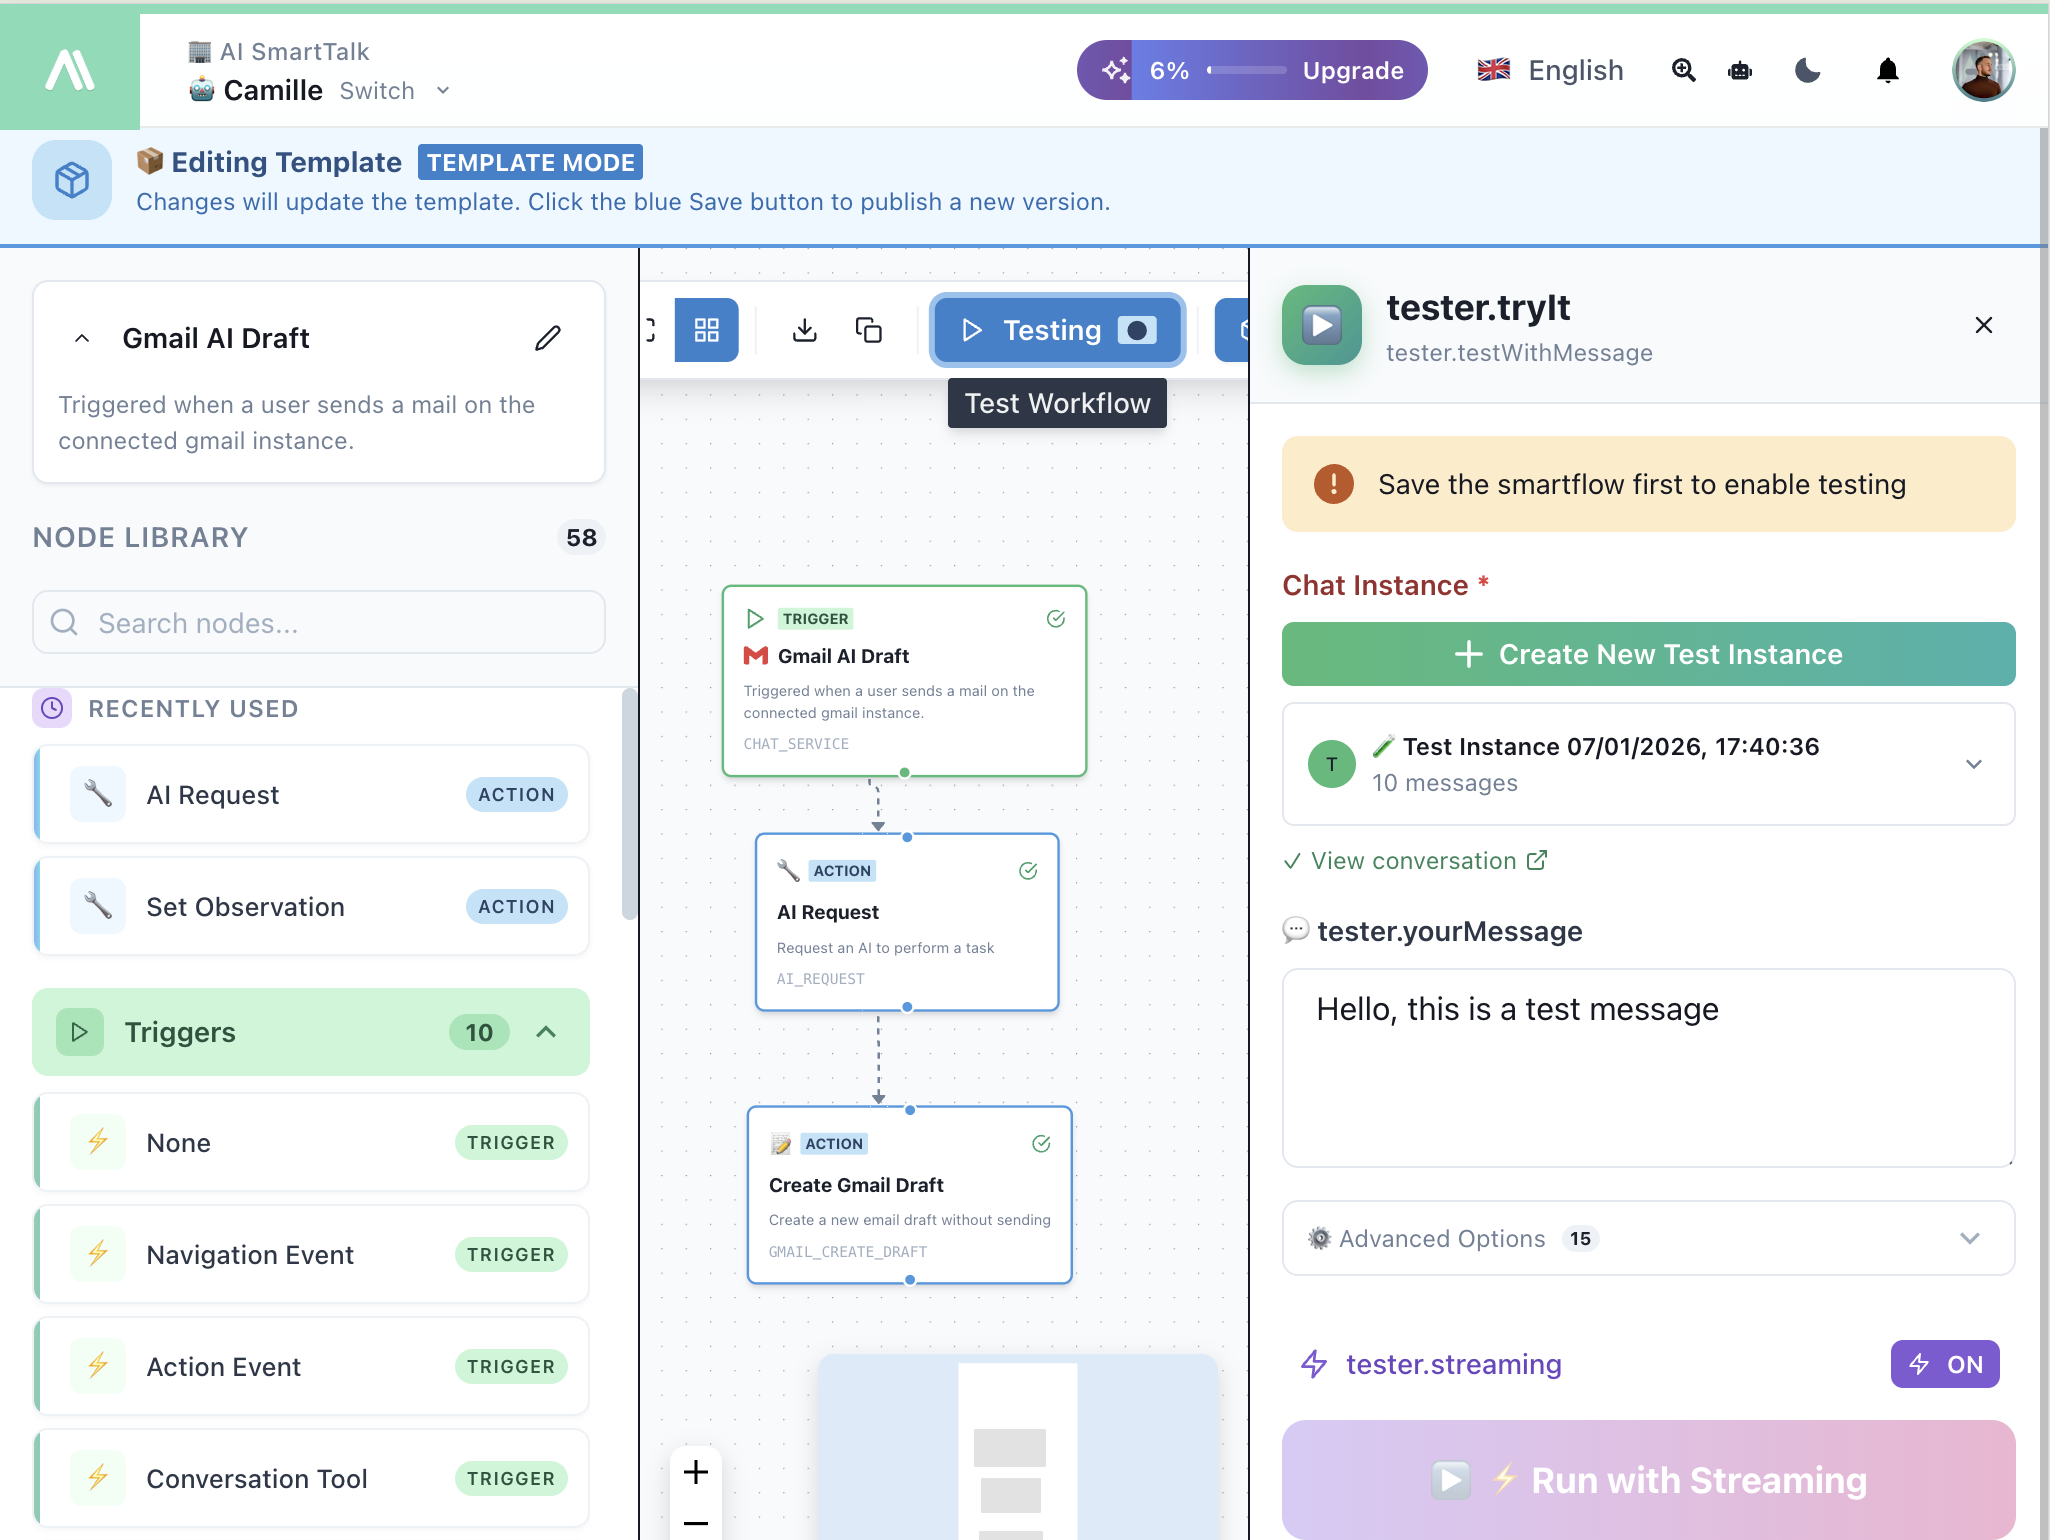
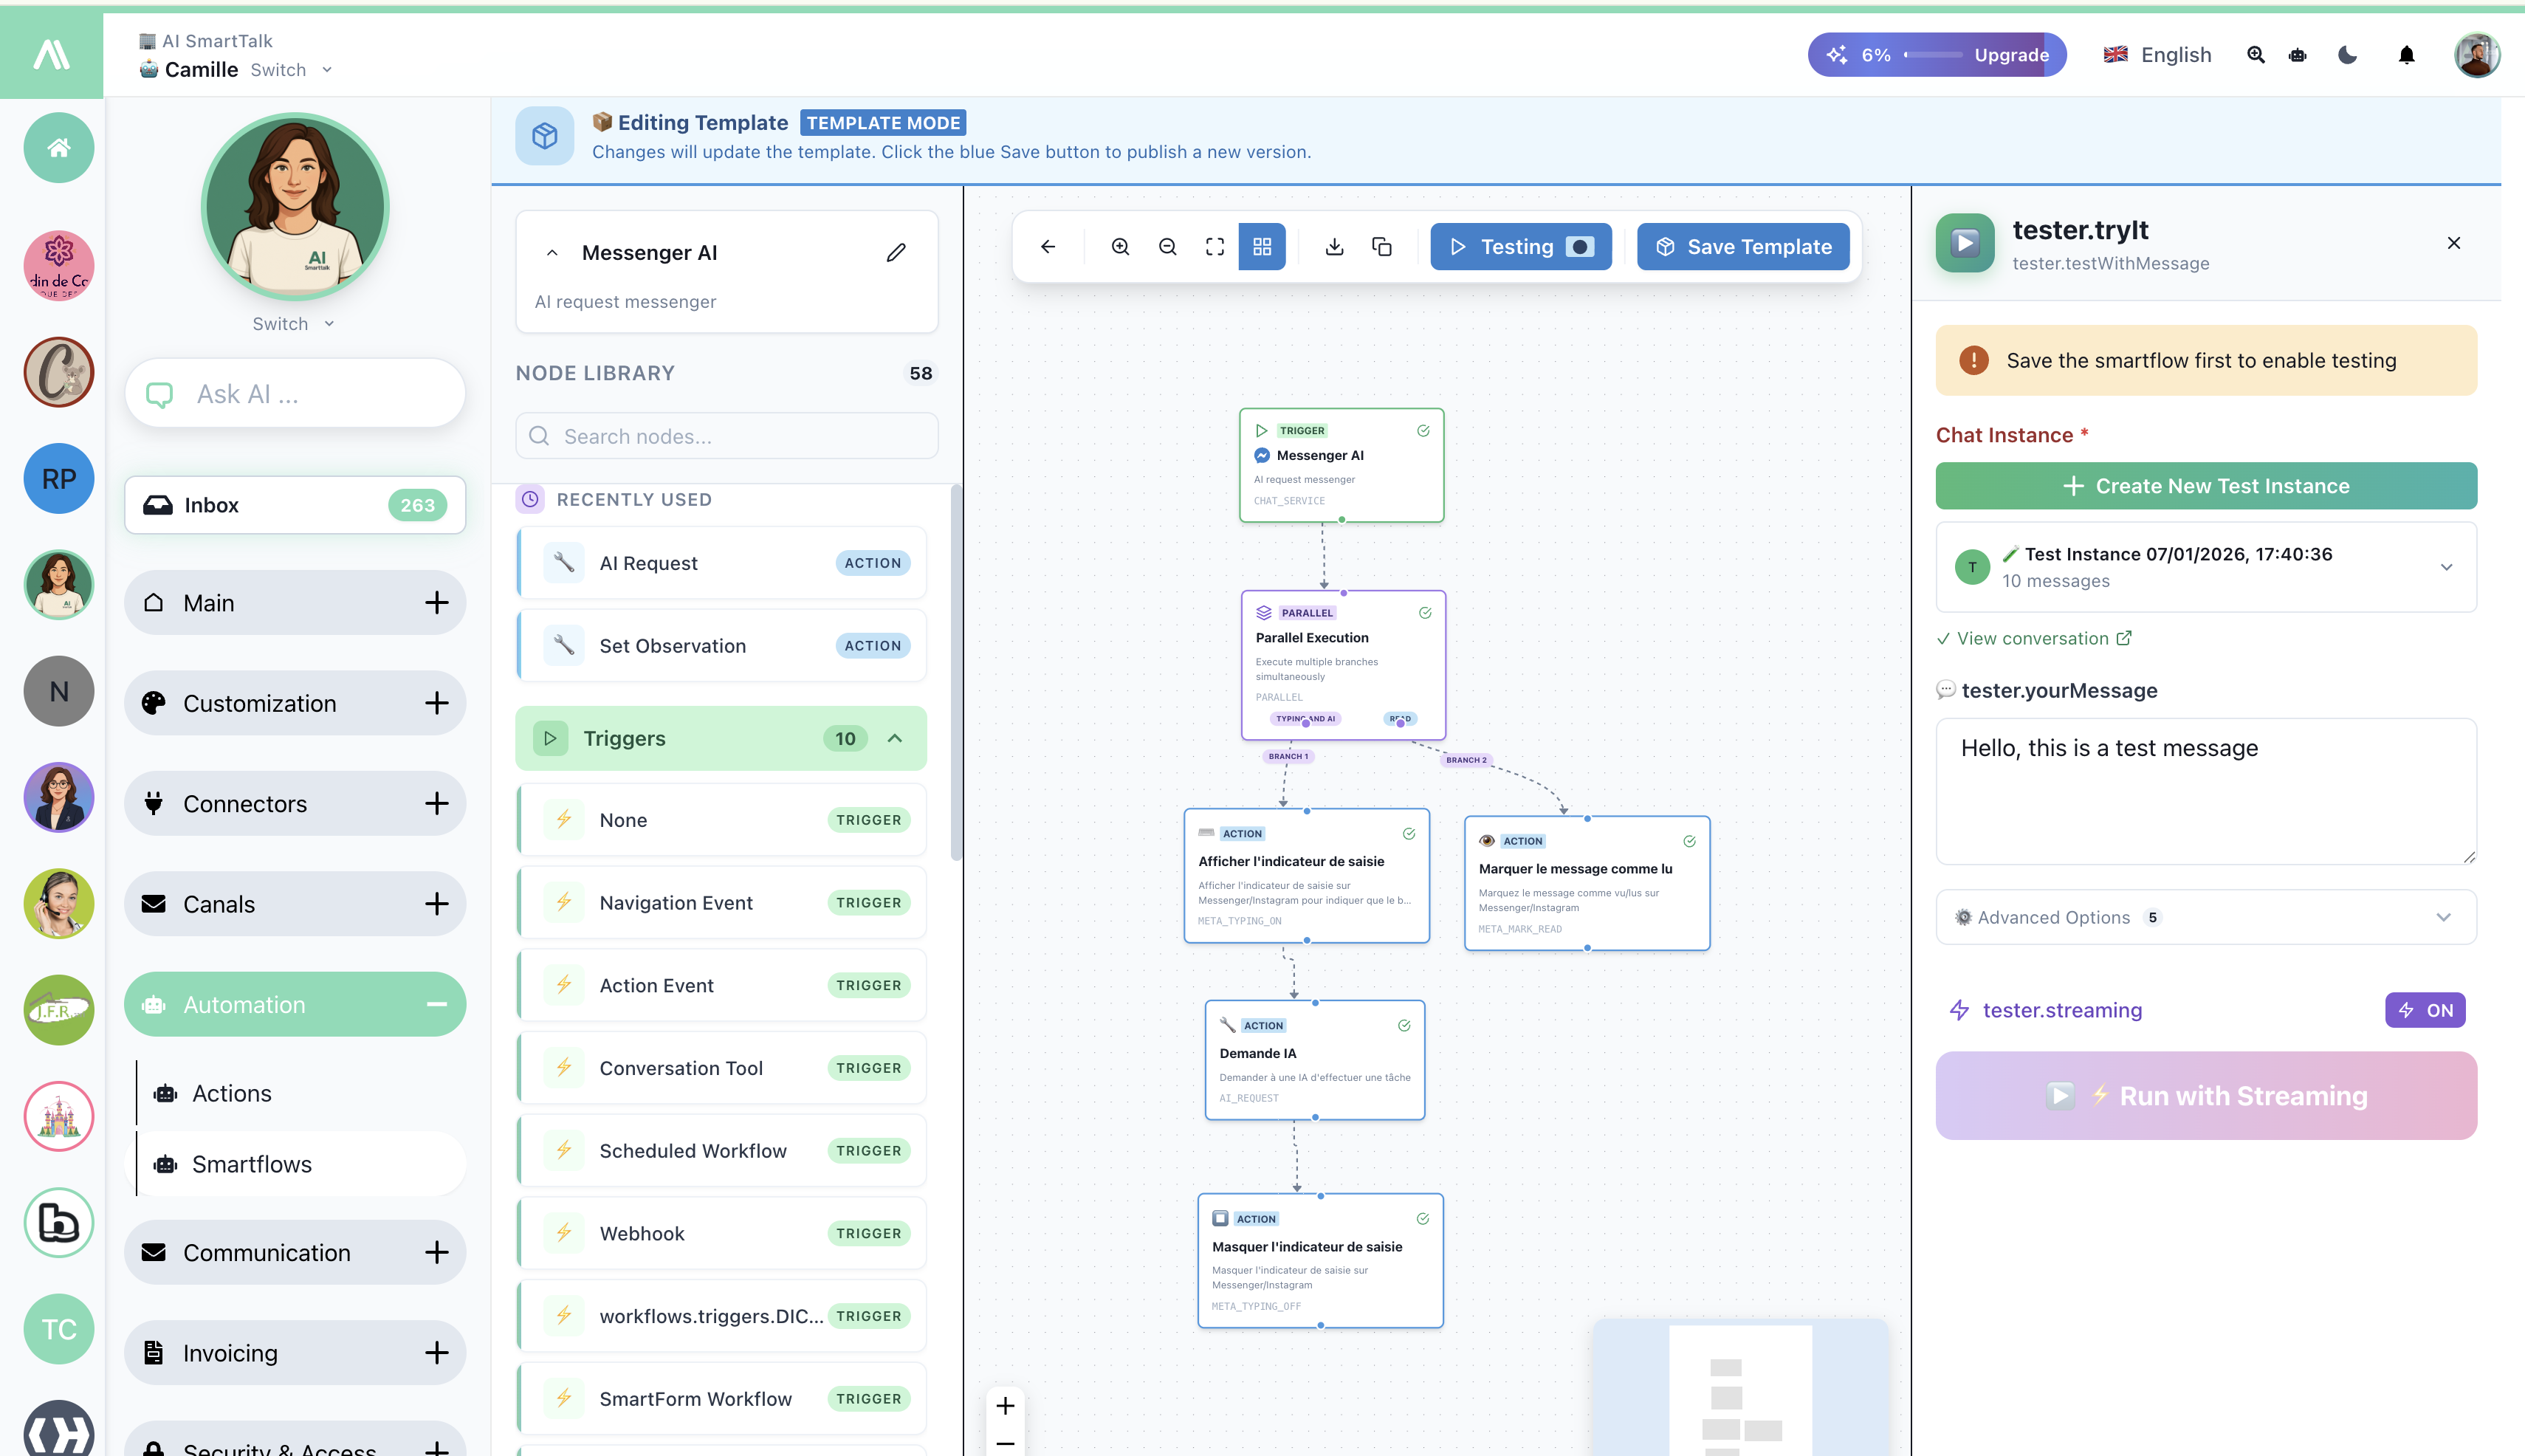
Click ▶ Testing in the toolbar to open the test panel.
Gmail / Email Channel

Messenger / Social Channels

| Element | Description |
|---|---|
| Chat Instance | Create or select a test conversation |
| tester.yourMessage | Input a test message |
| Advanced Options | Channel-specific parameters |
| Run with Streaming | Execute and watch nodes in real-time |
Available Channels
Test with any connected channel: Messenger, WhatsApp, Instagram, Discord, Slack, Gmail, Email. CMS integrations (WordPress, PrestaShop, Joomla) use the Web chat service.
Saving & Activating
| Action | Description |
|---|---|
| Save | Save your current work |
| Save Template | Publish to the Template Store |
| Live Toggle | Activate/deactivate the flow |
Variables
Use variables to pass data between nodes:
| Syntax | Example |
|---|---|
{{trigger.variable}} | Data from the trigger |
{{nodeLabel.output}} | Output from a previous node |
{{conversation.userId}} | Current user ID |
{{message.content}} | Current message content |
Next Steps
- Triggers Overview — All available triggers
- Actions Overview — All available actions
- Template Store — Install pre-built flows