WordPress
Add an AI-powered chatbot to your WordPress website in just a few clicks. No technical knowledge required!
1. Prerequisites
Before you begin, make sure you have:
- An administrator access to your WordPress website
- A few minutes of your time
2. Downloading the Plugin
- Go to the AI SmartTalk platform at aismarttalk.tech
- Navigate to Integration in the main menu
- Find the WordPress section
- Click the Download button to save the plugin ZIP file to your computer
3. Installing on WordPress
- Log in to your WordPress admin dashboard
- Go to Plugins > Add New
- Click Upload Plugin at the top
- Select the AI SmartTalk ZIP file you just downloaded
- Click Install Now
- Once installed, click Activate Plugin
4. Connecting to AI SmartTalk
This is where the magic happens! The plugin uses a secure connection to link your WordPress site to AI SmartTalk.
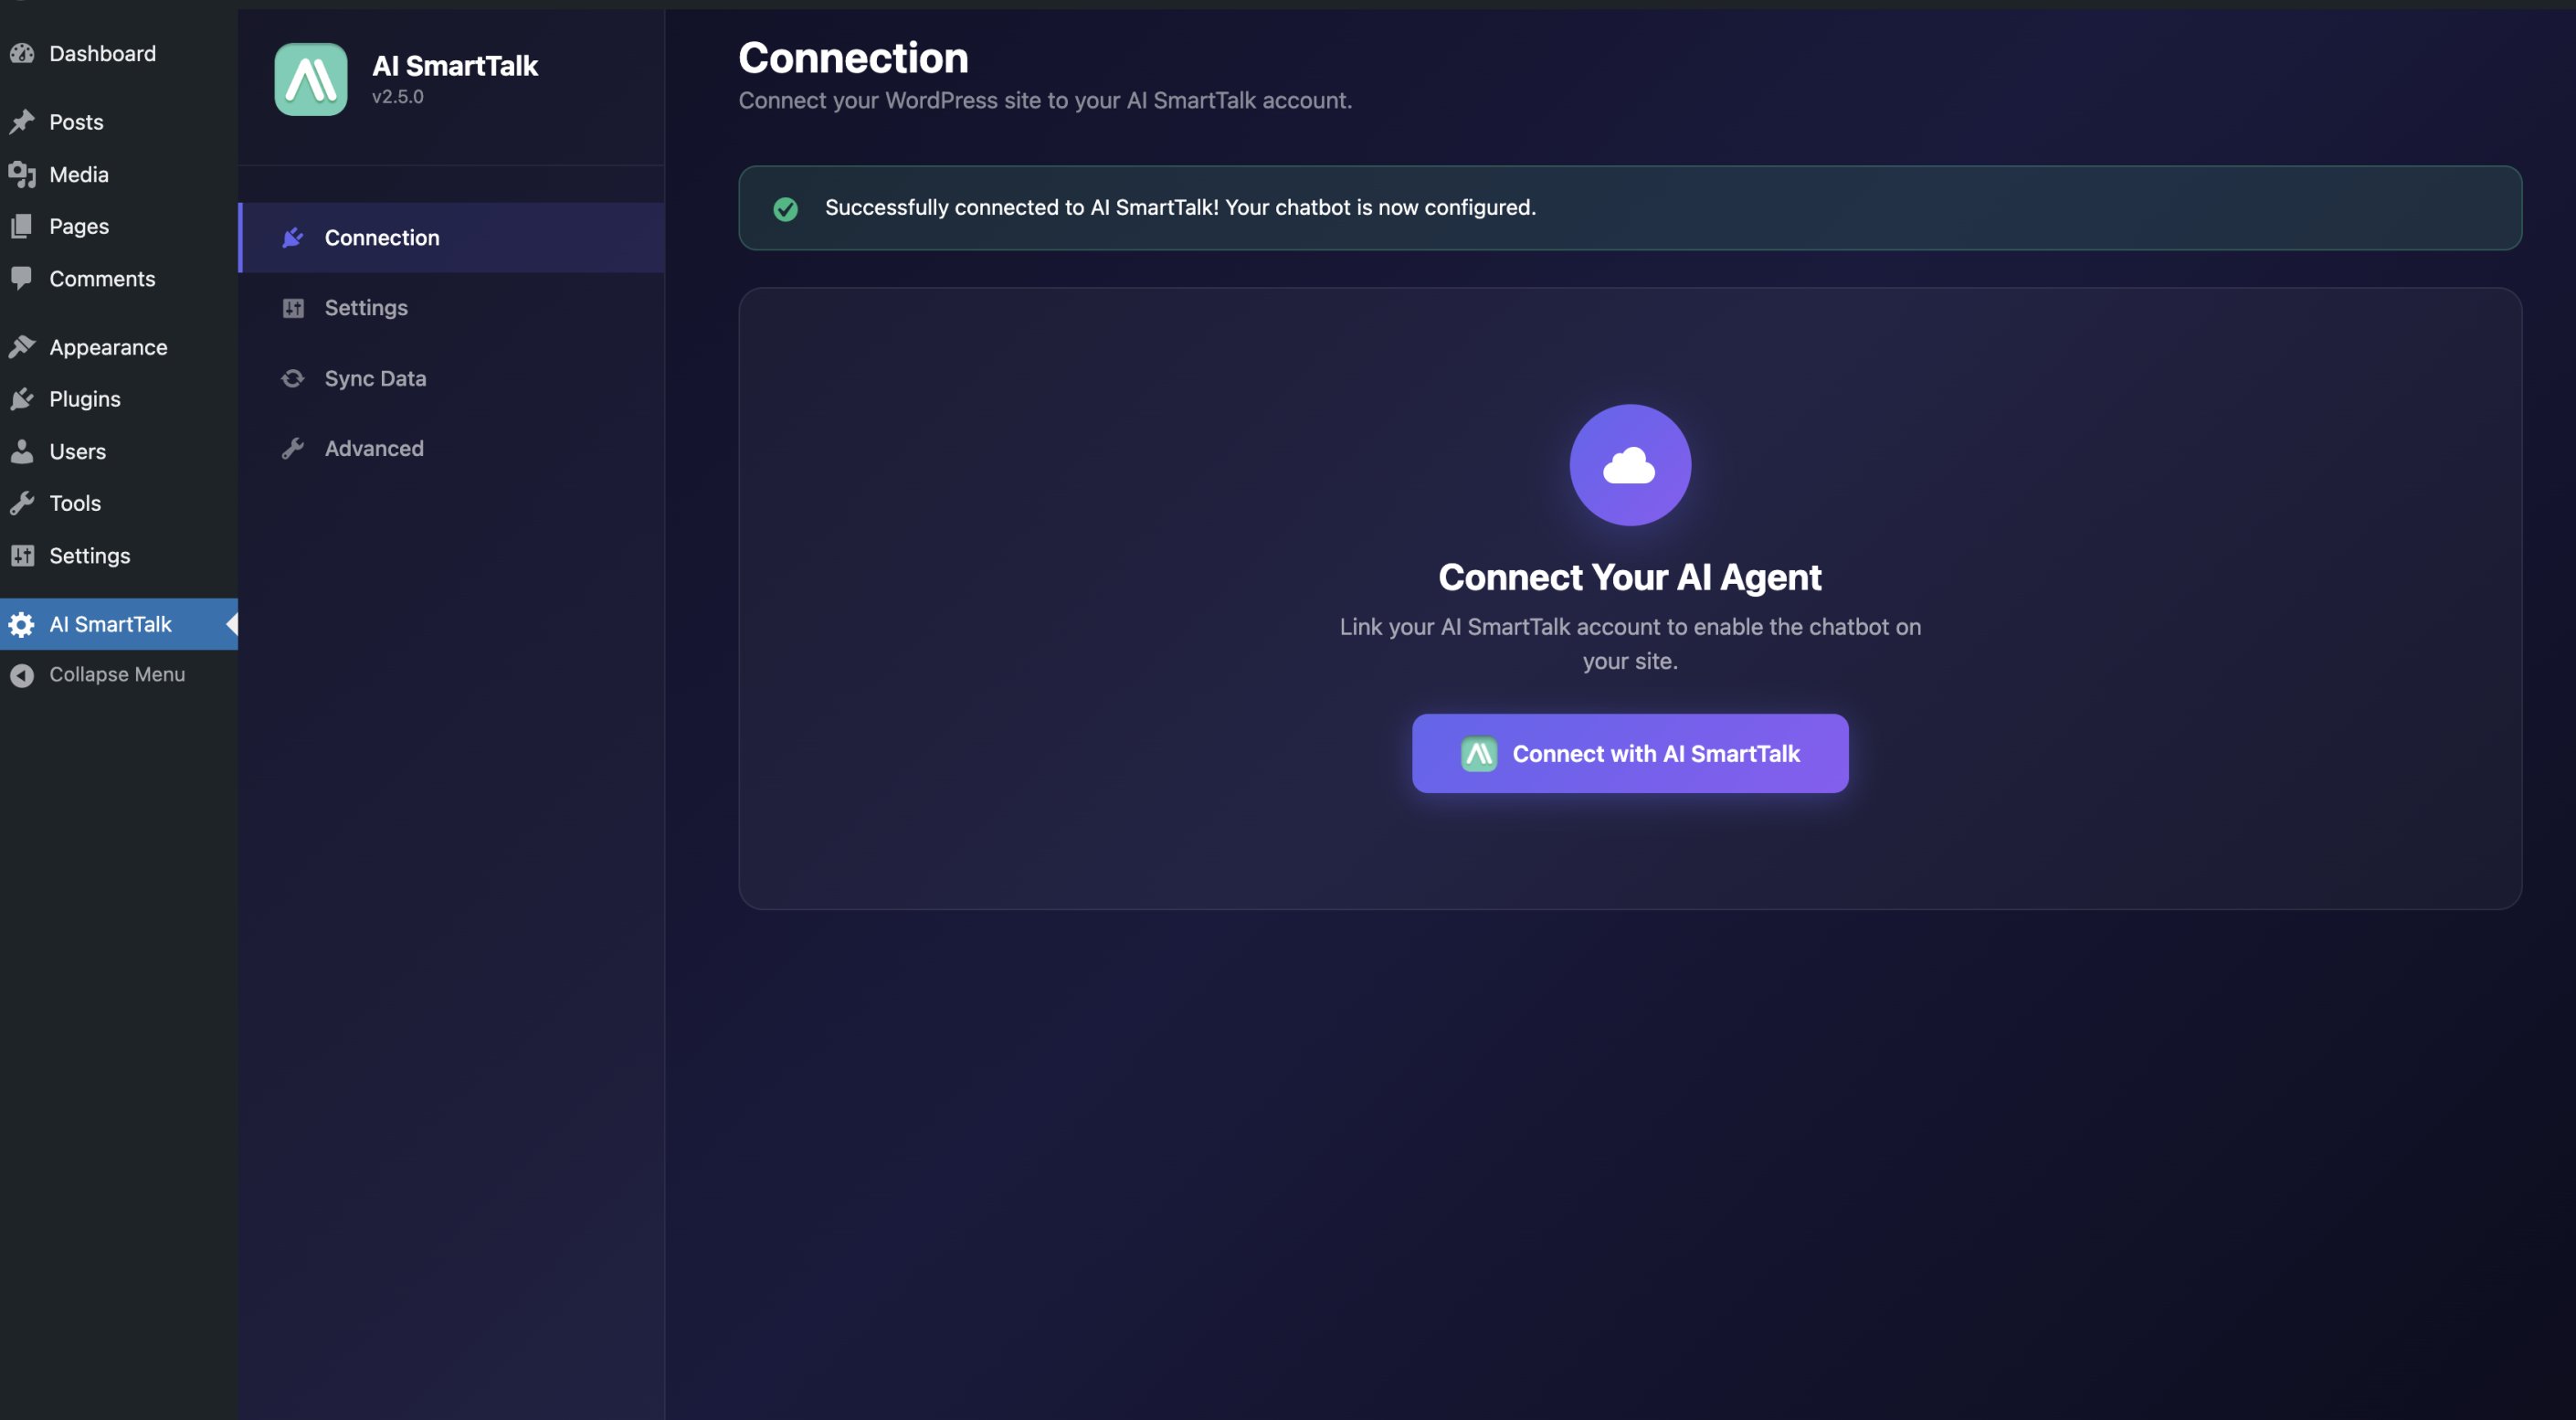
- After activation, go to Settings > AI SmartTalk (or click the settings link)
- Click the Connect with AI SmartTalk button
If you already have an account
Simply log in with your email and password. You'll be redirected back to WordPress automatically.
If you're new to AI SmartTalk
Click Create an account or sign up here. Fill in your details and you'll be redirected back to WordPress automatically.
5. Selecting Your AI Assistant
Once connected, you need to choose which AI assistant will power your chatbot.
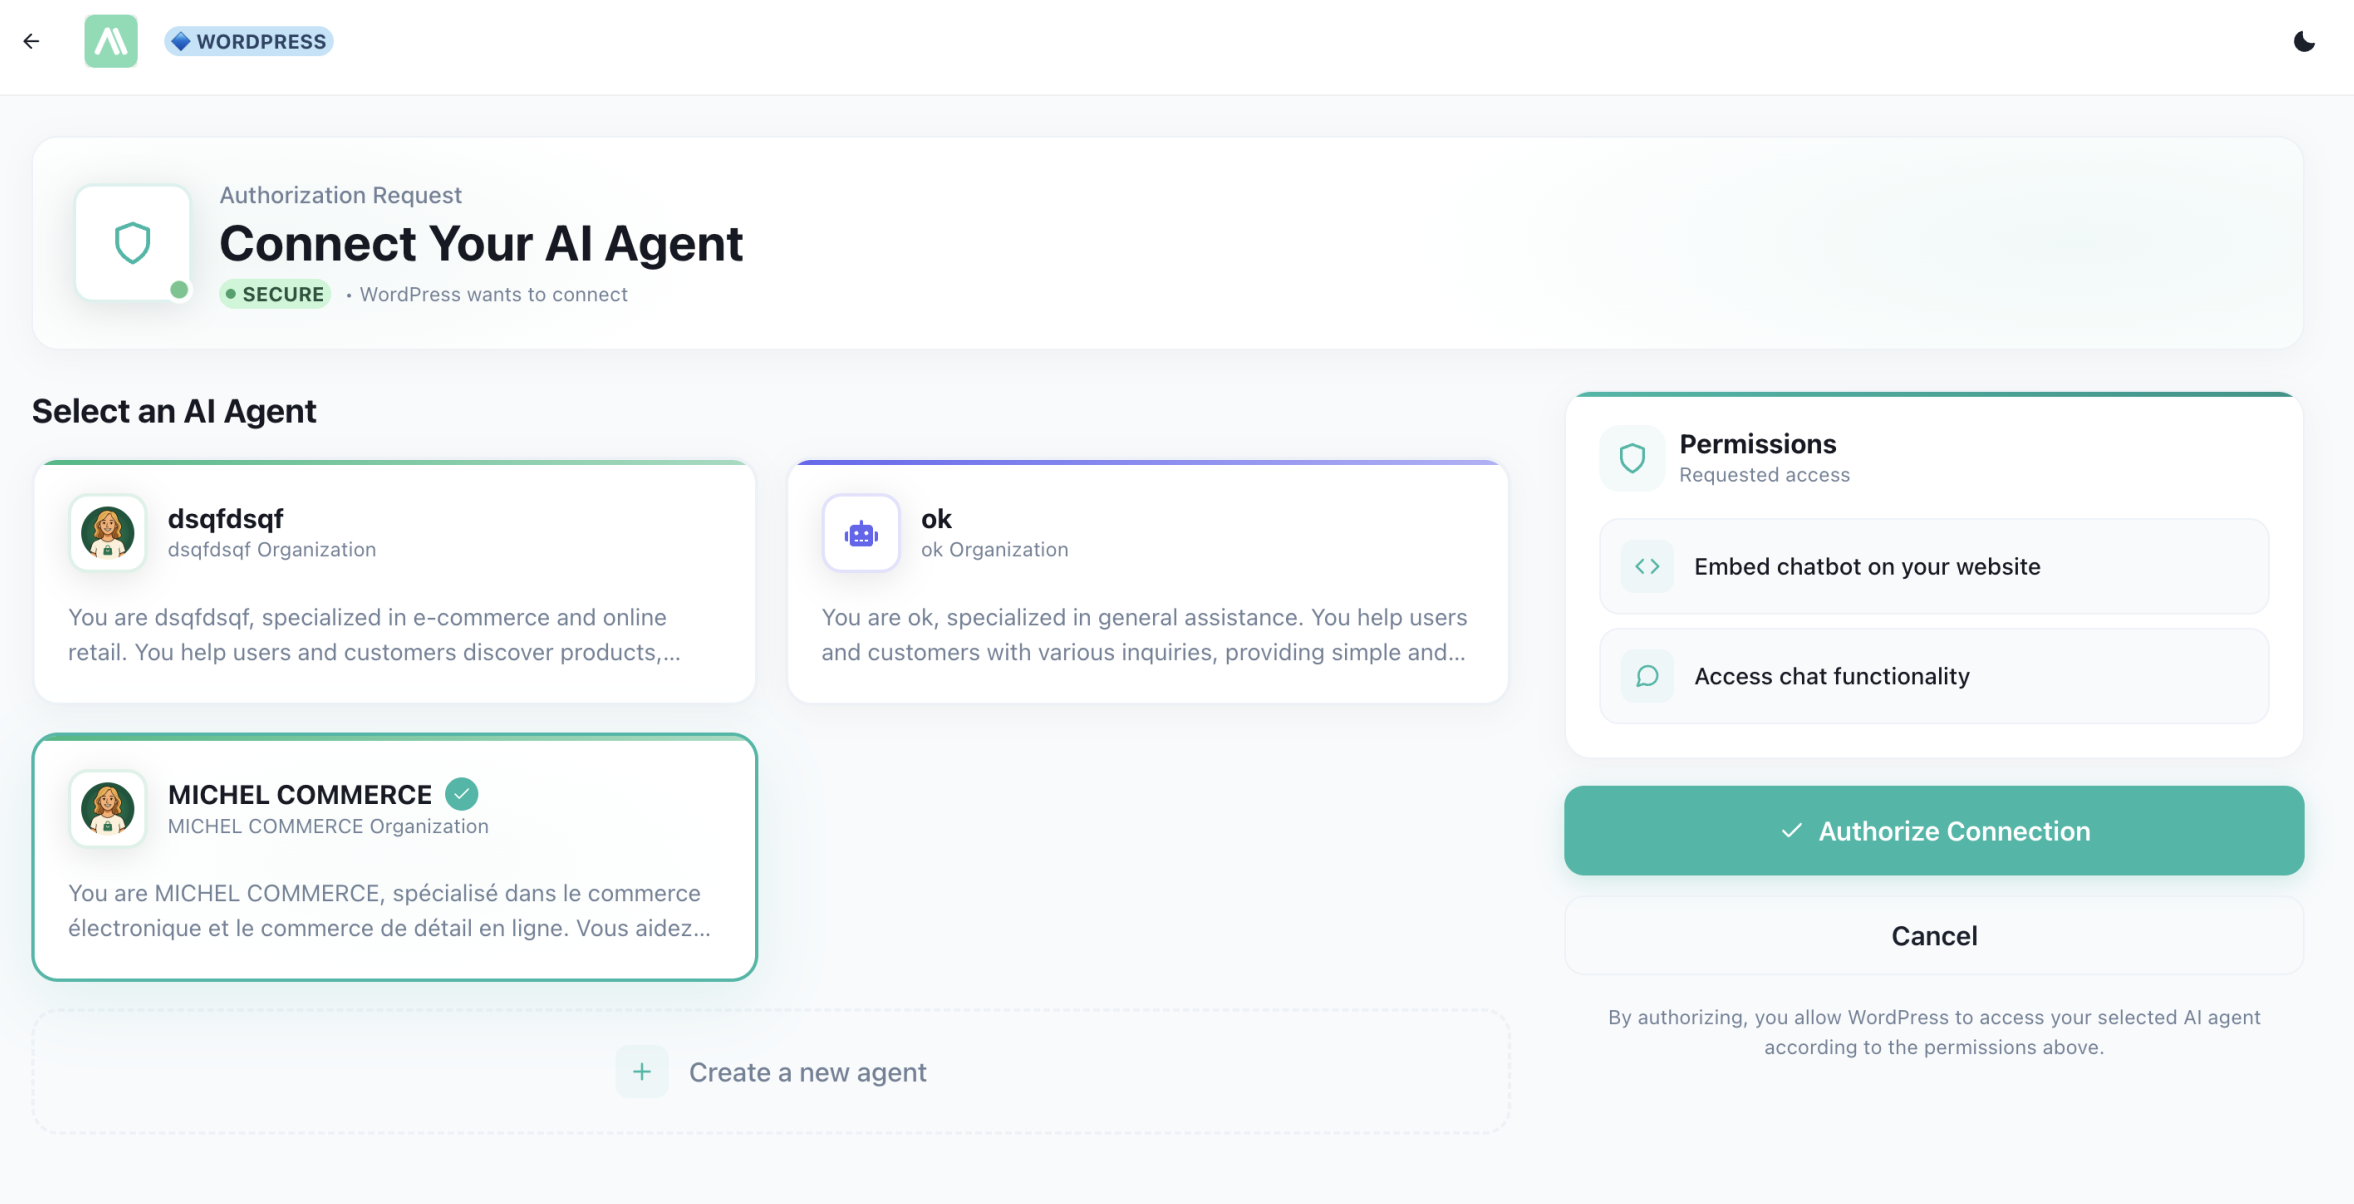
Use an existing assistant
If you already have assistants configured in AI SmartTalk:
- Select the assistant you want from the dropdown list
- Click Save
Create a new assistant
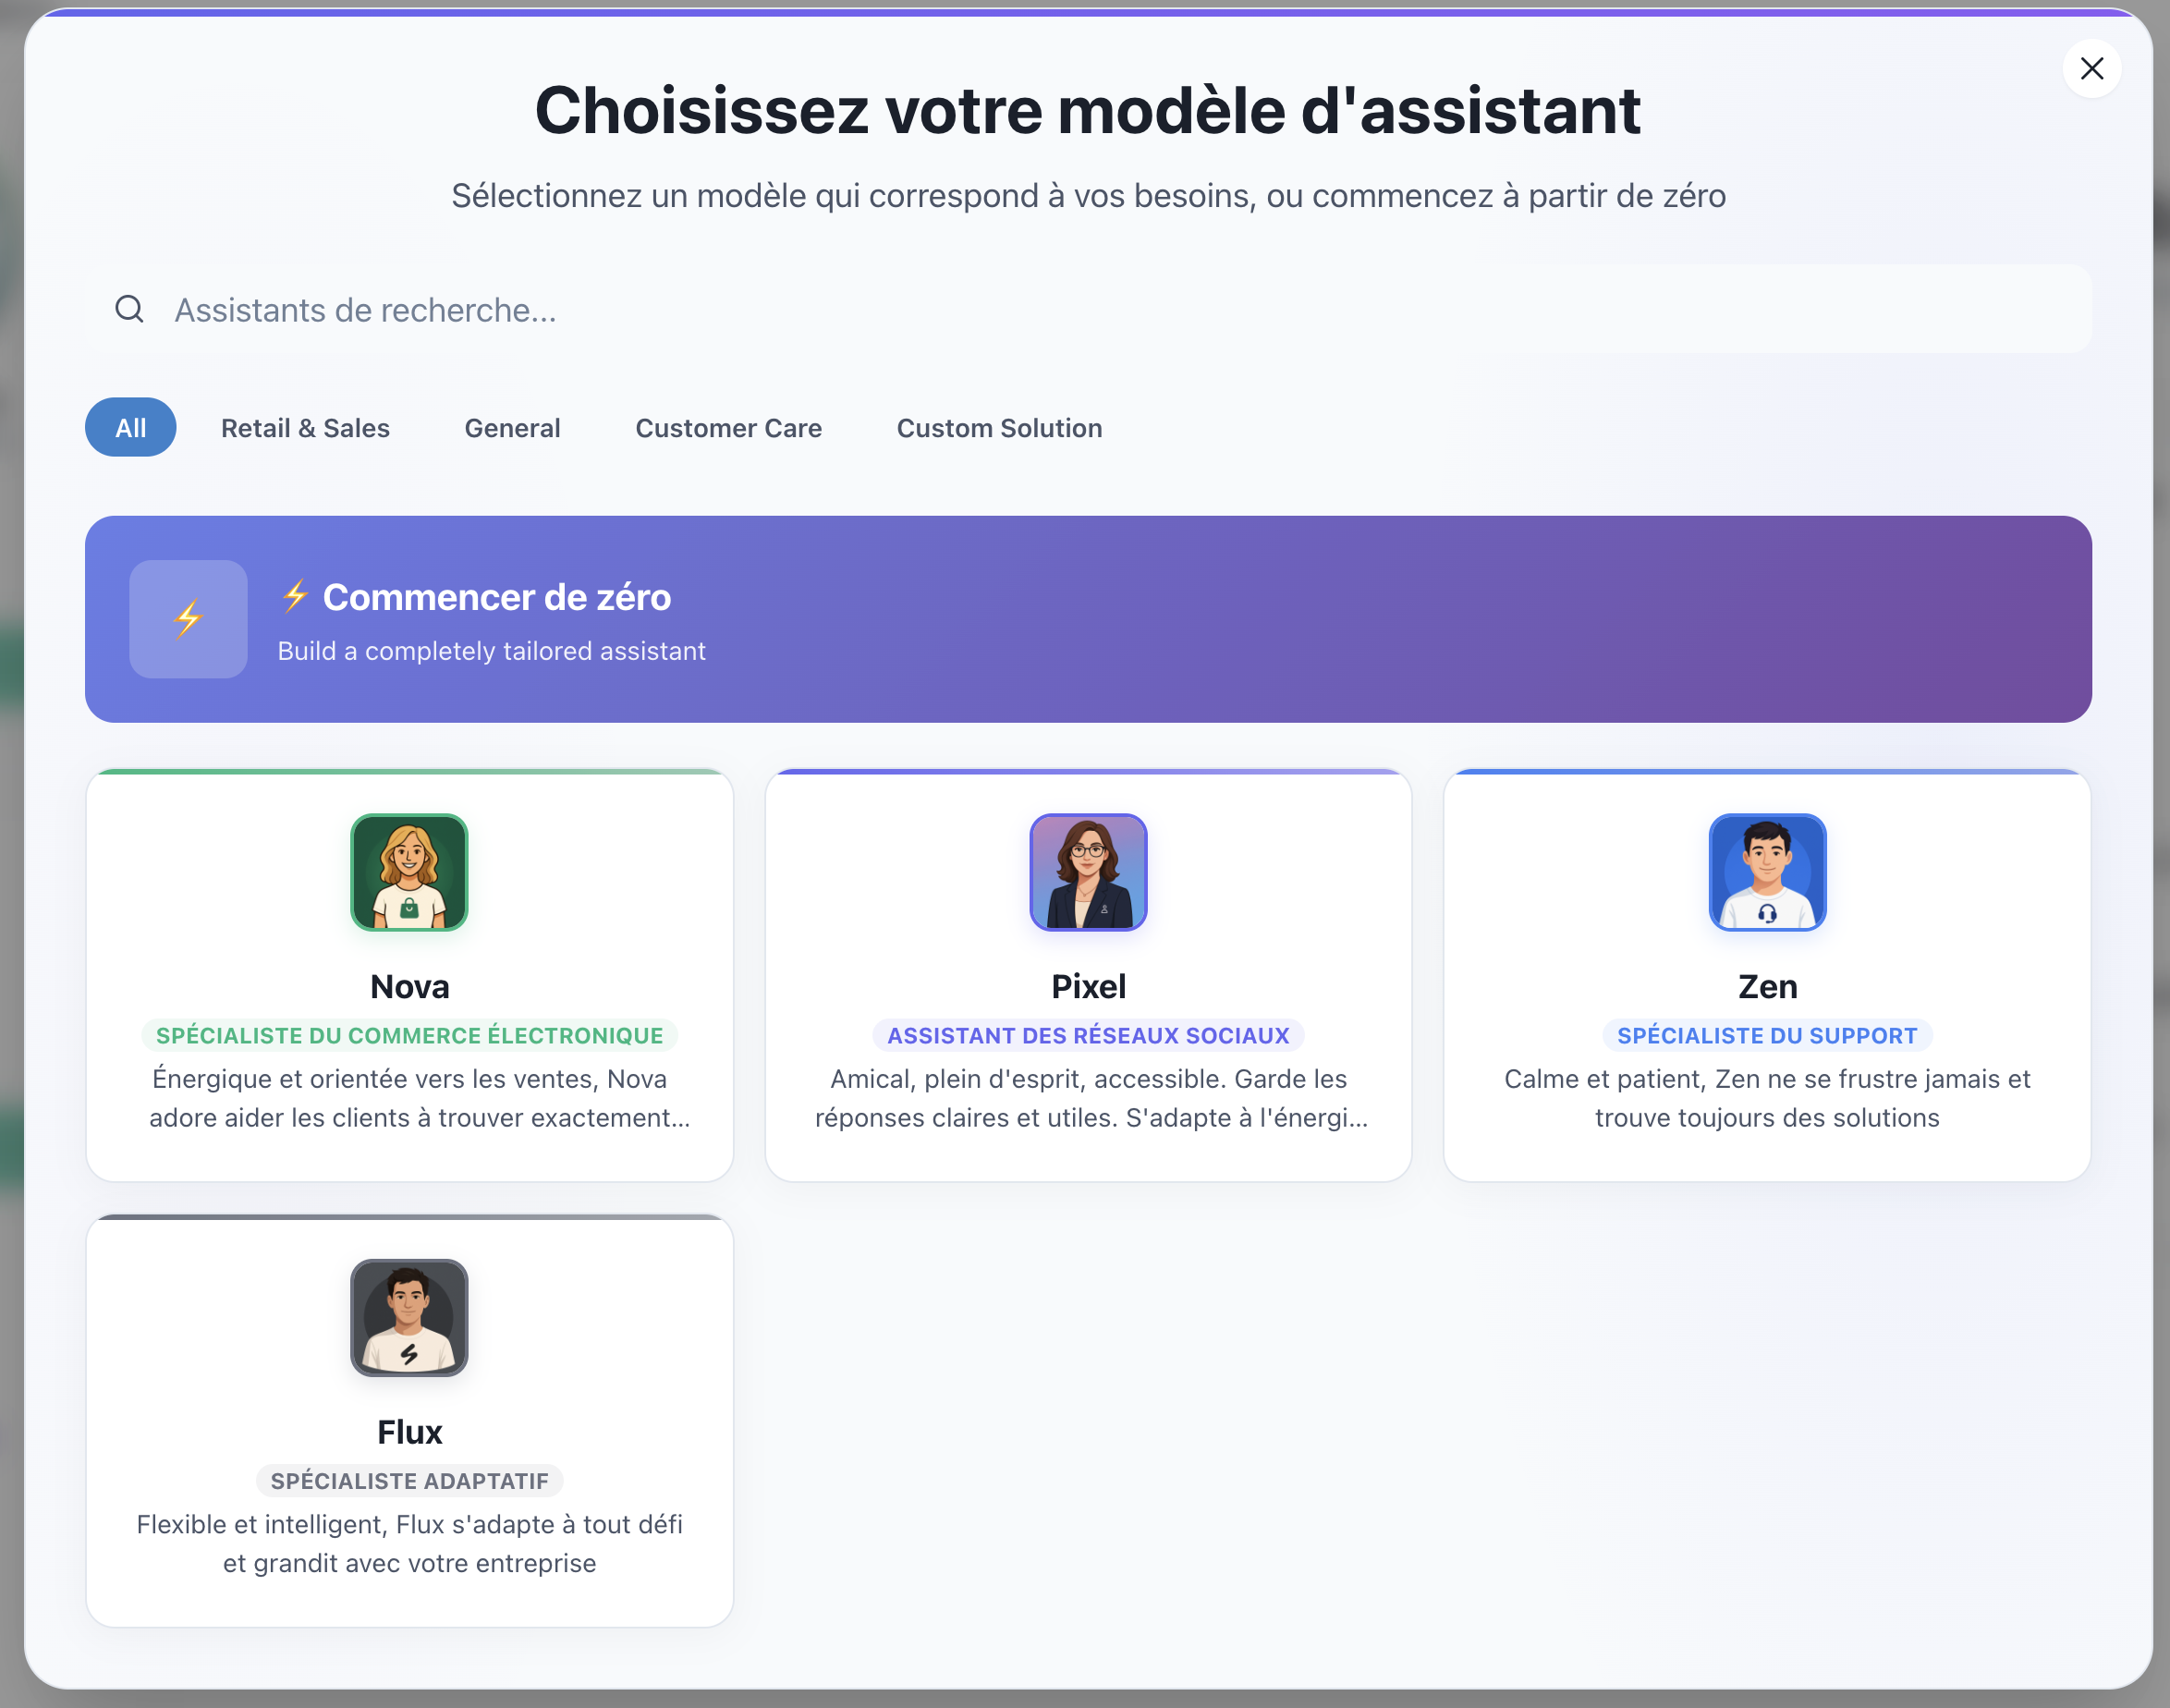
If you don't have an assistant yet or want to create a new one:
- Click the Create button
- A window will open with available templates
- Choose a template that fits your needs (e.g., "Customer Support", "E-commerce", "General Assistant")
- Your new assistant is created and automatically selected
- Click Save
6. Data Synchronization
Now let's feed your chatbot with your website content so it can answer questions about your business.
- Go to the Synchronization tab in the plugin settings
- Click Synchronize Data
- Wait while your pages, posts, and products are sent to your AI assistant
- You'll see a success message when complete
Your content will appear in the Knowledge section of your AI SmartTalk dashboard.
7. That's It!
Your chatbot is now live! Visit your website to see it in action:
- Go to your WordPress site's homepage
- Look for the chat bubble in the bottom-right corner
- Click to open the chat window
- Try asking a question about your content
Troubleshooting
The chatbot doesn't appear on my site
- Make sure the plugin is activated in Plugins > Installed Plugins
- Check that you've selected an assistant in the plugin settings
- Clear your browser cache and reload the page
- Clear any WordPress cache plugins you may have
Content is not showing in the chatbot
- Run the synchronization again from the plugin settings
- Make sure your content is published (not draft)
- Wait a few minutes for large sites
Connection issues
- Make sure your server allows outbound HTTPS connections
- Try disconnecting and reconnecting to AI SmartTalk
- Contact support if the issue persists
Conclusion
You've successfully:
- Installed the AI SmartTalk plugin on WordPress
- Connected it to your AI SmartTalk account with one click
- Selected or created an AI assistant
- Synchronized your content
Your visitors can now get instant answers about your products and services 24/7!
Need help? Contact us at contact+support@aismarttalk.tech