Add a tool or service
This is the first step to giving your assistant access to an outside service. There are two ways to do it: pick a ready-made one, or add your own.
New here? Start with the overview.
Option 1 — Pick from the ready-made list
The MCP Servers section shows a list of popular services you can add in one click — things like documentation tools, project trackers, and payment or support platforms.
- Open Connectors → MCP Servers for your assistant.
- Find the service you want.
- Click Add.
That's it — you're taken straight to the service's own page, where you finish by connecting it.
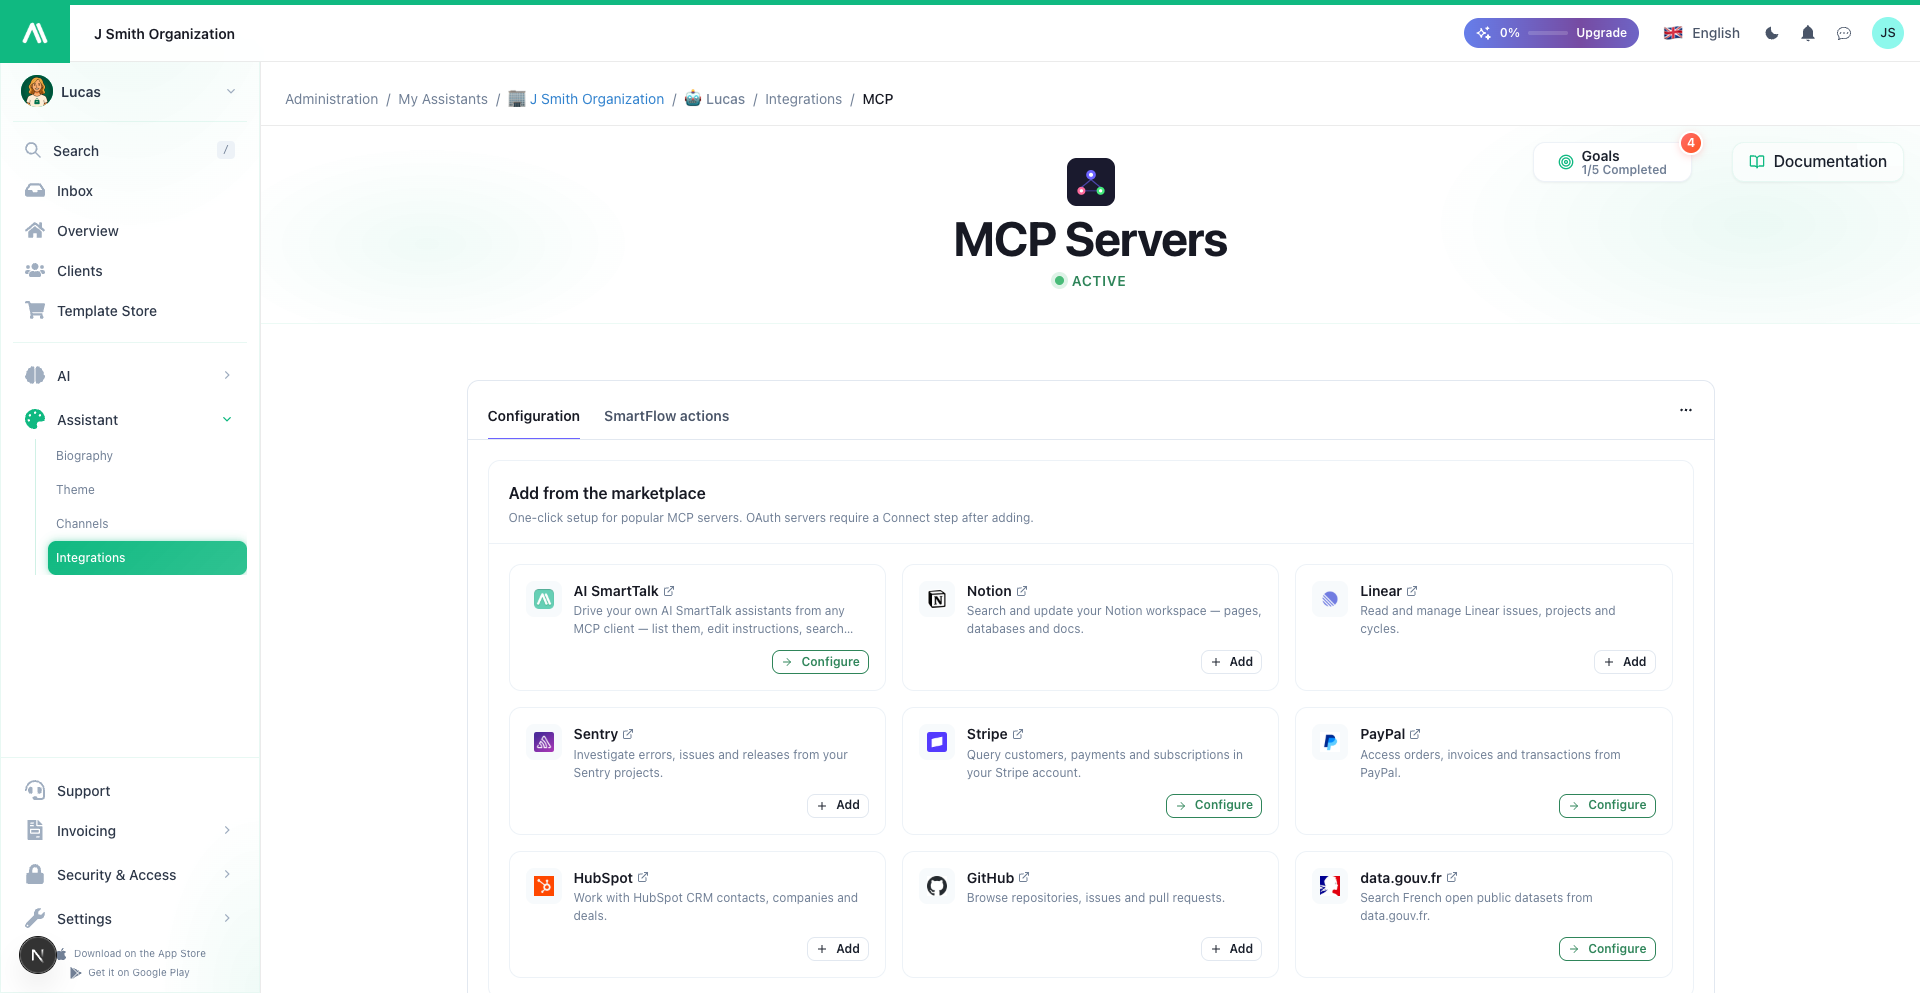
Already added a service? Its card shows Configure instead of Add — click it to jump back to its page at any time.
Option 2 — Add your own
If the service you need isn't in the list, you can add it yourself.
- In the MCP Servers section, click Add a server manually.
- Fill in:
- Name — a clear label so you recognize it later (for example, "Company CRM" or "Internal Wiki").
- Address — where the service lives. The service's own documentation tells you this.
- Access key (only if the service needs one) — a key or token the service gave you, so it knows the requests are really coming from you.
- Click Add.
You're then taken to the service's page to finish connecting.
Your assistant uses the name to tell services apart. A descriptive name like "Company CRM" helps it pick the right one — much better than "Server 1".
What happens next
Adding a service simply puts it on your list — your assistant can't use it yet. Each service has its own page, just like every other connector, where you:
- Connect it — sign in or provide an access key.
- Choose which of its tools your assistant can use, and who's allowed to use them.
You can add as many services as you like and connect them whenever you're ready.